fj cruiser rock crawling rubicon trail

Asking The Right Question FJ Cruiser Lift Kits

voodoo blue fj cruiser rock pile tillamook forest
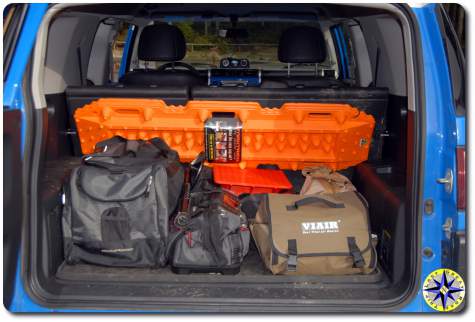
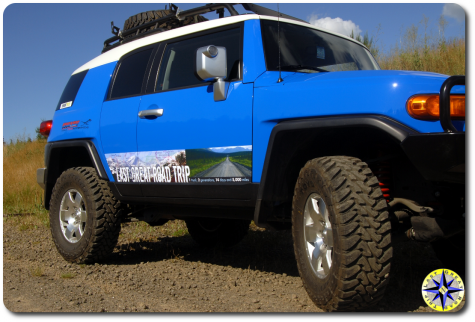
Seems like a reoccurring question I hear from new FJ Cruiser guys is “What lift should I get”?  Not that I’m an expert on all the lifts available but I thought it was time to address this question in a bit more public forum.

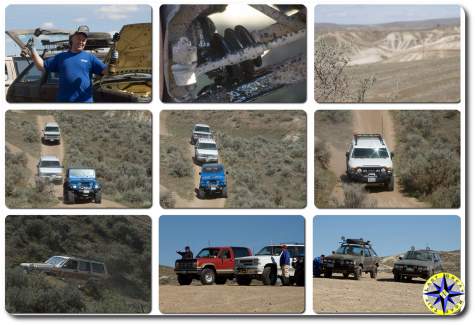
The question is not necessarily wrong, but it is incomplete.  The question should be  “What lift should I get for my style of off-road adventures…  I enjoy wheeling my rig… in the sand, on 4×4 trails, crawling up gnarly boulders, racing down desert roads, or just looking good on the street”.  The best lift for one style of wheeling is not necessarily the best for another style.  And as the saying goes one man’s garbage is another man’s gold, it all depends on what you’re planning to do with your rig, what your after and your budget.  Don’t worry if others tell you how they think you should enjoy you’re rig… Consider what will make you happy.

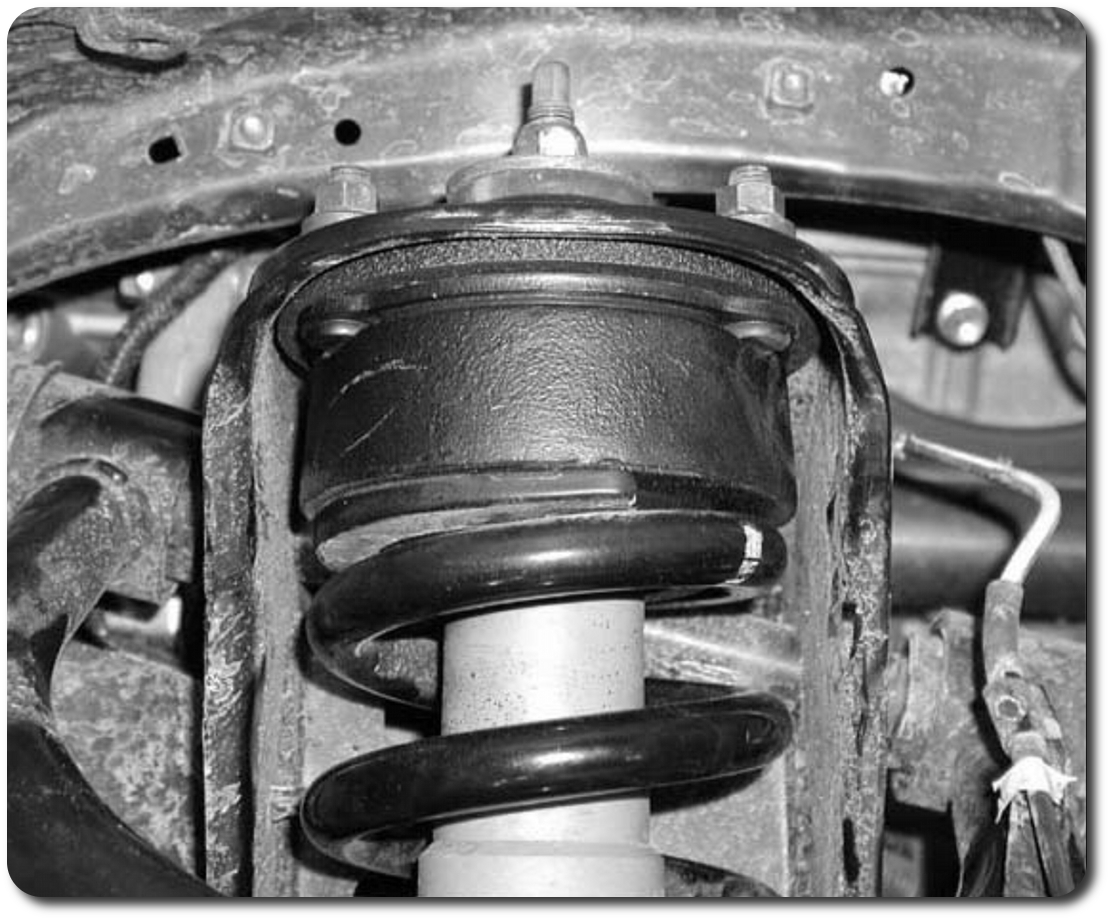
First of all, lifting your truck does not increase ground clearance.  A lift provides more room for larger (taller) tires.  Larger tires provide the increased ground clearance.

Second lift kits for the Toyota FJ Cruiser mainly address the front-end.  This is because the factory stance has the rig on a significant rack with the rear higher than the front.  However when lifting the front end, you should consider upgrading the rear suspension components (springs and shocks) to a quality that matches your front-end choice.

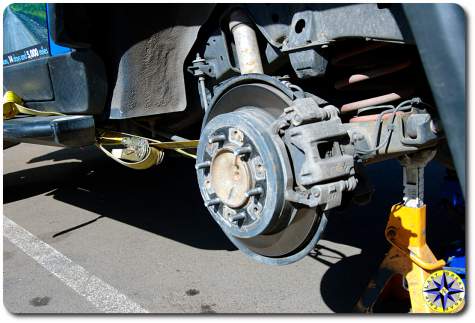
Third, springs provide lift and shocks provide dampening.  If you upgrade the shock you will feel a difference in ride but without changing the geometry of the coil (spacers or longer coils), the height remains the same.

Lift kits can be broken down into a couple of groups. There are a lots of choices and the number of inches of various lifts may vary, the basic groups of lifts available for the FJ Cruiser are:

  • spacer lift
  • 3″ suspension lift
  • 6″ lift (anything from 4″ – 6″ will fall into this group)
  • long travel
  • solid axle swap

spacer liftA spacer lift, sometimes referred to as a leveling kit, is the least expensive lift available with height achieved by placing a spacer between the top of the strut mount and the coil-over spring.  The spacer effectively compresses the spring which pushes the rig up as the spring tries to reach equilibrium.  A spacer lift does not increase travel and is now stretching your factory shocks to their limit.  This method of lifting your rig will level it out and allow you to put on larger tires (although depending on tire choice you may still need a body mount chop to avoid rubbing).  A lift that uses spacers to raise the rig is best suited for those who do not plan on going off road and simply want the look of a more rugged stance and bigger tires.  If you add a heavy bumper or winch to a spacer lift your springs will give back all the lift under the additional weight.

sway-a-way suspension lift coil-overs shocks and springsThe second 4×4 lift category, a 3″ suspension lifts use longer shocks, stiffer springs and coil-overs to provide the lift.  A 3″ lift will allow  for 33″ tires (yeah you still need the body mount chop), although some folks have stuffed 35″ tires into the FJ Cruiser’s wheel well accepting the rub that comes with them in this setup.  Unlike a spacer lift which simply compress the springs, suspension lifts gives you additional travel along with lift because of the longer components. Adding aftermarket front upper control arms will extend that travel even further.  That additional travel equates to a smoother ride in most cases along with improved handling.

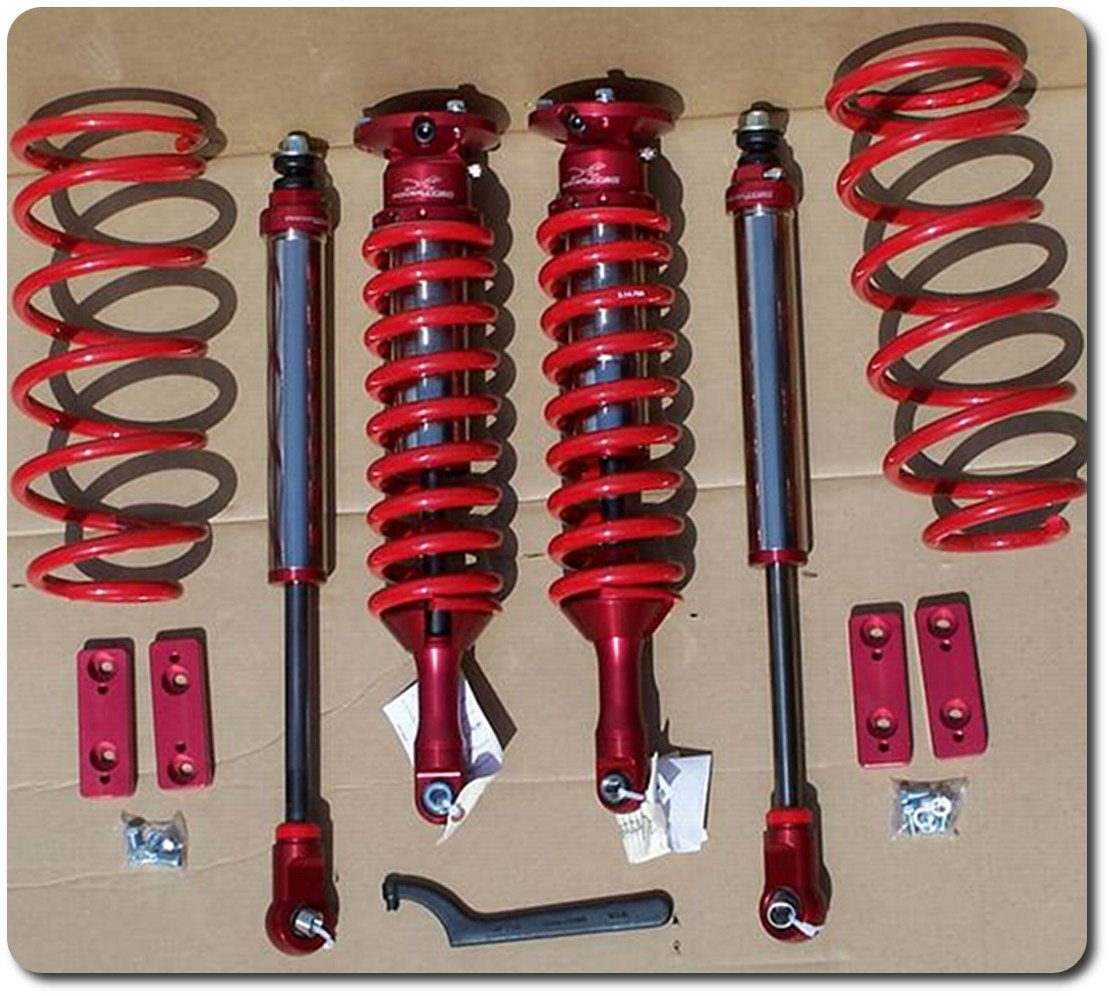
3″ suspension lifts can be broken down further into kits that are adjustable and those that are not.  With a non-adjustable suspension lift you select the stiffness of spring you want (or in some cases spacers to compress the springs) based on the weight of your front end. If you are running a heavy bumper and winch select a stiffer rated spring, if not choose a medium or light coil-over spring. Spring ratings can be heavy up front with medium in the rear allowing for some customization. If you change your front-end’s weight down the road, you have to change out your springs to maintain the same ride.

On an adjustable suspension lift kit, in addition to spring rating choices, the coil-over comes with a built in collar that will increase or decrease the pre-load tension on the coil-over spring, compensating for any additional weight.  A few turns of the collar allows you to dial-in the ride most suited to your liking.  Each side of the front-end can be tuned individually to compensate for the extra weight of the driver or dual batter stack.

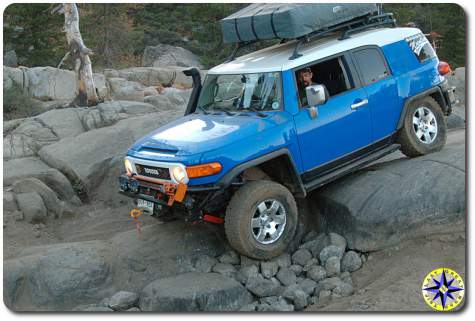
Because a 3″ lift increases travel and in most cases upgrades the quality of shock, as well as providing lift, it is well suited to individuals looking to wheel their off-road vehicle through many different terrains including 4×4 trails, sand dunes and two track dirt roads as well as miles of washboard gravel or dirt.

As you would expect their is a difference in price between the adjustable and non-adjustable suspension lift options.  Non-adjustable suspension lifts will cost up to $700 for a quality setup.  Adjustable suspension lifts kits can cost upwards of $2,600 depending on manufacturer…  The religious debate on the best manufacturer of coil-overs and shocks makes the holy war crusades look like a minor disagreement on the play ground.

rough country fj cruiser body lift
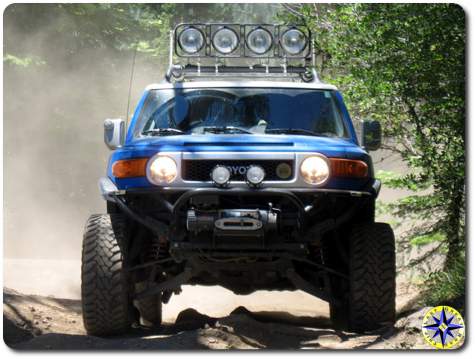
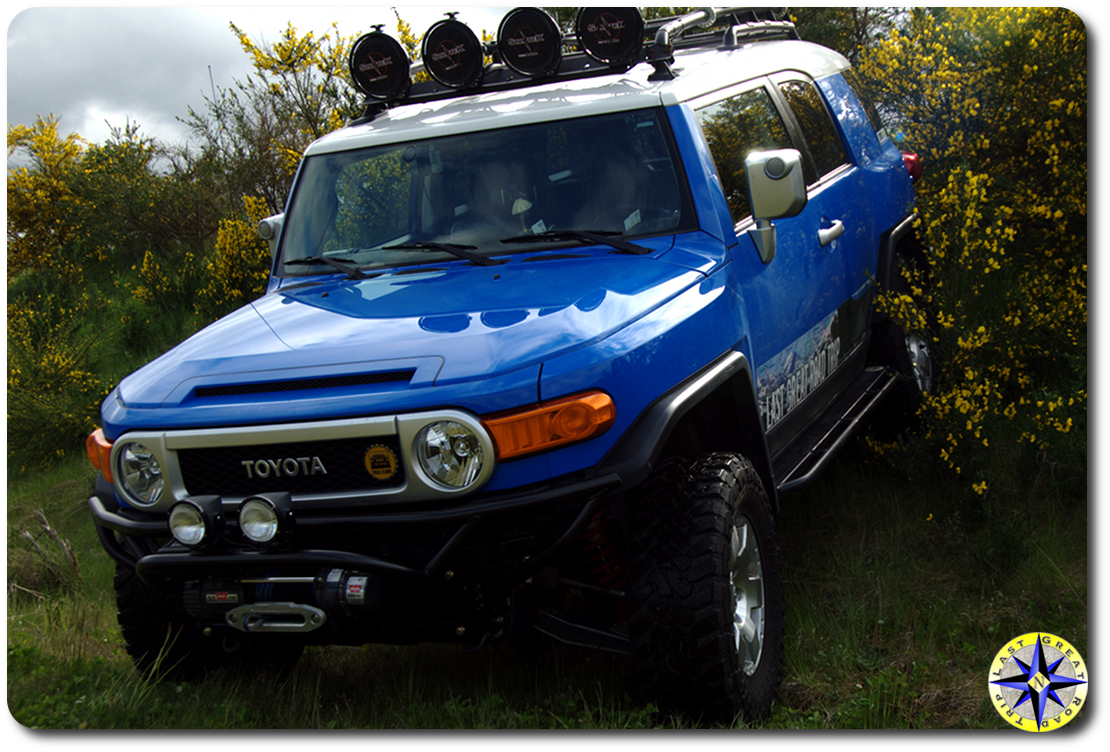
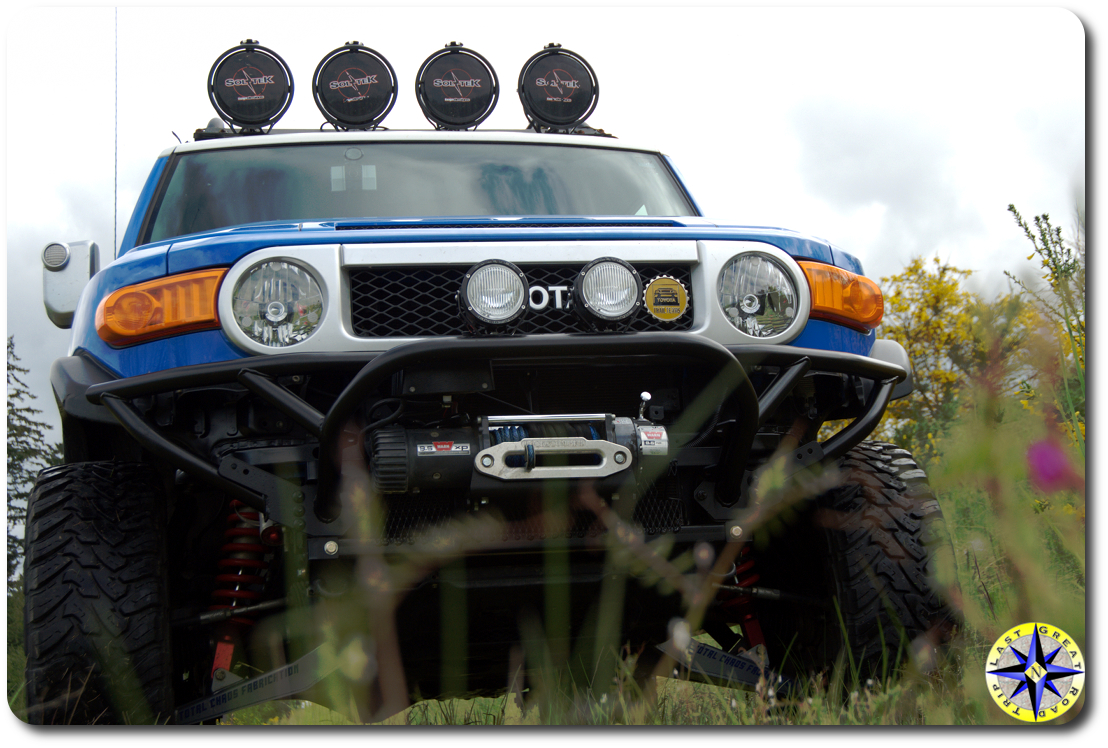
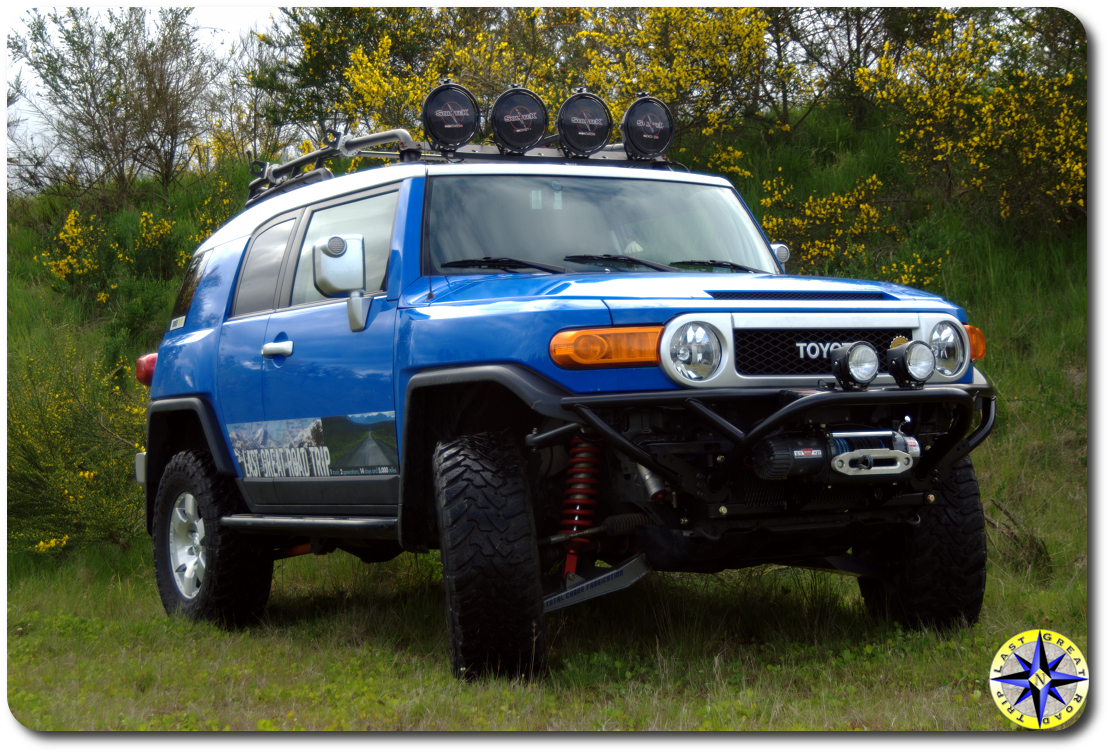
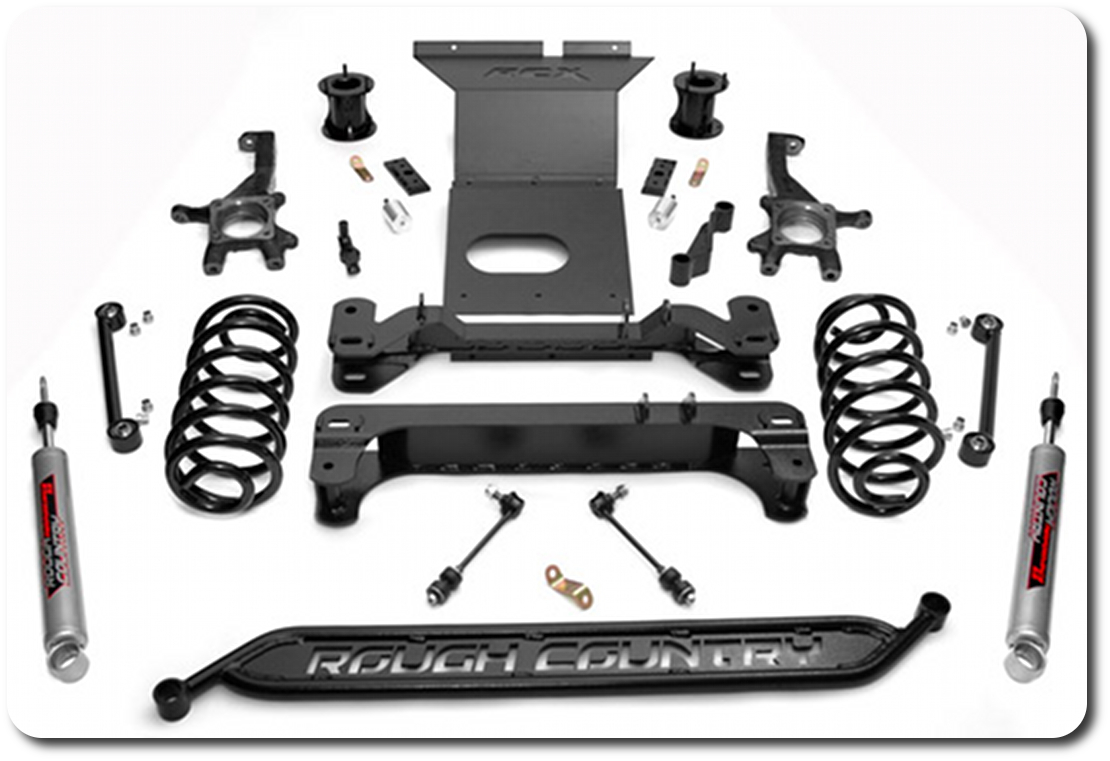
The next type of lift, a 6″ lift, will put you high off the ground.   Part suspension lift part body lift, a 6″ lift involves adding spacers that separate the body from the frame along with a number of suspension components including  longer rear upper and lower control arms (or relocation mounts for stock trailing arms)  longer shocks, springs, coil-overs, and steering knuckles.  A 6″ lift allows you to easily slide in larger 35″ tires (most tires over 275x70x17 will likely require a body mount chop).  The center of gravity is now six inches higher (think hard now before putting any weight up in the roof rack…  like a tent, gas cans, spare tire…).  The suspension travel gain and increased ground clearance of a 6″ lift is only about 3″ although 35″ tires will add to the ground clearance.  This lift is not for the budget conscious with parts running up to $3,700 depending on how complete the kit is and the quality of the suspension components.  Those who plan to drive slow on the trails and need larger tires to get over rocks and can stay away form the off chamber stuff will find the height of a body lift to their liking.  If you are seeking the big rugged 4×4 look you will also find the 6″ lift appealing.

total chaos long travel kit parts
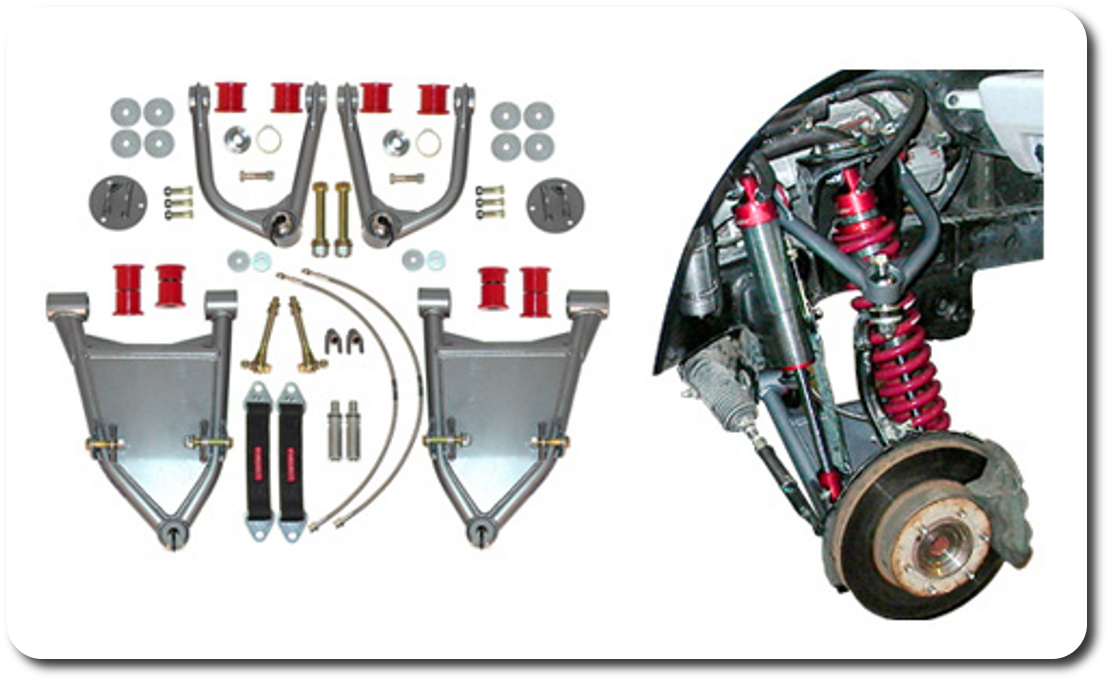
When you start talking about long-travel lift kits, you move into the more specialized lifts. With a long travel lift you replace almost all of the stock IFS components including upper and lower control arms, axles, and in some cases new shock mounts to allow for dual shocks up front.   The long travel kit pushes out the wheels extending the distance between the shock tower and lower arm mount.  2″ and 3.5″ kits are available from Total Choas for the Toyota’s FJ Cruiser.  The increased distance between the shock tower and lower control arm shock mount is now filled with a longer coil-over increasing the total travel available to soak up the bumps, ruts and pot holes in the trails.  Up to 13″ of travel can be achieved when you push each wheels out 3.5″.  The coil-over components of a long travel kit operates the same as an adjustable suspension lift but with more coil-over spring to work with.

The long travel kits are designed with desert racing in mind.  In this style of wheeling, height is not as important as keeping the wheels in contact with the ground to maintain forward momentum and steering control.  With a long travel kit the droop, a measure of how far the wheel can fall down from its resting stance, is just as important as the lift that is achieved.  More lift means less droop and vice verses.  But with those long coil-overs there is a lot to work with.  On a 4×4 tail the longer travel will bring addition flex allowing the rig to remain stable while traversing all sorts of contours.  As you would expect the price for replacing your entire stock IFS  is steep.  Depending on the long travel kit and the coil-overs, secondary front shocks and rear shocks you choose expect to pay between $4,000 and $7,000.  And just in case you were wondering, no you can not use the coil-overs from a 3″ suspension lift, they are just too short.

front solid axle
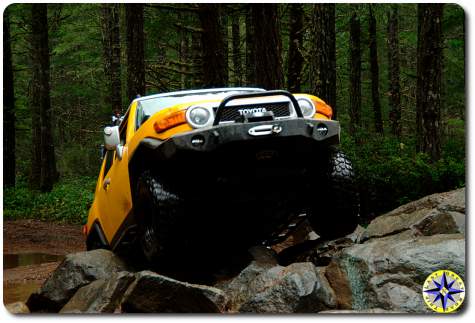
A solid axle is considered the holly grail of hard core off-road rock crawlers.  Tons of flex, high lift, locking front differential and armor plated toughness, a solid axle swap turns the FJ Cruiser into a point and shot rig.  Lift height and tire size is only limited by the shocks length you can throw down with and the amount of cutting on the wheel wells your willing to do. Of course what you gain in trail worthiness you loose in daily driving on-road manners.  The rigs that under go what today is mostly a one-off custom front end build, tend to be purpose built rock crawls.  Building a solid axle that can incorporate all the front end electronics including ABS and other sensors will set you back about $10,000.  But don’t worry, the kids dreams of college where never that realistic anyway with their grades.  Just let them know you spending their inheritance while you’re still young enough to enjoy it.

voodoo blue toyota fj cruiser 4x4 trail rocksWhat is the right lift for your FJ Cruiser, I don’t know.  How do you plan to wheel your rig?  How much are you looking to spend?  Have you considered the additional cost of tires to fill all that space?  What are you looking to gain by raising your FJ Cruiser, good looks, bigger tires, smoother ride, unlimited flex?  Of course if you were thinking of in stuffing 35″ tires so you could go rock crawling and have a $2oo budget; learn to live with disappointment.  If however your dream is to run logging roads and some 4×4 trails while still maintaining the rig as a daily driver on 33″ tires using a 3″ suspension lift and spending about $800, plus tires; you will most like see huge value from your investment, along with a little compromise on adjustablity. In other words if you are comfortable with the what you want to do and set aside the appropriate budget, you’ll get miles of smiles (sorry it just came out) from your lift, out on the trail or anywhere else you want to wheel you rig…  Even the Denny’s parking lot.

And now thanks to Metal Tech 4×4 there is an option specifically designed to improve FJ Cruiser rear travel for a long travel option with more travel and flex for the rear end of the Toyota FJ Cruiser.

Bahia de los Angeles base camp tent

Off-Road Adventure Shelter – Kelty Carport Review

fj cruiser kelty carport camp fireOff-road adventures can be for a day, a week, a month…  And at some point you need to stop for the night.  Options abound for overnight accommodations ranging from a tarp on the ground to roof top tents with changing rooms and a luxuriously padded floor.  In between is just about everything else.  We decided to test out the Kelty Carport Deluxe Shelter and see how well it would work as a shelter for long off-road adventures.

The Kelty Carport can be set up in several configurations.  It can function as a car side awning with just a top or as a sided privacy shelter attaching to the rigs roof rack.  It can also stand alone as a three sided shelter with the included poles.

The first thing you notice when setting up kelty carport fj cruiserthe shelter is that you will need to read the directions (not a straight forward setup process).  There is an order to things and in this case if you don’t follow Kelty’s order you’ll end up wondering why the shelter seems more difficult than it should be.   Set up time averaged about 15 minutes once we knew the right order.   The second thing you’ll notice is that everything is an extremely tight fit and you will be stretching and pulling to hook the Polyester taffeta shelter to the aluminum polls.  Kelty’s engineers use a lot of tension to keep everything in place.  The final issue to overcome is wind…  When the atmosphere is less than calm, lifting the shelter to attach it to the rig is a lot like holding a kite in a wind tunnel.  Once it is up and the sides all staked down it is stable and protects you from wind.  Even in the awning configuration it remained solid although you have to use three tension lines on each of the two polls to keep it standing tall.

In either configuration the shelter will keep the rain off, however there is no floor and you will have large gaps at the roof line where the shelter attaches to the roof rack allowing wind to push rain in when it is coming down horizontally.spaciousness of kelty carport

When the shelter is set up, you’ll find a spacious, well ventilated area that protects you from the wind, sun and night time dew point.  With the high point of the shelter  attached to your rig, there is plenty of standing room in the shelter with the added bonus of full access to your rig.  In fact the shelter can be set up with the sides down for full privacy while allowing you to open the doors of the rig providing full access.  The ability to keep your gear and cloths stowed in the rig while you sleep in the shelter add to the roominess of your living area.

The shelter attaches to your rig with three Velcro straps making it is fairly easy to unhook the shelter, rest it on the ground and drive off for a day on the trail, knowing it will take only seconds to reattach upon your return.

kelty carport stand aloneWe found the Kelty Carport makes a good summer shelter and like that it can be configured as an awning (roll up the sides) or a night time retreat.  The carport can be attached to the rig or stand alone providing countless configuration options. But setup and tear down takes can be a little challenging for one person.

The Kelty Carport is not cheap, retailing for $330.  If you like the idea of an awning and want a little more earthiness in your overnight accommodations, consider the Kelty Carport as an option somewhere in the middle of true luxury and bear bones minimalism.

fj cruiser baja racer

Metal Tech 4×4 Off Road Tube Bumper

voodoo blue toyota fj cruiser metal tech front bumperSo why did we say good bye to our tried and true off-road adventure ARB Bumper?  How else could we try out and review Metal Tech 4×4’s front tube bumper?  If you haven’t heard about Metal Tech 4×4 and their products for Toyota Land Cruisers than you probably don’t spend a lot of time on the FJ Cruiser forums or don’t wheel a Toyota Land Cruiser.  Metal Tech 4×4 started out building cages and other trail protection for the Toyota Land Cruisers (think old school FJ40, 80 series or FJ60).  Now Metal Tech 4×4 has taken that experience and applied it to Toyota’s newest member of the cruiser line building sliders, front and rear bumpers as well as cool tube doors Toyota’s FJ Cruiser.

metal tech front tube bumperMetal Tech’s off-road accessories are engineered from the ground up for protection and their front tube bumper is an ultra high performance, lightweight package. The tube bumper is only 19 pounds heaver than the factory stock front bumper. Made from 1 ¾”, .120 wall tube steel, the bumper features four light mounting tabs and the ability to work with or without a winch.    The bumper mounts to the front FJ Cruiser frame using the factory bumper mounts for easy installation as well as ensuring a strong integration with the frame.

Installing our Soltek off-road lights to the bumper was a simple matter of running the wire harness through the tube from the frame to the single 1/2 hole we drilled at top of the bumper next to the top light mounts.

We chose to add the optional winch mount system which is designed to be installed independent of the bumper allowing for increased strength as well as easy installation.  The winch system is a twin beam design that bolts to the sides of your frame using the factory reinforced points on the frame. This winch mount system was designed for the abuse of real off-road situations.fj cruiser metal tech front tube bumper

The winch system bolts on and as advertised is the easiest winch installation of any bumper. Once the mount system is in place you simply bolt the winch on.  A simple one-person job.  With both the tube bumper and winch mount system installed, the two look integrated as if they are one unit but remain independent for better strength to weight ratio.

The first thing we noticed after installing the new bumper and winch mount, was that the front end now sits about a half inch higher than before (without the bulk weight of the ARB bumper).  The lighter front end has reduced dipping in hard fast turns and with an improved approach angle climbing steep obstacles just got a little easier.

The openness of the tube bumper definitely shows off the suspension and in our opinion really complements the front lines of the Toyota FJ Cruiser.  Lite weight, engineered protection and good looks, what more could we ask for.  Look for updates over the coming year as we take the rig and it’s new bumper out on various off-road adventures.

close up arb front bumper fj cruiser

ARB Bumper – Long-Term Review

fj cruiser muddy trail fall colors 6It has been about two years since we first installed ARB’s Bull Bar on our off-road adventure based Toyota FJ Cruiser. In the early days of the FJ Cruiser, our choices of bumpers were limited to only a handful. ARB has been there with their bull bar since the beginning. These days FJ Cruiser owners have a wide array of the options when it comes to an aftermarket shell style bumpers but ARB remains as the standard by which others are measured.

ARB is one of the best known companies for aftermarket 4×4 products.  Headquartered out of Australia with it’s North American office in Renton WA., ARB has been building their 4WD products, outback tough for more than three decades.  In our case their bumper lived up to its reputation.  Originally installed on our Toyota FJ Cruiser to protect the front end during our Arctic Circle off-road adventure where there is always a real chance of colliding with wild life… large wild life.  After making the journey north the bumper continued to guarded the front end from trees, rocks and what goes bump in the night on numerous 4×4 trails and back roads across the west.arb bumper fj cruiser beach

Our overall impression?  This is a strong, well designed bumper (strong enough to hold your favorite pint glass).  Intended for off-road adventures in the Australian Outback, the bumper is built tough, supports a winch and houses built-in IPF fog lights as well as top mounted off-road lights.  This is the only after market bumper we know of which has been crash tested.

On the down side, like all shell style bumpers, that mass of steel is heavy and its square style pushes a lot of air, contributing to lower mpg.  When the rig is flexing over rocks or running fast down washboard back roads, expect a little rub from the bumper on the corners and fender flairs (we found this to be true for us and other ARB equipped FJ Cruisers we looked at).

2007 toyota fj cruiser field arb bumperQuality construction, bullet proof design and a reasonable approach angle makes the ARB, in our opinion, the top shell style bumper on the market today.  The ARB Bumper provided years of protection and performed well regardless of the terrain.  This is a product we can recommend to anyone looking for a shell style expedition bumper.

This is also the point at which we retired the ARB Bumper in order to test a Metal Tech tube style front bumper, but that’s another story…  off-road adventure accessory

fj cruiser packed maxtrax

Off-Road Recovery Made Easy

fj cruiser stuck in sand maxtrax ladders4×4 off-road adventures can put you in some sticky places and the last thing you want is to get your 4WD truck stuck.  Winches are great for self recovery as long as you have an anchor point.  But what do you do if there nothing but sand all around and no other rigs about?  We tested out a recover system (aka sand ladders) from Maxtrax out of Australia to see if we could find an easy one man means for getting unstuck.

fj cruiser arb bullbar maxtrax front wheelThe first thing you notice about Maxtrax is they are light, easy to work with and stack neatly for storage.  The second thing you notice is that Maxtrax put a lot of thought into their design and managed to build a better mouse trap with added gripping power built into the ladders as well as handles.  But do they work?

Putting the sand ladders to work is pretty easy…  On 4WD vehicles, place the Maxtrax up against the front wheels.  You may need to dig a little so the ladders lay as flat as possible, but that is easy enough since the Maxtrax can act as a shovel for scooping sand out of the way.fj cruiser driving on maxtrax

With the ladders in place, climb in the 4WD rig and drop it into low.  Gently apply the throttle.  As the tires slowly turn they will draw the Maxtrax sand ladders in and climb on top using the recovery system to gain traction and move the rig forward.  Keep the throttle steady and drive straight.

Once you’re onto firmer ground, it’s easy to go back and grab your Maxtrax for the next time you need a little help out of a sticky situation.

As advertised the Maxtrax recovery system worked well for getting us out of the deep sand.  When it came to hills we found it takes a little more work to use the ladders to move forward like climbing steps.  maxtrax fj cruiser stuck on sand hillPut the sand ladders under the rig, climb forward, retrieve the ladders, rinse and repeat until you’re up and over the dune.

Maxtrax recovery system does make self extraction in sand, snow and mud an easy one person job. These Maxtrax have definitely become a standard for our off-road adventures.

compass map

Adventure Puzzles For Your Mind

This post turned into a bust!

The difficulty with using web based items on our blog is we have no control over the other websites.  And what started out as a fun on-line puzzle has become an eye sore.  The other site that provided the puzzles replaced all of the overland pictures with kitten pics.  Ugh!!

So know we were trying to help you kill time and do something overlandy during those endless zoom meetings…  But the internet has no love.

the slab 4x4 trails

4×4 Adventure On “The Slab”

the slab hills 4x4 trailsLet me start by squelching the rumors that I’ve got an IFS dark cloud circling over head…  But more on that later…

A while back Jerry over on the Pacific NW Backroad Adventures Forum announced an off-road adventure out to “The Slab” in central Washington.  The Slab, named for the little cement pad that serves as the gathering place, is an open sagebrush filled area just northwest of Zillah, Washington.  It is a wide open area full of two tracks, hill climbs and sunshine which sounded like heaven in the middle of a wet, western Washington spring.

If you’re going explore the dirt you’re going to have to cover a lot of concrete getting there. To get to The Slab the drive took us over the Snoqualmie Pass as the sun was coming up just past O’dark thirty. Crossing over the pass the 20 degree, tree lined, snow capped mountains were soon replaced by sunny dry rolling hills, scrub, fence lines and wide open highway, not a bad start.  Rolling through the Yakima Valley and on into Zillah I soon met up with the crew that I would be running with.  Strewn around Micky D’s were 4x4s sporting Ford, Toyota and Subaru badges telling the tale of those inside.  This group is focused on wheeling, not the wheels your driving and everyone is welcome to come along even a voodoo FJ Cruiser.snoqualmie pass snow highway

Our leader, and generally great guy, Jerry gave us a quick run down of what to expect on the slab; rolling hills, steep hills, and one call Rollover Hill along with a place aptly named flex canyon guaranteed to pit driving skills against rock, bent metal and broken glass.  Driving through the apple orchards, we soon arrived at the concrete pad to gather up and air down.

eastern washington fence lineIn no time the rigs were set as we mounted up for Jerry to lead us into the hills with a brief stop to peak at flex canyon.  This is a great place to work on driving skills.  Winding through “telephone line” you get plenty of off camber experience and a chance to measure the width of your rig by squeezing it past sage brush branches which appear to reach out for your rig in an attempt to apply pinstripes as you go by.

Approaching the down side of steep hills can be a bit unnerving as you loose sight of the ground below with only the hills on the other side of the valley appearing over the hood.  However these vistas are quickly replaced as gravity grabs the nose of your rig and pulls it down the incline giving you a clear view of where the incline rejoins level ground some 50 feet beyond.  Of course coming up offers a similar experience as you approach the  crest viewing nothing but blue sky and glaring sun until the rig levels out on top.  These are tiny moments where you just have to have faith.toyota fj cruiser ARB bull bar the slabs

Soon a voice came over the CB announcing several guys from the All Wheelers Club had arrived and would soon join up with us.  These guy rolled in sporting rigs clearly built for the hard core stuff and we followed them back to Flex Canyon, where they put their skills to the test.  Big tires, high lifts and lots of flex, these guys made easy work of it.

Now back to that dark cloud thing…  As you recall from our 4×4 adventure in the dunes, day 1 turned into axle field repair, and on this run, one of the Subaru among us gave up not one but two IFS axle shafts.  This time however, he was equipped with all the spare parts, tools and a through knowledge of axle repair in order to have the Subaru back together just as everyone finished lunch.broken subaru half shafts

Not quite ready to leave yet, the whole crew poked around the hills a little more and before long we were looking up at Rollover Hill.  The 100 plus foot climb is steep and requires speed to conquer but just as you approach the upper area there is a bump forcing you to slow, followed by a stretch of traction-less gravel.  The hill gets its name from the rigs that fail to make through the final gravel section and have to back down, only to get kitty wompus with gravity taking hold and testing its roll cage.

4x4 susuki jeeps subaruTrue as the day is long,  the fact is that “it is not the rig, its the driver”.  Phil first looked up the incline, walked to its top, surveyed  the change in terrain, calculated his changes and put together his plan.  Phill’s rig is a capable Ford Explore, but no giant lift, mud slinging tires or locking differentials, just a man who knows how to drive what he brung.  And we all watch as he headed up one of the more difficult routes making his way over the bump and clawing through the gravel leaving a cloud of dust as crested the top and made the sharp turn. After seeing who easy Phil made it look a number of us thought about taking a turn but never after 3:00 p.m. and you shouldn’t really climb hills for 30 minutes after eating…

Bonus pictures at our Flickr off-road adventure account

The Slab is not a big area but with all the trails winding back around on themselves and cutting back and forth we spent a full day wheeling and enjoying the company making new friends as well as connect once more with some old one.  If you ever get the chance join a trip put on by Pacific NW Backroad Adventures…  I promise you wont be disappointed.

yellow sun fusion fj cruiser rock crawling

The Press Can’t Stop Complementing The FJC

Seems like this year which is probably its last, Toyota’s FJ Cruiser has received more press than ever before. Take for example “FJ Cruiser does its off-road namesake proud, Toyota’s rock-crawling mud eater is the real deal in an era of phonies” on the Edmonton Journal site.

Like most of the reviews, it talks about the more than capable off-road qualities of the Toyota FJ Cruiser, ranks it at the top above Jeep, Hummer or Land Rover (some combination of price, quality, and capability), and informs you that the seats are little uncomfortable (I don’t get that one), the nobs are big (I like Fisher Price sized toys) and of course the now legendary blind spots.  But they also let you know that all great rigs of the past have had their quarks.

With the phasing out of the FJ Cruiser at the end of 2014 there remains hundreds of thousands out there and like their older brothers, these will be handed down, sold, traded and reincarnated by thousands more new off-road enthusiast  for decades to come.

My prediction from back in the day seems to have been pretty close…

Look for a big hand off with many of the 4×4 technologies and styling ques showing up on the Toyota 4Runner.  I believe the FJ Cruiser allowed Toyota to test a number of engineering and styling ideas as well as 4×4 goodies in a smaller package that are now ready to land on the Toyota 4Runner, their more mainstream vehicle.  But that is just my prediction… 

To bad I couldn’t have found a line on it in Vegas?

fj cruiser rear lower control arm install

How To Install Rear Lower Control Arms

Metal Tech fj cruiser lower control arm stock fj cruiser lower control armSooner or later anyone who spends a little time enjoying off-road adventures will hear a story from someone they know who bent their rear lower control arm (LCA).  On FJ Cruisers the stock rear LCAs are not the strongest in the world and the first time they get dragged over a rock or log, they’ll fold like origami.

The fix for this weak link is to swap out the stock rear LCAs for a set Metal Tech 4×4 LCAs made out of D.O.M. tubing, aka high-strength seamless carbon steel.  And as you would expect from the guys who defined protection, Metal Tech has engineer a pair specifically for those who wheel their FJC.  Besides strength, Metal Tech added length adjustments to their rear LCAs to ensure proper geometry is maintained for rigs with different lift setups.  In fact last time we were at Metal Tech, we asked Mark to show us how they build their rear LCA.metal tech fj cruiser rear lower control arm cut away

  1. separate the heads of the Stock LCA from the body
  2. liberate the bushing by squeezing it out.  Less pain the childbirth but just about as much noise
  3. demonstrate unequaled TIG welding skills, assembling all the parts including tubing body, threaded adjustable section and heads
  4. press down the bushings and thread a grease nipple into place

There is always a big confidence booster in a product when the manufacturer is proud to show off exactly how their product was designed and the process for creating a part they put their name behind.  And after seeing how Metal Tech engineered and builds their LCAs, there was no questions about which ones were going on our rig.

Flip the calendar forward a few months and we were back at the shop getting our own pair of rear LCAs. Arriving at Metal Tech, Mark wasted no time putting our rig up on jack stands and pulling the rear wheel.  The procedure is very straight forward, remove the bolt, holding the emergency break line to the LCA and than the bolts that hold the LCA to the rig, one at each end.  One of the tricks Mark showed us that the Toyota rear lower control are installation instructions omits is that by placing a strap around the axle to hold it in place will keep everything still making both LCA removal and re-installation a simple procedure.  When attaching the strap around the axle take care to clear the brake lines and ABS sensor cable.

Metal Tech LCAs are fully adjustable.  Once you have the stock LCA removed, match it up to the new one and adjust the head until they are the length you want.  Once you have the length dialed in for the specific geometry of your rig match up the second LCA so they are the same.installing fj cruiser rear lower control arm

Bolting the new LCA in place is a simple matter of sliding the front head its mount and slide the retaining bolt through to hold it in place followed by doing the same on the other end.  When mounting up Metal Tech LCAs remember the adjustable head attaches in the rear with the grease nipple point up out of the way.  Slide the washers over the bolts front and rear and tighten up the nuts.  You will want to torque the bolts down to the proper setting.  Toyota calls for 96 ft/lbs.  A little hint here:  Fix the nut with a box wrench while turning the bolt head with the torque wrench.

After you have the LCA bolted up and removed your strap, replace the bracket holding the emergency brake line and bolt it into place.  Replace the tire and head over to the other side to rinse and repeat.  That is all there is to it.installing lower control arm toyota fj cruiser

Once both LCAs are replaced and the rig is back on the ground, take it for a spin around the block and than torque down the bolts once more to ensure proper hold.

With the new rear LCAs we can rest a little easier if we have to drag the rear end over an obstacle on the off-road trail without worry that a bent LCA will put an end to our run or worse cause us to hike out for help.

Update: Metal Tech 4×4 has released their second generation lower control arms for the FJ Cruiser and Toyota 4Runner.  The new control arms have the added benefit of being offset that prevents binding and improves it’s ability to slid over obstacles.

2007 toyota fj cruiser dirt

Show Your Support

thank youA friend asked if she could add the Last Great Road Trip banner to her forum signature.  I didn’t know anyone would want to, but how could you deny a request like that.  So on the off…  way off… chance anyone would like to jazz up their email or forum signature here you go.

Every email client and forum software is a little different but they will generally let you upload a file and place a link on it.  Copy any of the images below to your desktop by left clicking the mouse and saving the image to your desktop and than load it into your signature following the forum or email instructions.  To add a link back to the Last Great Road Trip blog add the following URL link:  http://www.lastgreatroadtrip.com

Desert Sunset Last Great Road Trip Banner

banner sunset

Back Roads Last Great Road Trip Banner

banner backroads

Original Last Great Road Trip Banner

banner original

Thank you in advance to anyone who adds one of these images to their signature.  Really Thanks! We appreciate the support.