 Search You Tube or Vimeo for “FJ Cruiser” and you will find off-road adventure videos showing a rig crossing a river, crawl over a rock garden or wheeling up hills. They are great fun to watch and equally addictive, as I usually find myself forced to step away from the computer at two in the morning. But after watching hundreds of video and trying to create my own I find myself wanting.
Most armature videos on You Tube are from the prospective of a bystander, rather than putting you into the action. When you find a video with shots mixed in from the drivers seat point of view, you feel like you are participating in the ride rather than just watching from the sidelines. Getting those driver seat shots is not easy since wheeling while holding a camera would be bad form and asking your passenger to keep the video camera steady as the rig tosses about is just plain silly. Enter the bullet cam.
A bullet cam, or helmet cam, is that little camera you see attached to adrenaline junkie’s as they exit a perfectly good airplane or go cartwheeling down the face of a glacier just barely attached to their snow board. While high quality video cameras can be costly and fragile, bullet cams are small, water and dust proof, designed to take a beating and relatively low cost. They are also available with high quality chip sets making them perfect for action based filming.
 With all this going for them, what are bullet cams missing? How about a recording component. A really bullet proof cameras receive and converts light into images but requires a recording device to make it useful. Fortunately there are a number of options. On the high-end are digital video recorders (DVR) designed to accept video input from as many as four bullet cams at once. These specialized DVRs are built to be mounted in places out of the way such as under the seat and setup to run on 12 volts with wireless remote control operation. But if you don’t want to invest a thousand dollars or more in a DVR you have another option.
With a few off the shelf items and your current video camcorder you are in business. Most video camcorders have a video input and will record audio and video from other input sources. Besides acting as a recording device for your bullet cam, using a video camcorder allows you to quickly unplug the video input and use your camcorder directly to tape the rigs behind you as they go through the section you just captured from the bullet cam, giving you several different angles of the same trail when you go into editing.
For our set up we started with our existing Canon XHA1 Hi-Def video camcorder which will act as a DVR and accept input from the bullet cam. Unfortunately bullet cams are not yet Hi-Def so we will be mixing together non-HD & HD video in post production, but this will give us that action shot look we are after.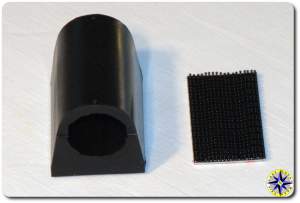
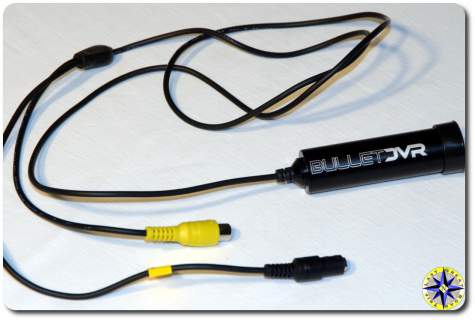
For our bullet cam, we chose the Bullet DVR 550TVL Pro Series camera from OnBoard.tv. This camera is protected against the elements, and internally treated with a silicone based compound, to keep dust and moisture out of the camera body, and also to protect the electronic internals against failures caused by vibrations. The addition of an o-ring seal with an external protective glass cover ensures a 100% protection against condensation. OnBoard.tv claims the 550TVL will never fog up, under any conditions. Boasting the latest CCD imaging technology by Sony Corporation, this camera provides a clean and crisp 550 TV lines of resolution, in full color, and is suitable for use with very minimal lighting. There are less expensive bullet cams on the market with lower resolution so do a little searching to find one that matches your needs.
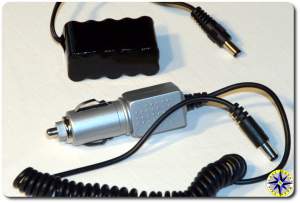
Bullet cams require a 12 volt power source in order to power its chip. You can use a rechargeable battery pack or tap into your rigs electrical. We decided to utilize a cigarette litter plug-in as our power source. This will allow us to quickly plug in our power supply and completely remove it when the day is done. And no worries about recharges or extra batteries to lose on the trail.
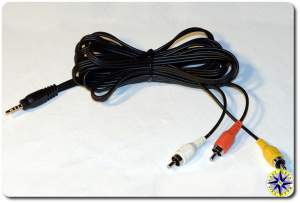 Our bullet cam has an RCA video out jack. Our Canon video camcorder takes an AV jack. Digging around in our spare parts bin I found an RCA to AV conversion cable (note to wife; this is why I keep all this junk). The conversion cable will accept the video from the bullet cam and sound from an external mic, combine it all together and plug into the Canon’s AV input.
Part of any good video is audio so an external mic was also purchased from OnBoard.tv. This mic is inexpensive and will pick up the road noise of the rig adding to the feeling of being in the driver’s seat.
Finally, for mounting the bullet cam, from OnBoard.tv an all-rubber mount with a Velcro base that allows the bullet camera to be mounted on any surface, including… yes even a helmet. The bullet cam simply slides into the rubber mount and according to OnBoard.tv “the camera rests on tiny dampers which act similar to a suspension system. This unique camera mounting solution offers good protection in the event of a crash, as well as the best anti-vibration features on the market.”
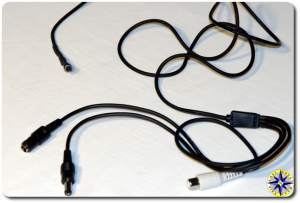
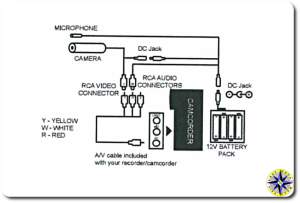
You can see in the diagram how all the wires go together. This diagram shows a rechargeable battery pack, but as discussed above any 12 volt source will work. The bullet cam and external mic are on separate leads but share the same power source. This allows us to place the mic next to or away from the bullet cam depending on what we want to capture.
You can purchase this setup as a kit or buy the individual pieces alone. The bullet cam, mic and all-rubber mount came to $323.90 plus taxes and shipping. We already had the RCA to AV cable and cigarette litter power supply. OnBoard.tv sells a complete kit for $349.00 which also includes a rechargeable battery pack, charger and hard-sided carrying case. You may still require an RCA to AV cable depending on what you are using as your DVR.
 While the bullet cam may be mounted just about anywhere. We choose to initially attach the Velcro on top of the FJ Cruiser’s dash gauges and a second piece to a magnetic sheet. The dash mount will give a picture similar to that of the drivers without blocking the view. The magnetic sheet, which we picked up for $2.99 at Office Max, will let us put the camera just about anywhere else on the rig including the outside of the door, roof, hood or bumper. Each location provides a different perspective and takes a little experimentation to find the locations that work best for you.
Using a little post production editing magic, we can now show viewers different angles of an off-road adventure. Some shots with us driving and other shots of our friends.
…All right, Mr DeMille, I’m ready for my close up.

I for one am pretty excited to see the bullet cam in action come Baja 2009.
Well…. it’s almost 2 in the morning and once again find myself glued to your site. I am thinking about taking the plunge on a used VooDoo Blue FJ – even in our uncertain economic times. Only live once…. Great videos. Great articles!