
The other day, Hula Betty, in her most sportive, I get to work on her truck, but she wants this fixed now voice, announced it was time for me to replace the clunky Lexus GX470 rear door stopper with a gas assisted strut that will allow the door to glide open, stay open and easily close.
A common complaint about the Lexus GX470 and Toyota Prado 120 is their rear door stopper mechanism’s poor design. Even in a slight breeze the rear door becomes randomly self-closing if you forget to lock it open. And opening the door with an arm full of gear can be overly challenging on an angle. Changing out the original door stopper mechanism with a gas strut solves both problems as well as adding a smooth glide on opening or closing the door.
Changing out the Lexus GX470 or Toyota Prado 120’s OEM door stopper with a gas strut and door reinforcement plate is a simple mod that anyone can perform in no time at all.
You will need a couple of tools:
- Felt tip marker
- Flat head screw driver
- 10mm box wrench
- 12mm box wrench
- Small grinder
- Electric drill
- 5/16″ drill bit
The parts required are:
- Gas strut – 24″ open length with 40lb of force
- 10mm Ball Studs, M8 X 1.25
- 2 in. x 36 in. Aluminum Flat Bar at x 1/8 in. thick
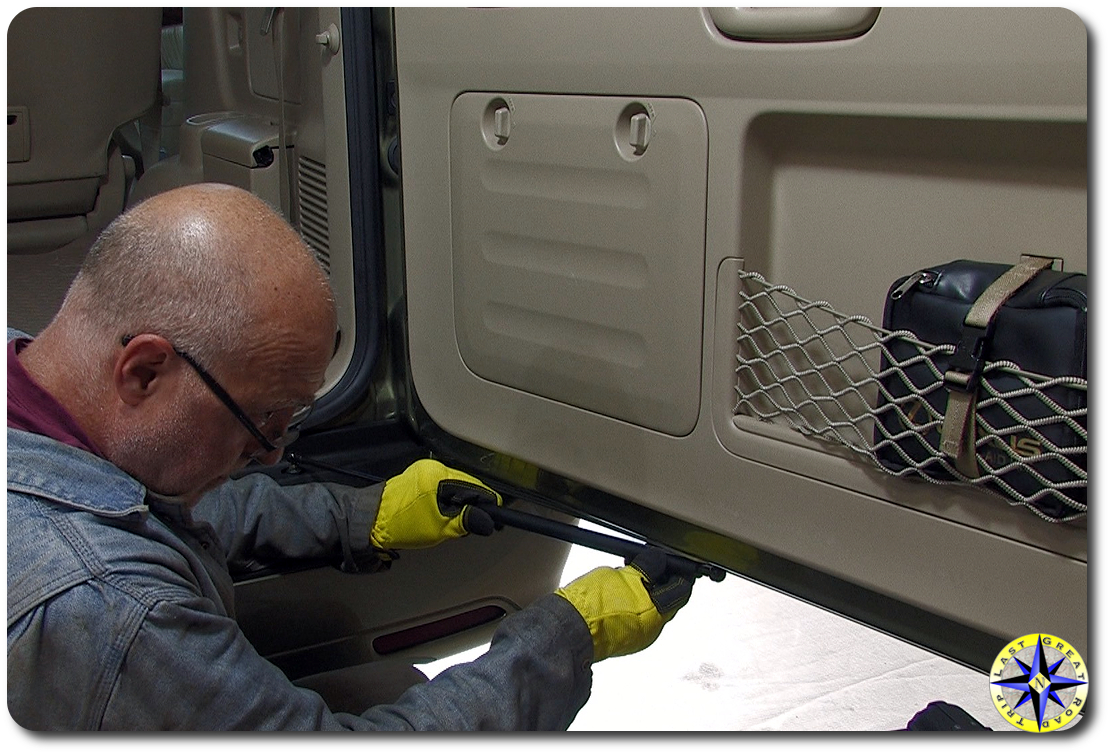
Step 1 -Using a flat head screwdriver, pry off the little round cap covering the bolt holding the OEM door stopper to rear frame of your Lexus GX470.
Step 2 – Remove the old clunky door stopper mechanism. Start with the bolt you just exposed on the bumper. Then remove the two bolts on the underside of the rear door. To avoid scratches, support the door stopper with one hand while you remove the bolts with the other.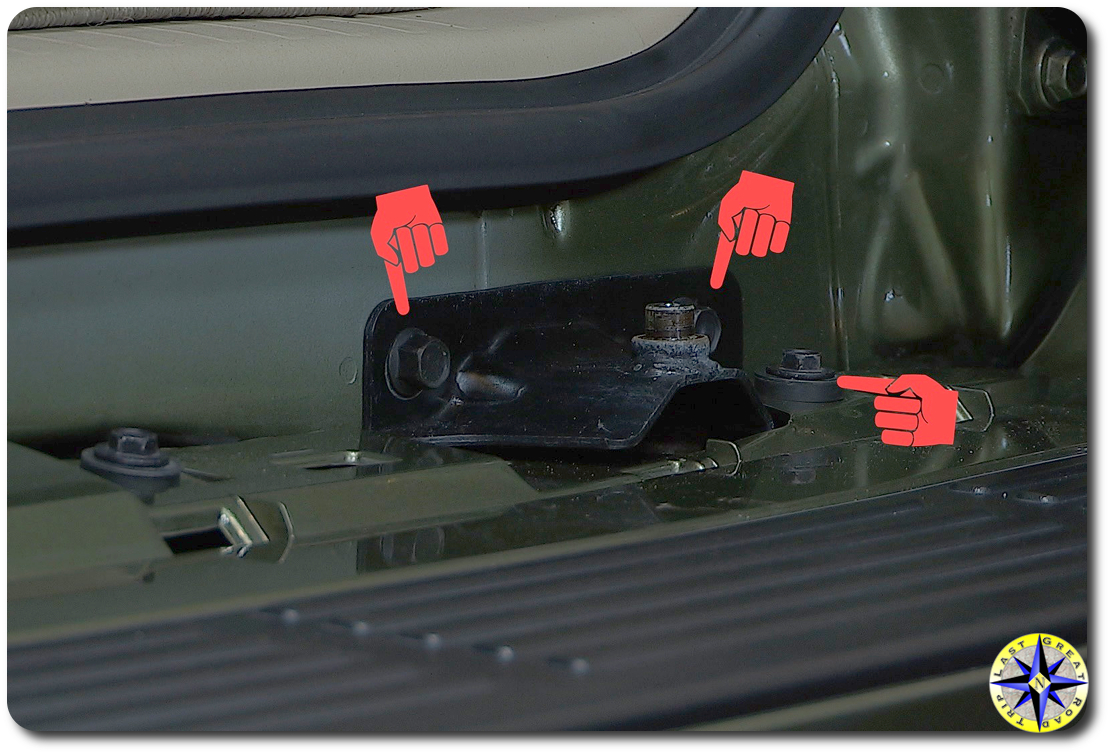
Step 3 – Remove the long thin plastic cover over the gap between the truck and the bumper. The Lexus GX470 has a portal on the cover for sliding in the jack handle to lower the spare tire. If you remove that little portal cover you can get a better grip to remove the long cover running the length of the bumper body gap.
Step 4 – After the cover is removed you will see the bracket that the old door stopper mechanism on your Lexus GX470 or Toyota Prado 120 attached to. Using a 10mm wrench, start by removing the bolt on the bracket that is attached to the bumper.
Step 5 – A 12mm wrench will remove the two bolts holding the bracket to the back of the truck frame.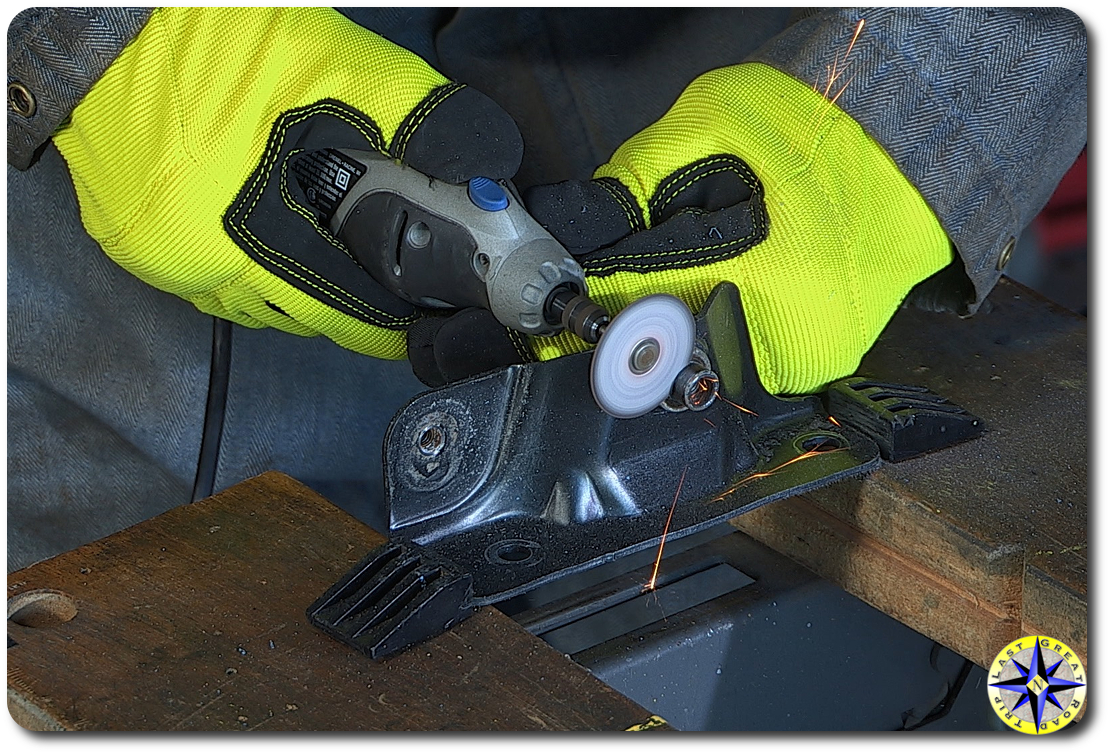
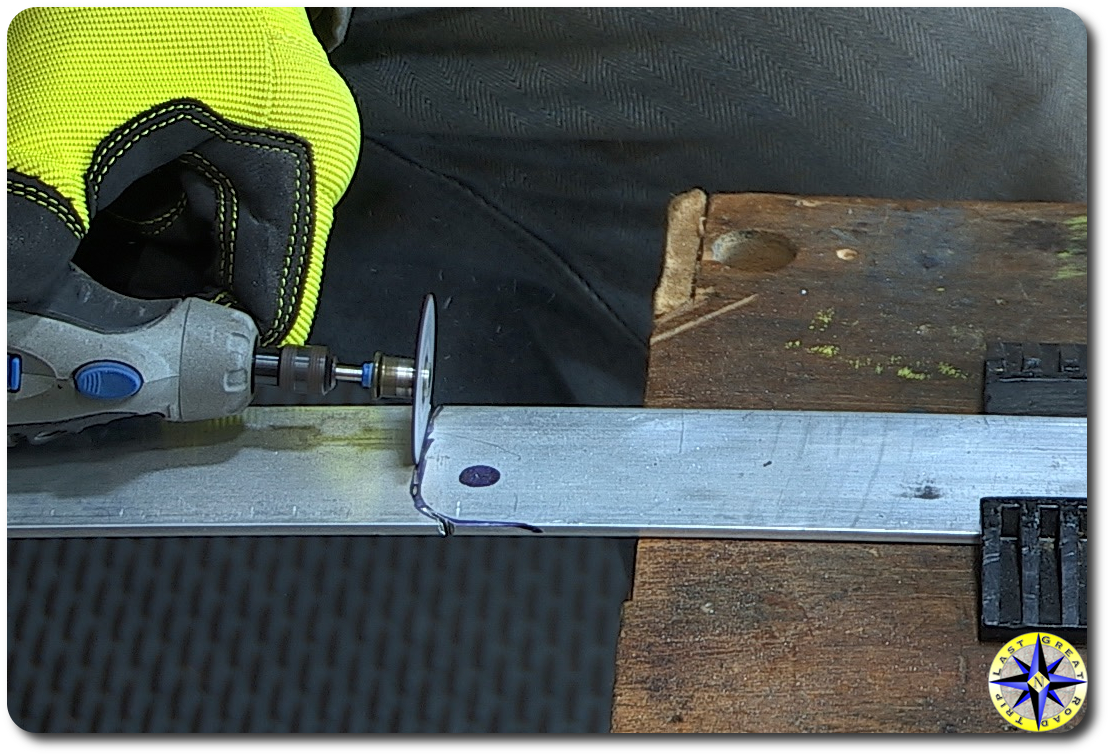
Step 6 – With a cutting disk attached to a small grinder, cut away the portion of the bracket that the OEM door stopper slide onto. This is just above the point at which the threads begin. After completing your cut, smooth down any high points and rough edges with a grinding disk.
Step 7 – Throw a little rattle-can paint on the bracket to keep everything looking good and prevent rust from developing.
Step 8 – To fabricate a rear door reinforcement plate you will use the OEM door stopper as a template. Place the door stopper on the aluminum flat bar arranging as if the flat bar was the rear door and the door stopper would be attaching to it. Trace the edges and bolt holes onto the flat bar with a marker.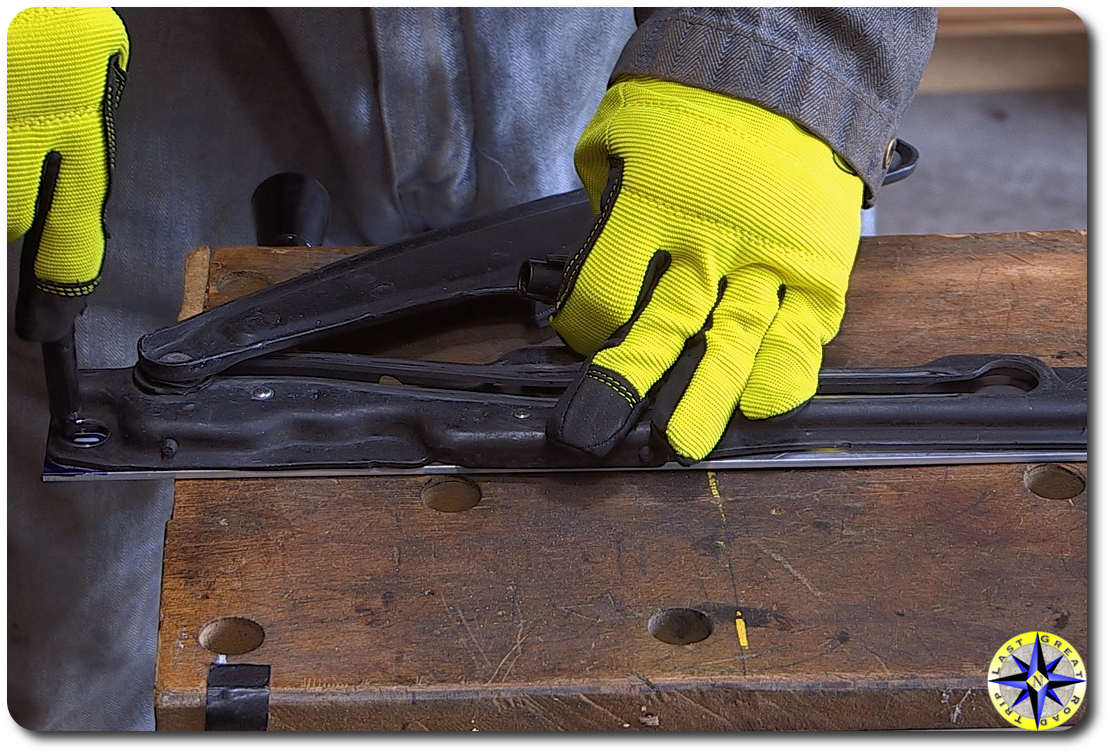
Step 9 – Cut the aluminum flat bar along the traced lines using your small grinder with a cutting disk.
Step 10 – Drill out the two holes for the bolts to pass through. Notice that one of the bolt holes is a bit elongated to allow for slit adjustments.
Step 11 – Sand or grind down any rough burrs or sharp edges. If you want a professional look, lightly sand the entire flat bar to give it a brushed finish.
 You are now ready to assemble everything back together.
Step 12 – Reattach the bracket to the back of your Lexus GX470 with the three OEM bolts you removed.
Step 13 – Press the plastic bumper gap cover back into place. Don’t forget to put the spare tire portal cover in place as well.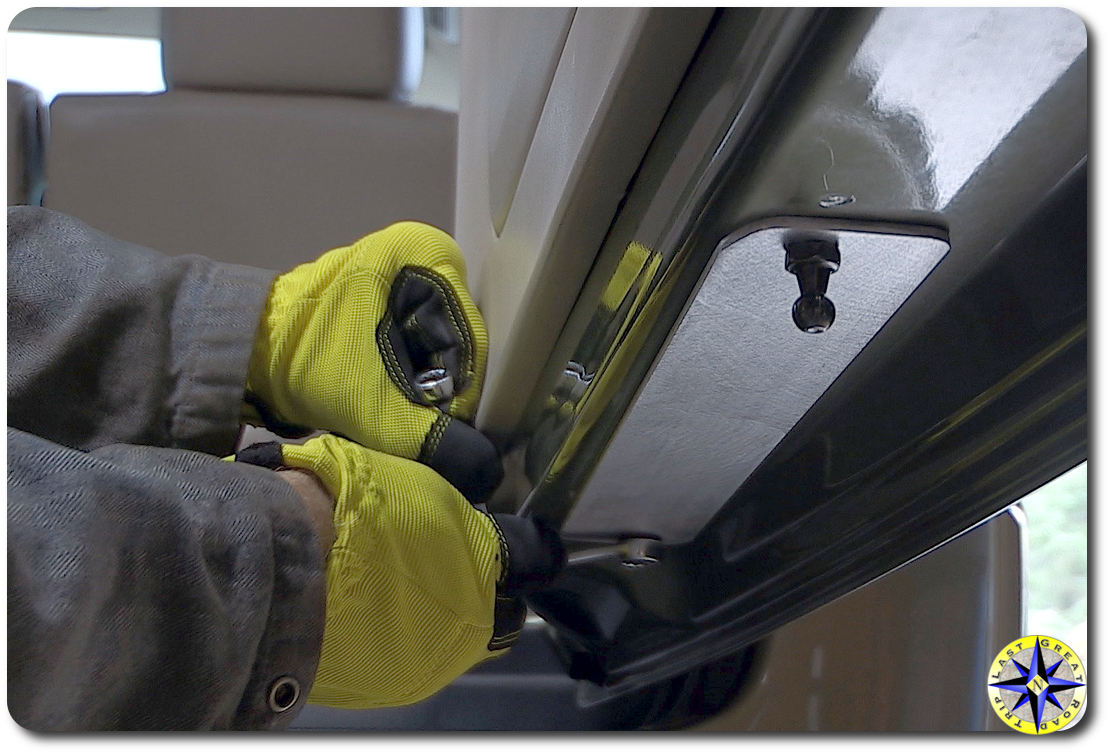
Step 14 – Screw one of the 10mm ball studs into the bracket you just attached.
Step 15 – Mount the door reinforcement plate you fabricated to the underside of your Lexus GX470’s rear door using one of the OEM bolts that held the door stopper in place and the second 10mm ball stud. The 10mm ball stud should mount into the original recessed nut hole on the underside of the door furthest away from the bumper. The OEM bolt screws into the original recessed nut hole closest to the bumper on the underside of the rear door.
Step 16 – Snap the gas strut onto the 10mm ball stud at the bumper first then to the 10mm ball stud on the rear door.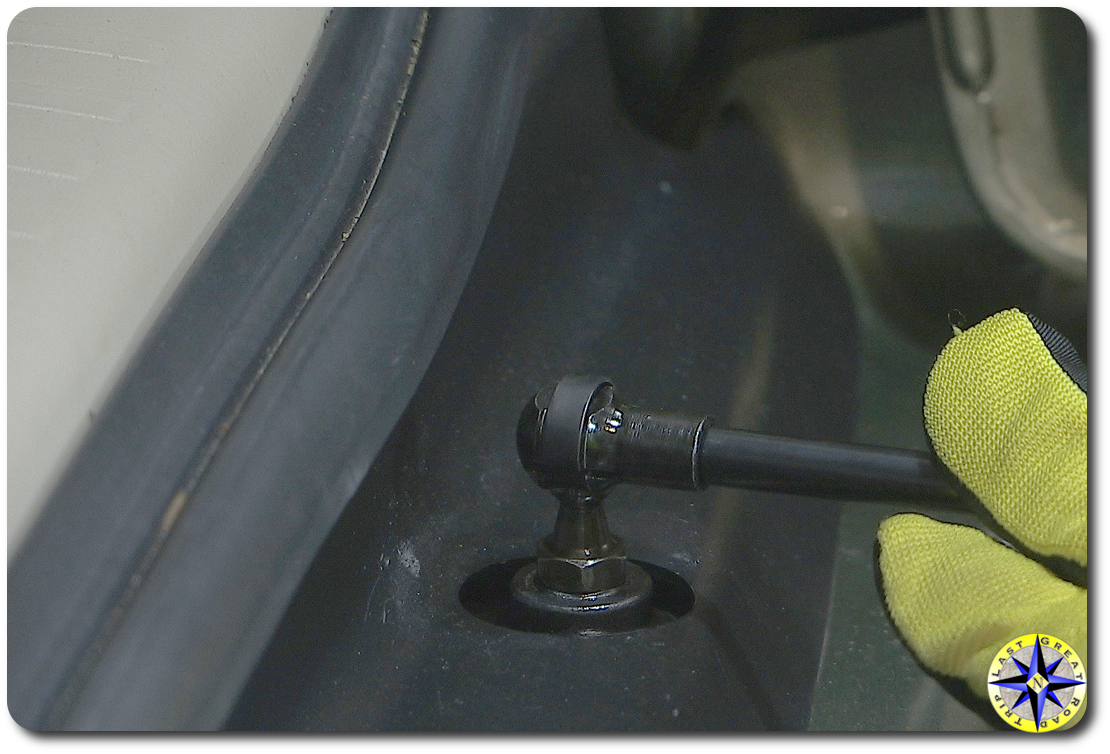
Step 17- Give everything a good tug to ensure it’s securely attached and your ready to test your new, smooth gliding Lexus GX470 rear door.
Note: Since your Lexus GX470 rear door will open and close tens of thousands of times, get in the habit of touching the door lightly and slowing it just before it fully opens in order to avoid any stress build up over time on the strut.
If you find yourself down under you can get a really cool complete rear door strut kit for the Pardo 120.
And in case you were curious, Hula Betty loves this mod!
guys. I love this modification and is the answer i’ve been looking for! my question is in regards to the amount of force needed to open the door. i noticed you utilized the 40 lb struts for this project. i plan on installing a GOBI roof rack with ladder on my Lexus. Will the 40lb strut be strong enough when the weight of the ladder is included or should i go up to the 60 or 90. Thanks for posting this awesome video.
thanks for the note. I would start with 40lbs… you don’t want it slamming open with too much force. if you find it is a little weak you can upgrade the strut but the ladder should not make much of a difference. good luck.
The 40 lb strut was way to powerful on my GX470 mod. I saw where the owner of Lifts support depot commented n this on youtube- do I go with a 30 lb or a shorter strut?
You guys rock! Just did this mod. Quick and easy. My ball studs needed a 13mm socket, so might add that to the list.
G’day guys,
I am the business mentioned there in the notes….
Please note 2 things…
1. I post these bad boys all over the world…no problem. If ordering one, please message me first and I will post a special listing for you on my webstore with the additional postage cost. To the USA, it is between an extra $45-$65 Australian dollars…depending how fast you require it. $45 is approx. 6 days lead time.
2. I custom dampen the strut for this application, so it softens the force on the mounts at full open ie no need to hang onto it!
Cheers,
Wazza
Strut Your Stuff Gas Struts
Hello Warren Metcalfe. I was looking for a gas rack with similar characteristics in Ukraine, I did not find. That which fits in length is too powerful. What is suitable for the power is not in the required amount. Can you send a gas rack to Ukraine? I have already acquired all the rest. I have a Prado 120 with a spare wheel on the door.
we don’t sell the parts… but at the bottom of the article you will find a link to a complete kit out of Australia. He ships anywhere and can sell you just the strut.
Fantastic mod! Thanks so much for posting this. All the parts came in yesterday and I was able to do the mod in less than 15 minutes (real-time). It took longer for the parts I painted to cure out than to facilitate the actual upgrade. This is *worlds* better than the factory bracket and, honestly, something Lexus should have done from the beginning. Kudos!
Hi, can you update the link to the Lift support, maybe have a SKU from the Lift Supports Depot website.
Thanks!
Hey Alex I just went through this myself, and ended up chatting with LFD. Here is the new link: https://www.liftsupportsdepot.com/23-70-lift-supports-depot-pm3947-lift-support-with-pm3947-w/ Note that it comes with the necessary 10mm ball studs. Hope that’s helpful
Great upgrade! I saw the comment about the added ladder, but what about a full size 33” tire and wheel mounted on the rear hatch? Would this 40lb push force be enough do you think?
Can someone recommend a gas strut to purchase in US, with oart number. I’ve tried three different sizes – 22-24” open position bought from Autozone – and I can close the door. Thank you!
This is amazing
anybody know if you can use the factory strut from a ’10-12 GX460 ? Is it the same length?
Thank you so much for the instructions and the product links! It was a breeze putting it all together. I think it took less than an hour from start to finish. Now I won’t have the trunk door close on me while changing the kids 🙂