Category Archives: gear review

Learn what we think is important to have on an adventure and what you can do without. We’ll tell you how the gear holds up on an adventure after we’ve tested it out in the real world.

yellow sun fusion fj cruiser rock crawling

Don’t Take My Word For It

sun fusion fj cruiser yellowIf you read this website and well you must or you wouldn’t be here….  You know I believe the Toyota FJ Cruiser is a great rig for the type of off-road adventures we do.  We take the rig on off-road adventures, across Alaska tundra, through Baja desert, over tough Rubicon 4×4 trails and explore just about any two track that looks interesting. And while I will tell you it is a great rig, who am I!

Well don’t take my word on it, turns out we have some other opinions to share and it is not the thousands of other FJ Cruiser owners… We’re all biased.  No, this best rating comes from US News & World Report.  They just came out with their list of best truck, cars, hybrids, and toasters.  Ok I’m kidding about the toasters, I think the Hamilton Beach True Toaster is the best.  In the category of Midsize Crossovers/SUVs US News & World Reports picked the Toyota FJ Cruiser number one.  In their words “Despite the fact that it’s a bona fide truck-based SUV, the Toyota FJ Cruiser provides a surprisingly comfortable highway ride. Add to that a cool, retro-looking exterior and its ability to double as a rugged off-roader and daily driver, and you’ve got a good value — even if fuel economy isn’t the greatest.”  And the Toyota FJ Cruiser’s quirky looks, it gets a 9.2 (excellent) score for it’s Exterior from US News & World Reports.

If that is not enough, The Washington Times reports on the Insurance Institute for Highway Safety, finds that the FJ Cruiser earned a Good ratings and has become a Top Safety Pick.  This rating is of course on the new 2009 rig but you check Insurance Institute for Highway Safety web site for Top Safety Picks from earlier years.  I’ll save you the click through…  2007-2009 received a Good rating.  And for these guys a rating of Good, is as good as it gets.  While your looking around on the Insurance Institute’s site check out all the cool info on safety, crash test and status reports.

toyo open country MT tire in sand

Long-term Tire Report – Toyo Open Country M/T

cactus embeded toyo open country mud tire30,000 miles later we can now give our long-term report on the rubber that took us on our off-road adventure to the Arctic Ocean, Telluride, Inuvik and around town.  Toyo’s Open Country M/T® are an aggressive mud traction radial.  Running 295x70x17 tires on our rig provides sure footed traction and an additional inch of lift over the stock 265s.  These tires fill the wheel well with massively lugged rubber just weeping testosterone.

But the Open Country M/T® does more than just butch up your rig.  According to Toyo “the Open Country M/T® is a mud and snow rated mud terrain radial tire that features hook-shaped tread blocks, scalloped shoulder blocks and a high performance cap of ply construction for excellent off road traction.”  With 3-ply polyester casting, two spiral wound nylon cap plies and two steel belts, this tire is designed for long life and more protection than a three pack of Trojans stuffed into the wallet of a sixteen year boy.

We found our Open County M/T®  tires to be very protective as we bombed down roads where the occasional granite dagger reached out for our sidewalls.  With their hook-shaped blocks they performed well on slippery hills, and gripped the rocks they were asked to climb.  Feed back from others who have used the Open Country M/T® confirms, their compounds grip the obstacles, feeling “stickier” than other tires.  Even with 30k miles on them, after the occasional rotation, our set still have most of their tread life left.toyo open country mud tire cross sections

And while mud tires are known to be noisy on the road we found Toyo’s claim of being the “quietest mud terrain tires on the market” to be true.  No they are not silent, but even with the windows down they don’t have that typical whirl as you drive down the tarmac.

All that rubber, polyester and steel adds weight…  serious weight.  Each one of our tires tips the scale at just under 75 lbs.  Add a rear spare and second on the roof and you can use an egg timer to measure the time between fuel stops.

In addition to the weight the sheer size of the 295 tire has caused some rubbing on the upper arm controller.  Without wheel offsets or after market UCAs, a 285 is probably the way to go.  You can find all the sizes available in the Toyo Open Country mud tire spec sheet.

fj cruiser toyo open country mtOverall the  Open Country M/T® has  been a good choice for our style of wheeling, overland adventures and daily driving. And although they are heavy and priced higher than most (about $300 each MSP), we would do it again. But than again we are kind of nuts about having a tire we can count on when we are hundreds of miles from no where.

Update: We’ve had two sets of these Toyo Open Country M/T tires.  They are indestructible and we relied on them for our Baja off-road adventure.  Our one complaint is their weight.  Based on simple around town and highway testing, these heavy M/T’s cost about a mile or two per gallon of fuel when compared to all terrains such as the Falken Rocky Mountain ATS.

air down fj cruiser baja mexico

What Goes Up Must Air Down

airing down 4x4 tires fj cruiserIf your off-road adventures include sand, mud or 4×4 trails you realize the advantages of letting a little air out at the start.  Lowering your tire’s air pressure, known as “airing down” has a number of benefits including:

  • In sand lower tire pressure increases the tire surface that comes in contact with the ground allowing your rig to float on top of the soft surface rather than sinking into it
  • On rocks airing down allows your tires to contour to and bite the obstacle keeping more tire surface in contact with the rock or tree root to maintain forward momentum
  • On mild trails you will find a lower tire pressure provides a softer ride over bumps and ruts.

In order to lower the air pressure on the trail you can take the minimalist approach and hold down the valve stem with a pen or twig until you get to the pressure you want.  Or you can purchase one of several tools on the market designed to air down tires.  Some of your choices include: Tire Buddy II, Sun Performance Quick Air Deflator, Oasis Trailhead Deflator, ARB E-Z Tire Deflator and many others.

staun tire deflatorFor our wheeling needs, we use Staun Tyre Deflator.  They are adjustable, simple to use and can quickly bring a tire to a preset tire pressure.  Staun Tyre Deflators come is a set of four so you can air down all your tires at once without having to run back and forth.  Simply set your deflators to the desired air down pressure ahead of time, then at the trail head screw them onto the valve stem and watch while they do their job.  They will automatically stop at the pressure you set them to, ensuring all four tires are at the same PSI (pounds per square inch).

Setting the Staun Tyre Deflator to the desired presure is a matter of following these five steps:

  1. Air down one of your tires (the spare is handy for this) to the desired PSI.  I like to keep my Staun Tyre Deflator set a little high, say 24 PSI.  This gets me to a known preset on all tires and than I can make any final adjustments down (16, 18 ,22) depending on trail conditions.
  2. Wind  the lock ring and adjusting cap all the way down (clockwise).  Screw the Staun Tyre Deflator onto the valve stem of the tire you deflated in step 1.  Be sure the value stem threads are clean and in good condition.
  3. Loosen the adjusting cap (counter clockwise) until the deflator opens and you hear air escaping, Immediately tighten the adjusting cap (clockwise) until air flow stops.
  4. Turn the locking ring up to the adjusting cap and tighten.
  5. Remove the Staun Tyre Deflator. Air up your tire, adding 5 to 10 lbs of pressure. Screw on the defaltor and wait until it stops.  Remove the deflator and check the tire’s PSI to ensure it is where you expected it to be. Make any slight adjustments and repeat if necessary.  When making adjustments to Staun Tyre Deflators,  each 1/2 turn of the adjusting cap is equivalent to 3 PSI.

Your deflator is now set.  Repeat this process for each  of the four deflators in a set.  When the tire pressure and the Staun Tyre Deflator setting is less than 8 PSI apart, you may need to lift the center pin to start the deflator.

Trail Tip: It is a good idea to print-off up these five steps, cut them out, laminate it and keep the laminated card with your Staun Tyre Deflators in case you need to readjust your deflators on the trail.

Having an adjusted set of Staun Tyre Deflators will allow you to go from street pressure to trail pressure in minutes and ensure that all four tires are aired down to the same PSI. Be sure to remove the deflators, check the pressure and screw on the valve cover caps prior to starting down the trail.

Don’t forget to air up when you’re done wheeling before heading back onto the tarmac.

sway-a-way racerunner shocks and coilovers

Long-term Mod Report Sway-A-Way Suspension

Every one loves their mod the first week. The real test is how you feel after a year or more. Would you do it differently, would you spend the money, is it a still worth it? Does it improve your off-road adventure?

Jumping into the way-back-machine, it was in 2007 that we asked Metal Tech to add a Sway-A-Way (SAW) suspension lift giving us a three inch lift. Our setup is mild as far as racing suspension go, 2.5″ diameter coil-overs up front and 2″ shocks and springs in the rear.  No auxiliary oil reserves or exotic bypasses just a straight coil-over. Built by hand and tuned for the FJ Cruiser at the factory this is a great all-around setup.

After a number of off-road adventures with thousands of miles of bombing down washboard riddled dirt roads, local 4×4 trails and more than a year of daily driving, the Sway-A-Way suspension continues to prove its worth. Born from a tradition of desert racing, the setup excels at smoothing out the bumps.  The ability to smooth out the terrain is clear when cruising on the dirt/gravel roads as well as torn-up city streets.

Although Sway-A-Way says the factory sway bar fits without modification, we had a significant amount of rubbing and squeaking as we sped down Alaska’s Haul Road.  When I say squeaking, think putting a loudspeaker next to the black board and Sister Mary Knuckle Buster drags her fingernails down its length. Not a pretty sound.

Although annoying there are two simple fixes for this problem. First you can take a grinder to the factory sway bar until there is a 1/4″ or so of clearance. This will allow your front springs and factory sway bar to pass each other unmolested.

The second option is to remove the factory sway bar altogether.  Desert racers are build to go fast over bumps with suspensions designed to keep the wheels on the ground through the ruts and turns.  As a result, Sway-A-Ways can manage the FJ Cruiser’s sway and roll on their own without a factory sway bar.  In addition, removing the factory sway bar gives you more flex when slowly picking your way through 4×4 trails.

While a set of SAWs will empty your wallet more then some other options, their reliability, ride, travel and flawless performance have been well worth the extra cost for our style of off-road adventures.

bullet cam

Lights… Camera… Action! – The Director’s Cut

bullet cam battery and power chargerSearch You Tube or Vimeo for “FJ Cruiser” and you will find off-road adventure videos showing a rig crossing a river, crawl over a rock garden or wheeling up hills.  They are great fun to watch and equally addictive, as I usually find myself forced to step away from the computer at two in the morning.  But after watching hundreds of video and trying to create my own I find myself wanting.

Most armature videos on You Tube are from the prospective of a bystander, rather than putting you into the action.  When you find a video with shots mixed in from the drivers seat point of view, you feel like you are participating in the ride rather than just watching from the sidelines.  Getting those driver seat shots is not easy since wheeling while holding a camera would be bad form and asking your passenger to keep the video camera steady as the rig tosses about is just plain silly.  Enter the bullet cam.

A bullet cam, or helmet cam, is that little camera you see attached to adrenaline junkie’s as they exit a perfectly good airplane or go cartwheeling down the face of a glacier just barely attached to their snow board.  While high quality video cameras can be costly and fragile, bullet cams are small, water and dust proof, designed to take a beating and relatively low cost.  They are also available with high quality chip sets making them perfect for action based filming.

mini microphoneWith all this going for them, what are bullet cams missing?  How about a recording component. A really bullet proof cameras receive and converts light into images but requires a recording device to make it useful.  Fortunately there are a number of options.  On the high-end are digital video recorders (DVR) designed to accept video input from as many as four bullet cams at once.  These specialized DVRs are built to be mounted in places out of the way such as under the seat and setup to run on 12 volts with wireless remote control operation.  But if you don’t want to invest a thousand dollars or more in a DVR you have another option.

With a few off the shelf items and your current video camcorder you are in business.  Most video camcorders have a video input and will record audio and video from other input sources.  Besides acting as a recording device for your bullet cam, using a video camcorder allows you to quickly unplug the video input and use your camcorder directly to tape the rigs behind you as they go through the section you just captured from the bullet cam, giving you several different angles of the same trail when you go into editing.

For our set up we started with our existing  Canon XHA1 Hi-Def video camcorder which will act as a DVR and accept input from the bullet cam.  Unfortunately bullet cams are not yet Hi-Def so we will be mixing together non-HD & HD video in post production, but this will give us that action shot look we are after.bullet cam mount

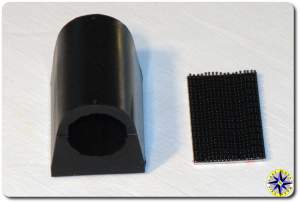
For our bullet cam, we chose the Bullet DVR 550TVL Pro Series camera from OnBoard.tv.  This camera is protected against the elements, and internally treated with a silicone based compound, to keep dust and moisture out of the camera body, and also to protect the electronic internals against failures caused by vibrations. The addition of an o-ring seal with an external protective glass cover ensures a 100% protection against condensation. OnBoard.tv claims the 550TVL will never fog up, under any conditions.  Boasting the latest CCD imaging technology by Sony Corporation, this camera provides a clean and crisp 550 TV lines of resolution, in full color, and is suitable for use with very minimal lighting.  There are less expensive bullet cams on the market with lower resolution so do a little searching to find one that matches your needs.

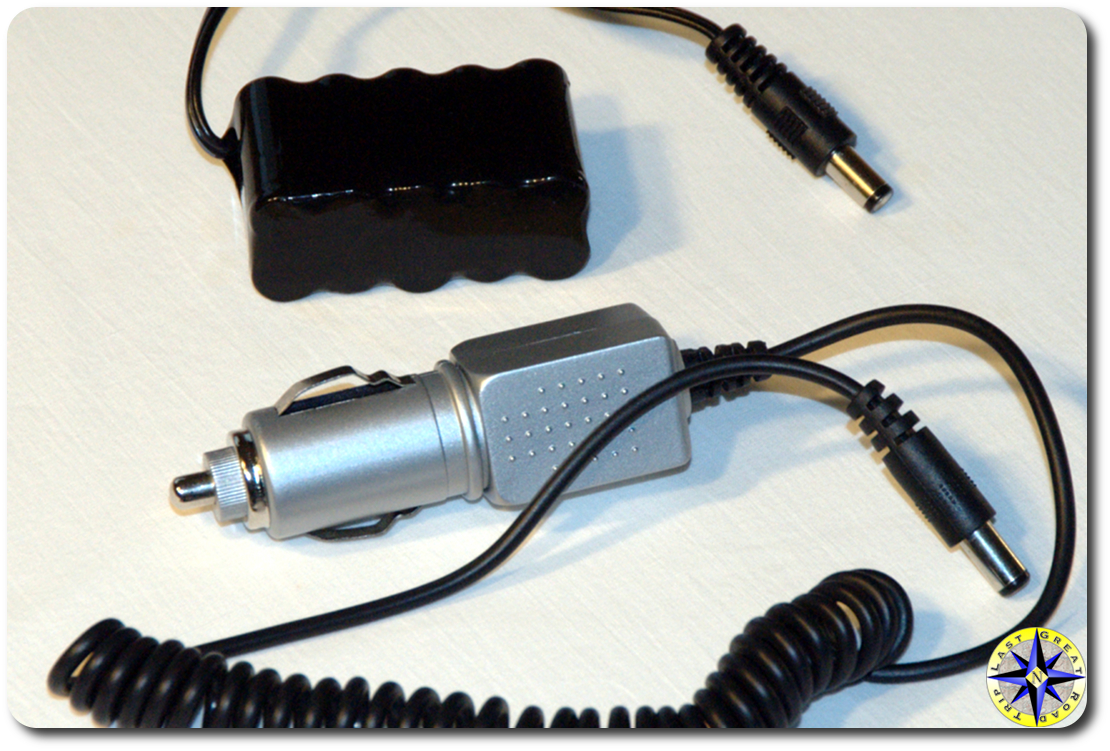
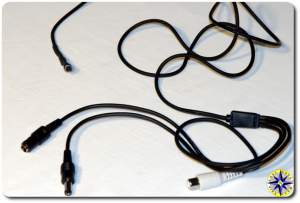
Bullet cams require a 12 volt power source in order to power its chip.  You can use a rechargeable battery pack or tap into your rigs electrical.  We decided to utilize a cigarette litter plug-in as our power source.  This will allow us to quickly plug in our power supply and completely remove it when the day is done.  And no worries about recharges or extra batteries to lose on the trail.

video rca to mini cable
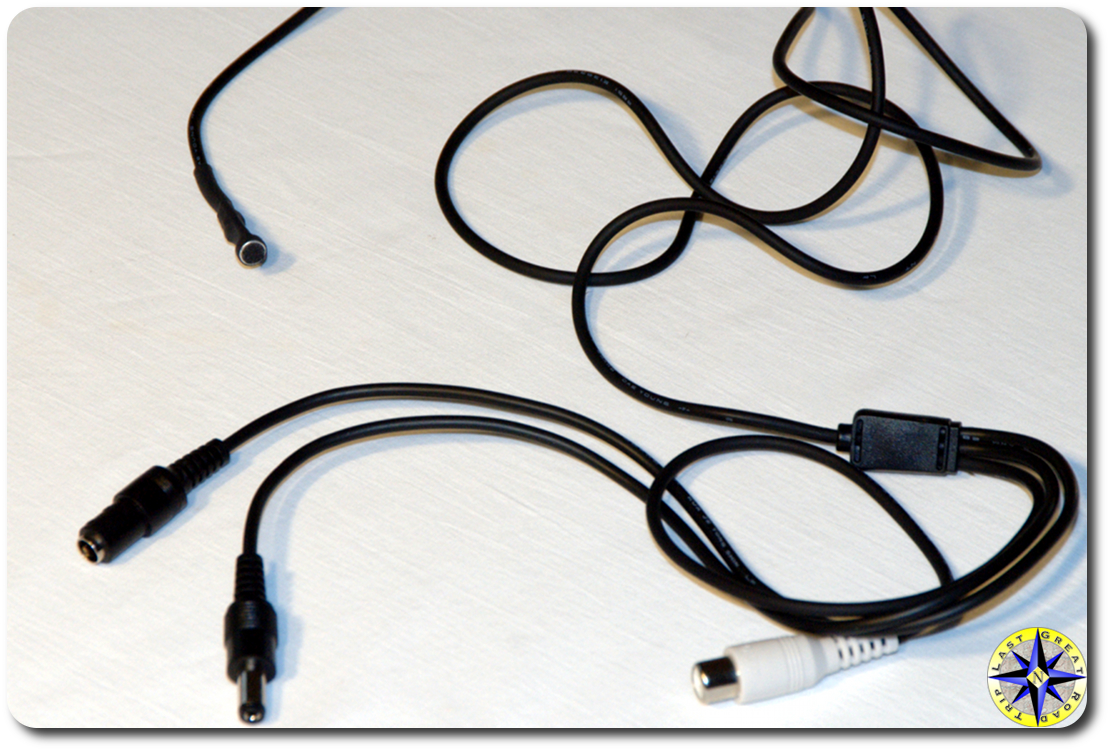
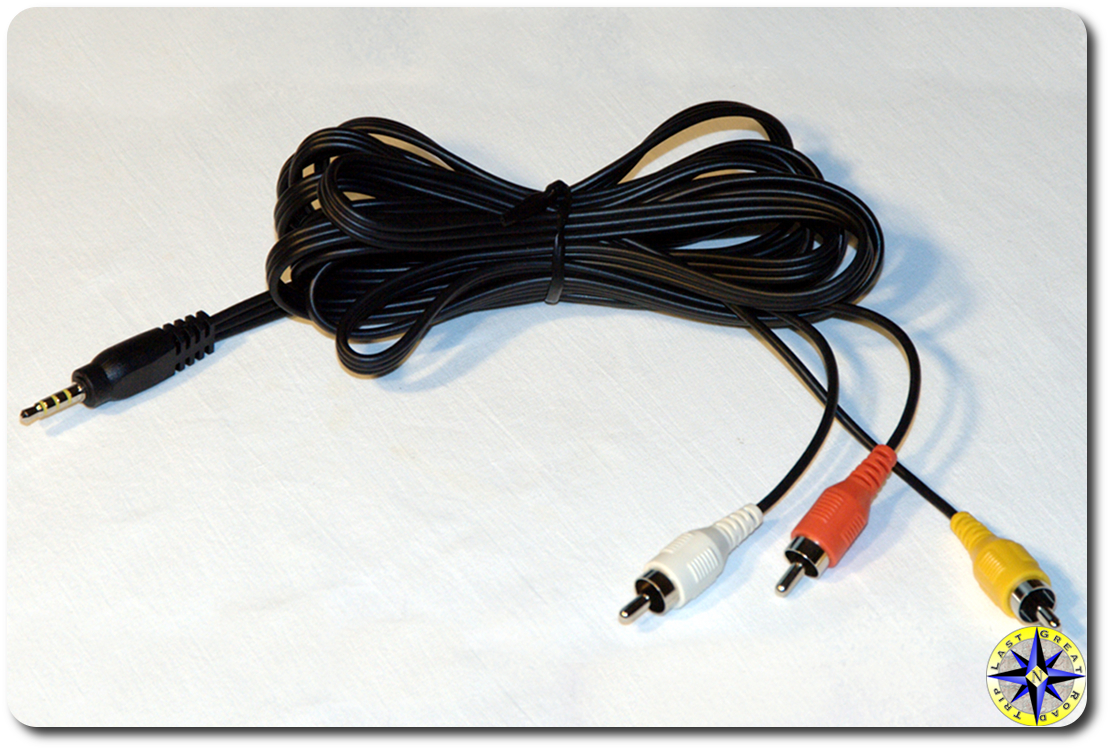
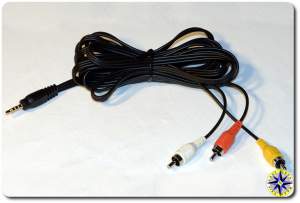
Our bullet cam has an RCA video out jack.  Our Canon video camcorder takes an AV jack.  Digging around in our spare parts bin I found an RCA to AV conversion cable (note to wife; this is why I keep all this junk).   The conversion cable will accept the video from the bullet cam and sound from an external mic, combine it all together and plug into the Canon’s AV input.

Part of any good video is audio so an external mic was also purchased from OnBoard.tv.  This mic is inexpensive and will pick up the road noise of the rig adding to the feeling of being in the driver’s seat.

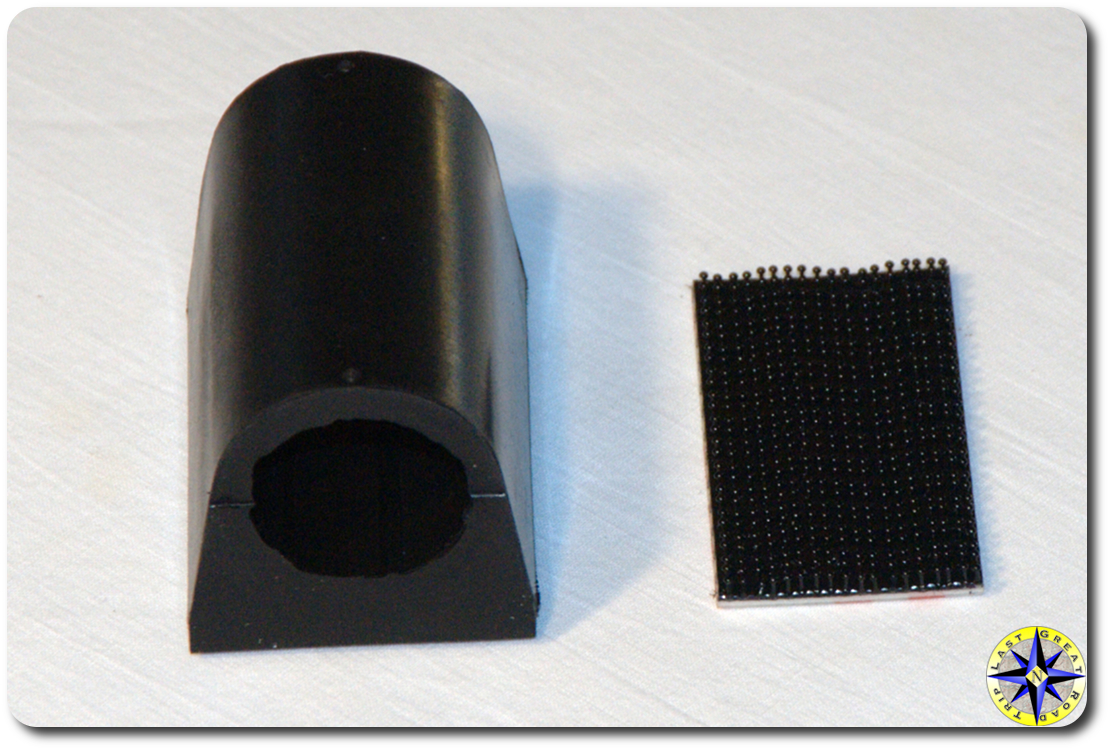
Finally, for mounting the bullet cam, from OnBoard.tv an all-rubber mount with a Velcro base that allows the bullet camera to be mounted on any surface, including… yes even a helmet.  The bullet cam simply slides into the rubber mount and according to OnBoard.tv  “the camera rests on tiny dampers which act similar to a suspension system. This unique camera mounting solution offers good protection in the event of a crash, as well as the best anti-vibration features on the market.”

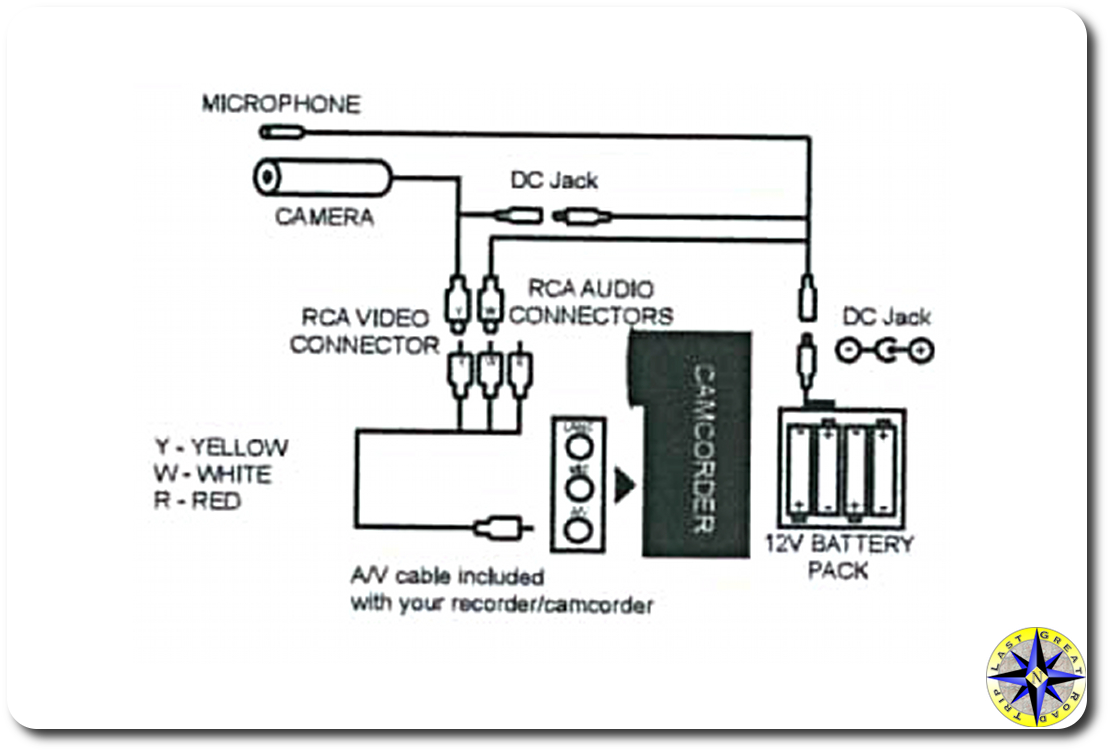
You can see in the diagram how all the wires go together.  This diagram shows a rechargeable battery pack, but as discussed above any 12 volt source will work.  The bullet cam and external mic are on separate leads but share the same power source.  This allows us to place the mic next to or away from the bullet cam depending on what we want to capture.

You can purchase this setup as a kit or buy the individual pieces alone.  The bullet cam, mic and all-rubber mount came to $323.90 plus taxes and shipping.  We already had the RCA to AV cable and cigarette litter power supply.  OnBoard.tv sells a complete kit for $349.00 which also includes a rechargeable battery pack, charger and hard-sided carrying case.  You may still require an RCA to AV cable depending on what you are using as your DVR.

bullet cam setup scmatic
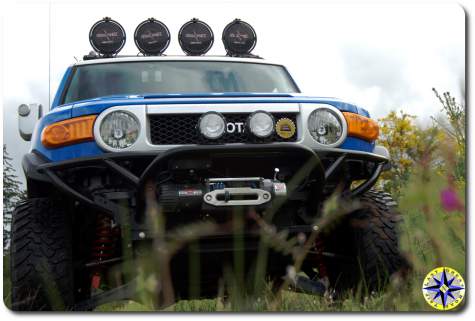
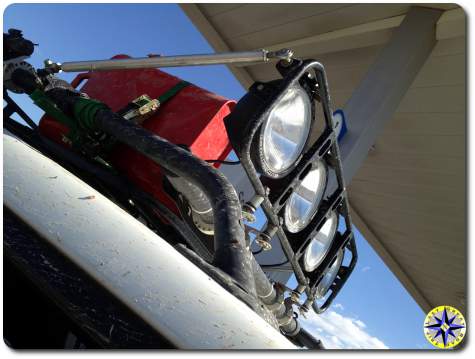
While the bullet cam may be mounted just about anywhere. We choose to initially attach the Velcro on top of the FJ Cruiser’s dash gauges and a second piece to a magnetic sheet. The dash mount will give a picture similar to that of the drivers without blocking the view.  The magnetic sheet, which we picked up for $2.99 at Office Max, will let us put the camera just about anywhere else on the rig including the outside of the door, roof, hood or bumper. Each location provides a different perspective and takes a little experimentation to find the locations that work best for you.

Using a little post production editing magic, we can now show viewers different angles of an off-road adventure.  Some shots with us driving and other shots of our friends.

…All right, Mr DeMille, I’m ready for my close up.
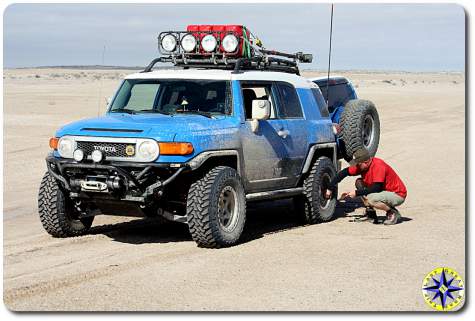
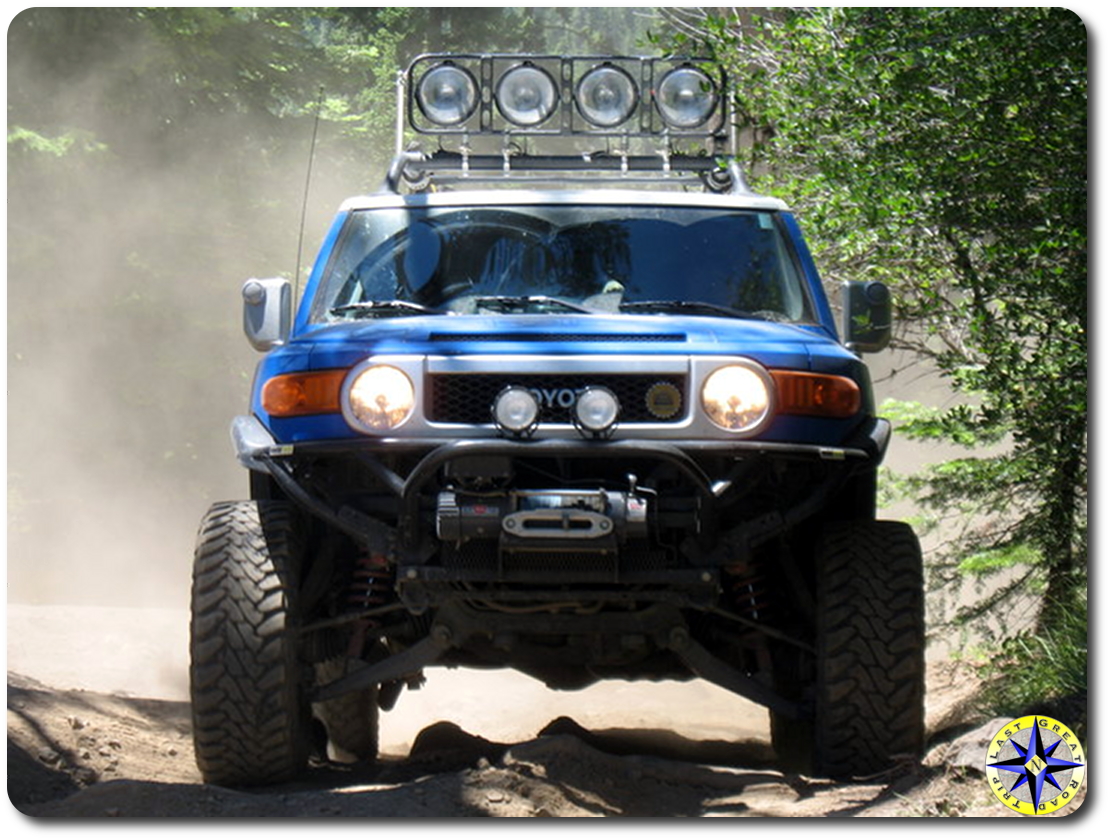
metal tech front tube bumper fj cruiser

Bumper Talk with Mark Hawley

2007 toyota fj cruiser field arb bumperThere are a number of aftermarket products for the FJ Cruiser and the list continues to grow everyday.  For us one of the first mods we completed was a bumper swap-out to add protection and support a winch mount.  Originally we chose a shell style bumper designed for off-road adventures that would allow us to nudge a musk oxen or buffalo gently if it came down to it.  Later we swapped out to a tube style for its light weight high strength ratio.

When we purchased our shell bumper, the choices were limited.  Today not so much.  In fact there are more bumper options than pimples on a fifteen year old boy the night of his first dance.

Recently we had the opportunity to talk with Mark Hawley of Metal Tech and ask him about some of the things to look for when selecting a bumper.

Mark explained that there are two basic styles of bumpers, the shell and tubular bumper.  Shell style bumpers are characterized as a box type bumper such as ARB’s Bull Bar or All-Pro Off Road’s FJ front bumper.  Although the shell style bumper can appear beefy and protective, not all are engineered to take a blow and deflect the obstacle away from the truck.  Look for reinforcement of the outside wing areas and thick steel to prevent twisting into the body in the case of a collision with a rock or tree.  The trade off for sturdy, undeniable protection is weight which can be significant in some cases.

Tube style bumpers are designed from tubular steel presenting a more open airy look to the front end.  While appearing to be less protective, well designed tubular bumpers are designed to deflect the force of an obstacle away from your rig.  Tubular bumpers are typically lighter and reduce the weight hanging off the front end lending themselves to racing and rock crawling competition rigs.

Ultimately the style choice is a personal taste and based on the type of off-road adventures the truck will be set up for.  Always research your choices and talk with knowledgeable shops to determine if the bumper is truly designed for the off-road adventures you plan to put it through.  Also be sure to ask about installation and lighting options that can add to the cost and installation whoas.

Thanks to the ‘blue room forum‘ you can find a number of bumpers compared side by side.  You will also find a number of opinions from owners of the different bumpers.  Remember it is your responsibility to make an informed choice so always consult with several knowledgeable sources before putting down your hard earned money on any aftermarket product.

toyota racing development

Toyota Racing Development Interview

Not long ago on an off-road adventure we had an opportunity to meet and talk with some of the folks behind Toyota Racing Development’s (TRD) products for the FJ Cruiser and Tundra trucks. TRD is Toyota’s team responsible for taking what they have learned from racing and turning it into products for the consumers who want more than basic grocery getter transportation. The TRD super charger is just one of the many products that the team has brought to market.

baja design roof lights

Baja Designs Joins in Supporting The Adventure

fj cruiser baja racerWe are very pleased to have Baja Designs as the newest sponsor of our off-road adventures.

When we went looking for auxiliary off-road lights for the rig, we spent a great deal of time researching the various technologies, available products and the companies behind those products. What we found from painstakingly analyzing our off-road lighting needs and asking for input from a number of experts is that Baja Designs has been developing top quality high-end aftermarket lighting systems for the off-road race industry for 14 years. Baja Designs also offers a 3 year warranty on their Soltek Fuego 4″ and LaPaz 8″ lights. These guys stand behind their products. Legendary quality lights, warranty protection, crystal clear optics, one-of-a-kind tool free aiming system and guys that know the Baja like the back of their hand, oh yeah these lights are for us.

When we contacted Chris Chapman at Baja Designs, asking for assistance and sponsorship support we were ecstatic to hear that they would help us out. These are the same guys who are the official sponsors for the American Honda’s off-road team; we are in good company.

Over the coming weeks look for how to install off-road lights as we discuss the lighting basics and mount our two Fuego 4″ HID Lights on our Rig’s bull bar and four 8″ Soltek HID Lights on the roof.

yukon car ferry

Landing at Your Launching Point

So you’ve got your great adventure driving through Chile all planned out. You’ve tuned up your rig, dug up all your gear, and mapped out your route. Now you’ve just got one minor problem: that big red dot marked “START” on your map is at the foot of the Andes, while your rig is getting the neighbor kid’s basketball bounced off of it in your driveway in Hoboken. Getting your vehicle to your launch point can be a challenging task, but given the proper time, preparation, and precaution, this process doesn’t have to be such an adventure.

Before you even start to look at how you are going to get your rig to that big red dot, you should make sure that doing so is actually feasible. Every country is going to have its own vehicle standards and import regulations. A good starting point when researching these issues is the State Department’s list of Web Sites of Foreign Embassies in the U.S. These usually have links to the relevant regulatory entities in each country. Make sure that your vehicle will be street legal and that you will have the resources and parts to make repairs.

By Land
So now you’ve done a little homework, and it is time to figure our how you are actually going to get your trusty rig to the origin. Your adventurous instinct might tempt you to just pick up and drive all the way to Chile, but chances are that time, money, and your spouse may push you to look for other options. Travel can get expensive, and every border you cross could present you with any number of surprises. If you get delayed, you might not make it in time to complete your Chilean quest.

If you aren’t going to move your vehicle from behind the wheel, you are probably going to be looking at paying someone to do it for you with some combination of land and sea transport. This is where advance planning is going to be critical. The more flexible you can be with your time-frame, the more affordable shipping should be. If you are lucky enough to live on the coast, you should be able to save some time and money by getting your rig to the docks yourself. Otherwise, you are looking at some domestic shipping, which in itself could require about a month of advance planning. Some international shippers will be able to cover this domestic leg of the trip as well, and this consolidation of services can simplify the process considerably.

By Sea
Your vehicle will likely spend the maritime portion of its voyage in an enormous box shipping container with other vehicles. If you are extremely protective of your rig, you may want to shell out some extra cash for a private container. One other high-end option is a cruise ferry. This is essentially a combination of a roll-on/roll-off (RORO) freight ship and a luxury cruise liner. In addition to a steep price, this option also may leave you with little flexibility regarding timing and destinations. As an advantage, however, this option also moves something else you will need on your trip: you! If you can swing the cash, you’ll be able to ride in style.

There are any number of companies that provide international auto transport. When choosing a shipping carrier, make sure to do some research to ensure that they are a reputable company with the necessary registrations and licenses. Find out what parts of the customs process they can handle for you. Shipping brokerages and auction sites can be useful in finding the right shipper for your needs.

You can save yourself a lot of hassle by starting your trek from your incoming foreign port. If your origin is landlocked, however, you may need to secure shipping within a foreign country. The difficulty of this task depends a lot upon the level of development in that country and your comfort with the foreign language. In more developed areas, you may be able to arrange something online, but in a developing nation, you might have to make some arrangements in person.

By Any Means Necessary
If all this sounds a bit too daunting, don’t be afraid to get creative. Does it make more financial or logistical sense to purchase a new or used vehicle at the origin? Maybe you can find a fellow adventurer that already has a vehicle on location. Perhaps you could trek together or use the vehicle when they are done and split the cost of shipping. Find some adventure forums and see what other travelers have done.

Don’t let getting there be the whole battle. Plan ahead and work within your means. You’ll be chugging along towards that “FINISH” dot before you know it.

Written by Adam Greenspan of uShip, an auction-style marketplace for Auto Transport.

FJ Cruiser dimensions drawing

The Rig That Gets Under The Skin

Today was a good day! Planning for an off road adventure takes a lot of work… no matter what my wife, Hula Betty, says about my playing around on the Internet. One of the areas to plan for is rig maintenance, modifications and inevitable breakage. A big part of this effort is having the original manufactures specifications for electrical and mechanical components. And out of shear dumb luck I came across these great resources:

With these manuals, we should be able to better plan for some of our upcoming mods including auxiliary lights and a low gear transfer case.

Than there is the just plain cool stuff. How do you sell a new car model? You put out a retro coffee table book, FJ Magazine, and send it to dealers along with a FJ Cruiser new car features that provides a technical explanation of the construction and operation of new mechanism and technologies used in the new FJ Cruiser. And finally include a 2007 Toyota FJ Cruiser specification sheet  and FJ Cruiser product reference guide which shows off the best features of the vehicle against the competition. And Wala! You have product launch.

I’ve never had a rig that got under my skin like this one. Maybe it is the history, the vehicle quality or the rugged go anywhere ability… but this rig is still cool and one of the reason we started our off road adventures.