Tag Archives: off road truck stuff

close up arb front bumper fj cruiser

ARB Bumper – Long-Term Review

fj cruiser muddy trail fall colors 6It has been about two years since we first installed ARB’s Bull Bar on our off-road adventure based Toyota FJ Cruiser. In the early days of the FJ Cruiser, our choices of bumpers were limited to only a handful. ARB has been there with their bull bar since the beginning. These days FJ Cruiser owners have a wide array of the options when it comes to an aftermarket shell style bumpers but ARB remains as the standard by which others are measured.

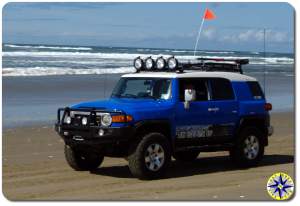
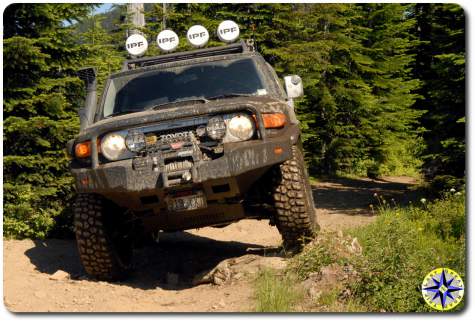
ARB is one of the best known companies for aftermarket 4×4 products.  Headquartered out of Australia with it’s North American office in Renton WA., ARB has been building their 4WD products, outback tough for more than three decades.  In our case their bumper lived up to its reputation.  Originally installed on our Toyota FJ Cruiser to protect the front end during our Arctic Circle off-road adventure where there is always a real chance of colliding with wild life… large wild life.  After making the journey north the bumper continued to guarded the front end from trees, rocks and what goes bump in the night on numerous 4×4 trails and back roads across the west.arb bumper fj cruiser beach

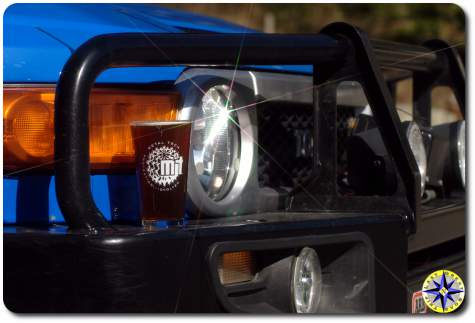
Our overall impression?  This is a strong, well designed bumper (strong enough to hold your favorite pint glass).  Intended for off-road adventures in the Australian Outback, the bumper is built tough, supports a winch and houses built-in IPF fog lights as well as top mounted off-road lights.  This is the only after market bumper we know of which has been crash tested.

On the down side, like all shell style bumpers, that mass of steel is heavy and its square style pushes a lot of air, contributing to lower mpg.  When the rig is flexing over rocks or running fast down washboard back roads, expect a little rub from the bumper on the corners and fender flairs (we found this to be true for us and other ARB equipped FJ Cruisers we looked at).

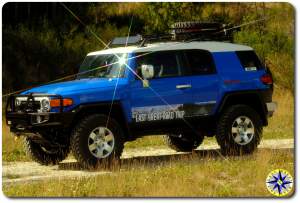
2007 toyota fj cruiser field arb bumperQuality construction, bullet proof design and a reasonable approach angle makes the ARB, in our opinion, the top shell style bumper on the market today.  The ARB Bumper provided years of protection and performed well regardless of the terrain.  This is a product we can recommend to anyone looking for a shell style expedition bumper.

This is also the point at which we retired the ARB Bumper in order to test a Metal Tech tube style front bumper, but that’s another story…  off-road adventure accessory

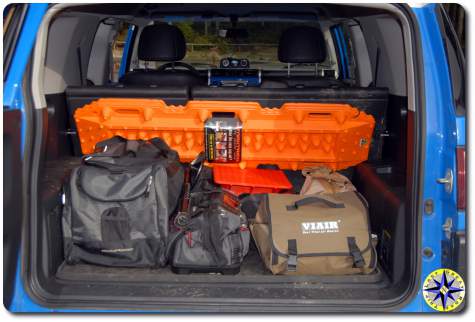
fj cruiser packed maxtrax

Off-Road Recovery Made Easy

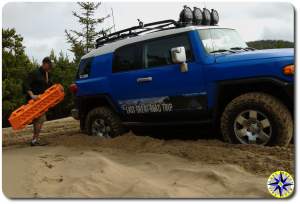
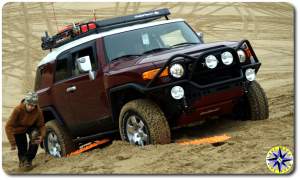
fj cruiser stuck in sand maxtrax ladders4×4 off-road adventures can put you in some sticky places and the last thing you want is to get your 4WD truck stuck.  Winches are great for self recovery as long as you have an anchor point.  But what do you do if there nothing but sand all around and no other rigs about?  We tested out a recover system (aka sand ladders) from Maxtrax out of Australia to see if we could find an easy one man means for getting unstuck.

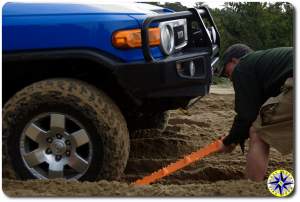
fj cruiser arb bullbar maxtrax front wheelThe first thing you notice about Maxtrax is they are light, easy to work with and stack neatly for storage.  The second thing you notice is that Maxtrax put a lot of thought into their design and managed to build a better mouse trap with added gripping power built into the ladders as well as handles.  But do they work?

Putting the sand ladders to work is pretty easy…  On 4WD vehicles, place the Maxtrax up against the front wheels.  You may need to dig a little so the ladders lay as flat as possible, but that is easy enough since the Maxtrax can act as a shovel for scooping sand out of the way.fj cruiser driving on maxtrax

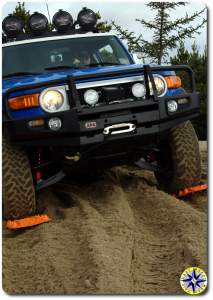
With the ladders in place, climb in the 4WD rig and drop it into low.  Gently apply the throttle.  As the tires slowly turn they will draw the Maxtrax sand ladders in and climb on top using the recovery system to gain traction and move the rig forward.  Keep the throttle steady and drive straight.

Once you’re onto firmer ground, it’s easy to go back and grab your Maxtrax for the next time you need a little help out of a sticky situation.

As advertised the Maxtrax recovery system worked well for getting us out of the deep sand.  When it came to hills we found it takes a little more work to use the ladders to move forward like climbing steps.  maxtrax fj cruiser stuck on sand hillPut the sand ladders under the rig, climb forward, retrieve the ladders, rinse and repeat until you’re up and over the dune.

Maxtrax recovery system does make self extraction in sand, snow and mud an easy one person job. These Maxtrax have definitely become a standard for our off-road adventures.

fj cruiser rear lower control arm install

How To Install Rear Lower Control Arms

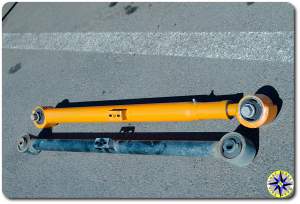
Metal Tech fj cruiser lower control arm stock fj cruiser lower control armSooner or later anyone who spends a little time enjoying off-road adventures will hear a story from someone they know who bent their rear lower control arm (LCA).  On FJ Cruisers the stock rear LCAs are not the strongest in the world and the first time they get dragged over a rock or log, they’ll fold like origami.

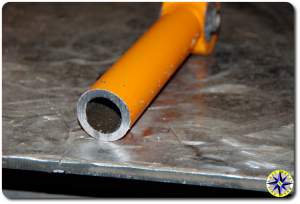
The fix for this weak link is to swap out the stock rear LCAs for a set Metal Tech 4×4 LCAs made out of D.O.M. tubing, aka high-strength seamless carbon steel.  And as you would expect from the guys who defined protection, Metal Tech has engineer a pair specifically for those who wheel their FJC.  Besides strength, Metal Tech added length adjustments to their rear LCAs to ensure proper geometry is maintained for rigs with different lift setups.  In fact last time we were at Metal Tech, we asked Mark to show us how they build their rear LCA.metal tech fj cruiser rear lower control arm cut away

  1. separate the heads of the Stock LCA from the body
  2. liberate the bushing by squeezing it out.  Less pain the childbirth but just about as much noise
  3. demonstrate unequaled TIG welding skills, assembling all the parts including tubing body, threaded adjustable section and heads
  4. press down the bushings and thread a grease nipple into place

There is always a big confidence booster in a product when the manufacturer is proud to show off exactly how their product was designed and the process for creating a part they put their name behind.  And after seeing how Metal Tech engineered and builds their LCAs, there was no questions about which ones were going on our rig.

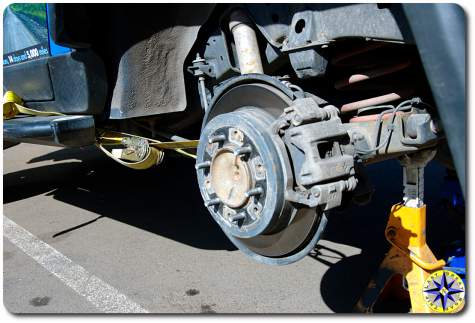
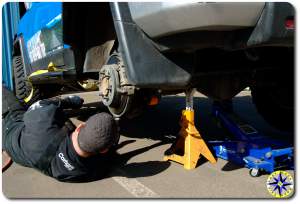
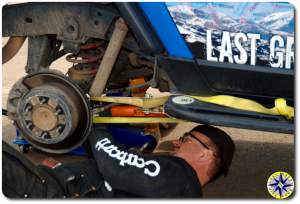
Flip the calendar forward a few months and we were back at the shop getting our own pair of rear LCAs. Arriving at Metal Tech, Mark wasted no time putting our rig up on jack stands and pulling the rear wheel.  The procedure is very straight forward, remove the bolt, holding the emergency break line to the LCA and than the bolts that hold the LCA to the rig, one at each end.  One of the tricks Mark showed us that the Toyota rear lower control are installation instructions omits is that by placing a strap around the axle to hold it in place will keep everything still making both LCA removal and re-installation a simple procedure.  When attaching the strap around the axle take care to clear the brake lines and ABS sensor cable.

Metal Tech LCAs are fully adjustable.  Once you have the stock LCA removed, match it up to the new one and adjust the head until they are the length you want.  Once you have the length dialed in for the specific geometry of your rig match up the second LCA so they are the same.installing fj cruiser rear lower control arm

Bolting the new LCA in place is a simple matter of sliding the front head its mount and slide the retaining bolt through to hold it in place followed by doing the same on the other end.  When mounting up Metal Tech LCAs remember the adjustable head attaches in the rear with the grease nipple point up out of the way.  Slide the washers over the bolts front and rear and tighten up the nuts.  You will want to torque the bolts down to the proper setting.  Toyota calls for 96 ft/lbs.  A little hint here:  Fix the nut with a box wrench while turning the bolt head with the torque wrench.

After you have the LCA bolted up and removed your strap, replace the bracket holding the emergency brake line and bolt it into place.  Replace the tire and head over to the other side to rinse and repeat.  That is all there is to it.installing lower control arm toyota fj cruiser

Once both LCAs are replaced and the rig is back on the ground, take it for a spin around the block and than torque down the bolts once more to ensure proper hold.

With the new rear LCAs we can rest a little easier if we have to drag the rear end over an obstacle on the off-road trail without worry that a bent LCA will put an end to our run or worse cause us to hike out for help.

Update: Metal Tech 4×4 has released their second generation lower control arms for the FJ Cruiser and Toyota 4Runner.  The new control arms have the added benefit of being offset that prevents binding and improves it’s ability to slid over obstacles.

black fj cruiser with snorkle

The Return of Scuba Steve

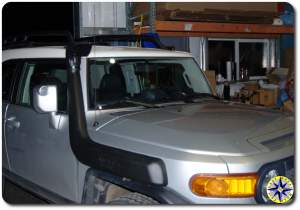
fj cruiser arb snorkelWhen we last left our off-road adventure hero, Scuba Steve had just saved the orphans from the waters of the 100 year flood and was riding off into the sunset to wheel another day.   Scuba Steve’s rig had barely dried off when a cry for help came over the CB.  Dastard Dobbs, Scuba Steve’s arch enemy, had kidnapped the Swedish bikini full-contact origami team and was holding them for ransom at his hideout deep in the middle of nowhere.  Without regard for himself or his rig,  Scuba Steve wheeled through the engine clogging desert dirt and crossed the chest-high torrent waters of Goober river which surrounded  the island hideout like a mid-evil castle moat.  Like all evil doers, Dastard had underestimated the power of the snorkel modded scuba rig and had flown off leaving the girls unguarded.  As Scuba Steve forged the waters and rolled up to the hideout, the front door flew open and the girls ran out, bouncing and bounding into the rig.  With the entire team, including its goalie, on board, Scuba Steve and the girls headed off  to the ESPN World Cup Beach Full-Contact Origami Bowl… But that is another story.

Snorkels are designed to allow the engine to draw fresh, clean, dry air from the rigs roof line.  In desert convoys the higher intake point of snorkels has been shown to deliver cleaner air to the rig’s engine reducing the strain on the filter.  And when it comes to water crossings…  well it works just like a snorkel, keeping the water out and the air flowing in.  Friends of ours, Ruben and Becky let us know they Snorkel Kitwere heading up to Metal Tech and having a Safari Snorkel from ARB installed on their rig.  So why not run down there and show everyone what it takes to add a snorkel to your FJC.  (some pictures courtesy Safari Automotive Technologies Pty. Ltd.)
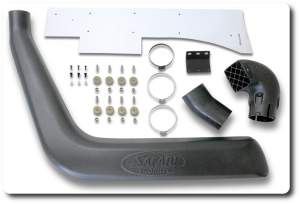
The snorkel kit comes complete with all the hardware needed to connect it to your rig’s air intake system but you will need a few tools including:

  • Loctite® for the studs that you will insert into the snorkel body
  • 105 mm hole saw
  • 16 mm step-up drill bit
  • painters tape (blue or green)removing fj cruiser fendor apron
  • screwdriver, hacksaw, drill, grinder (or sander),  8mm & 6 mm wrenches
  • permanent marker or grease pen
  • body colored touch up paint
  • silicon sealant (optional)

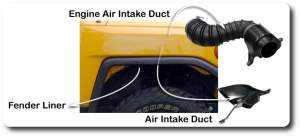
You need to remove the plastic apron under the wheel well exposing the inside of the fender.  This involves popping out the little plastic fasteners that hold the liner in place.  It helps in spotting all the snaps if you hose out the wheel well fist to wash off the dirt and gunk.  With the fender  liner pulled out, remove the air intake duct located inside the fender well.  step1This is also the time to remove the intake duct located inside the engine compartment that connects to the engine’s air filter cover.
 

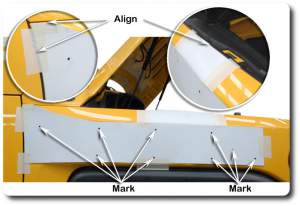
Thstep 2e kit comes with a template that will layout all the points where you will be poking holes in your rig.  There are eight (8) 16mm holes and one 105 mm hole. Getting the alignment correct is straightforward.  The template meets up with the rear edge of the fender and the tab come up to the top fender edge.  Use the painter’s tape to secure the template than mark the points with your pen and remove the template.
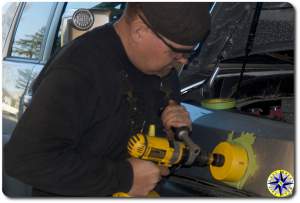
Drilling hole in fj cruiser for snorkleOk this is where we separate the men from the boys.  There is no turning back on this mod once you start the drilling.  Take a big breath relax and go easy.

Start by using a small bit to drill pilot holes on all the marks.  This will keep the larger drill bits from sliding off across the fender.  With the pilot holes in place take some painter’s tape and cover the areas that will be drilled out extending past the final hole size.   Be sure to leave the pilot hole visible.  The tape will keep any metal slivers caught on the drill bit from spinning around and scratching the fender on the hole’s edge.  If your step-up bit goes beyond 16 mm, run a piece of tape on the bit where you want to stop.
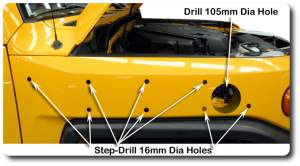
step3That wasn’t so bad…  kind of like ripping a band aid off, it only hurts for a minute. At this point you can remove all the tape and appreciate you work.  De-burr the holes and give a quick swab of body paint to keep the rust off.

Now that you’ve recovered from the trauma of attaching arb snorkel boltscutting a perfectly good fender, its time to install the eight studs into the snorkel body.  Apply a little Loctite® to the stud threads and screw them in.  Once you’ve hand tightened the studs, grab a couple of 8mm nuts to double and tighten the studs in.  A couple of DO NOTS.
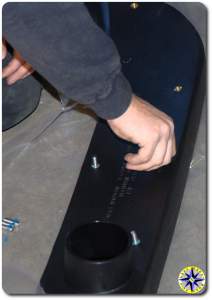
  • Do not use the the nuts that came with the kit to tighten the studs since they have nylon bushings and are designed to be used only once
  • Do not over tighten the studs.  Remember the snorkel body is plastic and you don’t want to strip out the threads

At this point you will also step 5want attach the upper mounting bracket to the snorkel body neck.  Add a dab of Loctite® here as well.
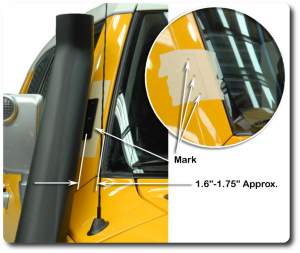
Grab the tape again and cover the upper A pillar cover where the upper mounting bracket will be attached to the rig.  In order to determine where these holes will be drilled, dry fit the snorkel body on the rig holding snug to the body and A pillar cover. Mark the tape with the pen and pull the snorkel back out.  Drill the three holes which will hold the plastic inserts.  Start again by tapping the hole, followed by the step up bit to 8 mm.  De-burr and swab with a little body touch up paint.
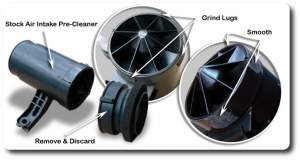
step 7aDepending on the type of air intake you have, the procedure changes a little here.  Later models have a pre-filter which acts like a centrifuge spinning the air which throws the dirt to the side and down the one-way rubber debris cup.  To ready this style of pre-filter, remove the front cap and grind down the plastic lugs that hold the front of the step 7 old style pre-filterpre-cleaner in place.
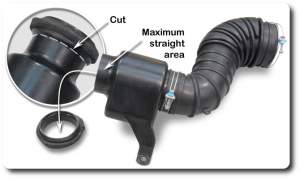
The older style pre-filter is one piece unit.  Grab the hacksaw and cut the collar off just behind the point at which the foam rubber gasket is attached.  When the cut is complete, be sure to wipe out the interior and remove any of the plastic sawdust.
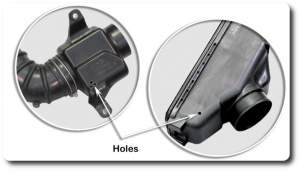
step 8This is also the time to decide if you want to seal the drain holes using a little silicon.  Sealing the drain holes will prevent water from getting in, but also means it can’t get out if some finds it way down the snorkel during a monsoonal down pour.  You can rotate your air ram to face backwards when driving in the big rain to prevent water from entering the air ram.  There is a single drain hole in the air filter cover and on the older style pre-filter you will find three drain holes on the bottom.
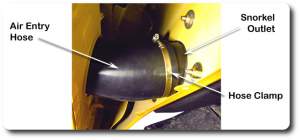
step9Lets bolt it all in place.  Attach the rubber boot to the snorkel intake collar.  Bring the snorkel up to the rig and using the washers and 8mm nylon lock nuts, attach the snorkel body to the fender.  Attach the upper mounting bracket to the A pillar cover using the three screw included with the kit.  Tighten the 90/100 stainless steel hose clamp over the hose and collar holding it in place against the snorkel body.step11
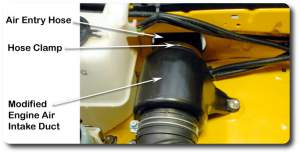
Hang in there, you’re almost home!  Using the other stainless steel hose clamp (80/100) attach the modified pre-filter to the hose that connects the snorkel to your air intake.  re-attach the pre-filter to the rig and the air filter cover.  Wow that part was easy.
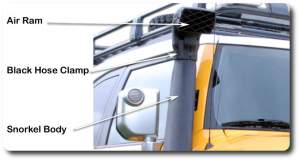
step 13Lastly, attach the air ram assembly to the snorkel body using the black hose clamp to hold it all in place.  Use a socket to tighten the hose clamp instead of a screw driver, this will lesson the paint scratch on the black clamp.  A little black rattle can will touch up any scratches on the clamp.

Your engine is now safe from gulping water when crossing rivers or playing in the mud.  Don’t forget to protect your rear diff and e-locker, relocating their breather by performing the original scuba mod.  When it’s all done your rig is ready to join Scuba Steve on his next adventure, keeping the world safe for orphans and the world of Beach Bikini Full-Contact Origami.

2007 toyota fj cruiser arb bumper

Best Auto Review’s Top 10

2007 toyota fj cruiserBest Auto Review recently came out with their TOP 10 SUVs.  Unfortunately they did not include any information on what went into their ranking, how they evaluated the rigs against their criteria or even what value their rank carries in the market place.  But, we do like their choice for #2 although we might have ranked the FJ Cruiser a little higher.
  1. Mercedes-Benz GLK Class 2010
  2. Toyota FJ Cruiser 2009
  3. Honda CR-V 2009
  4. Acura MDX 2009
  5. Toyota RAV4 2009
  6. Ford Flex 2009
  7. BMW X6 2009
  8. BMX X5 2009
  9. Mercedes-Benz GL Class 2009
  10. Toyota Highlander 2009

Let us know where you would put the FJ Cruiser in your Top 10.

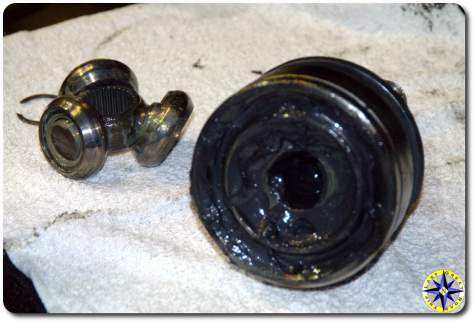
cv axle insides

IFS Axle Disassembly (Old School)

I don’t always disassemble an IFS half shaft…  But when I do I use kinetic energy. The world’s most interesting Land Cruiser Guy.

It does not happen often, but when you need to rebuild your font axle, its good to know how it all comes apart. Recently Metal Tech upgraded our front end, which involved rebuilding the front axles with longer shafts. While we where there, Mark Hawley demonstrated how to disassemble the front axles. The typical IFS method involves duct tape and a chop saw followed by cutting and throwing away the shaft. Instead of cutting, Mark went old school, calling on trick from the cruiser guys that uses a little kinetic energy release the shaft from the CVC.

For the price of some pipe or tubing you have laying around save yourself the cost of replacing the shaft or rounding up a chop saw.

toyota fj cruiser front long travel suspension flex

Too Much Wheel Travel, Is There Such A Thing?

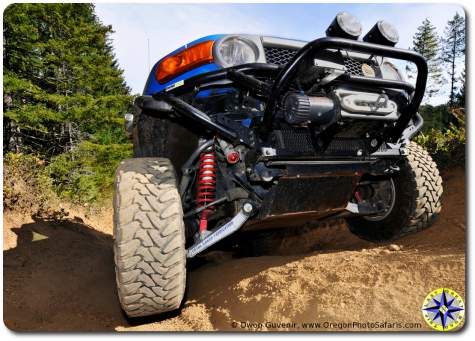
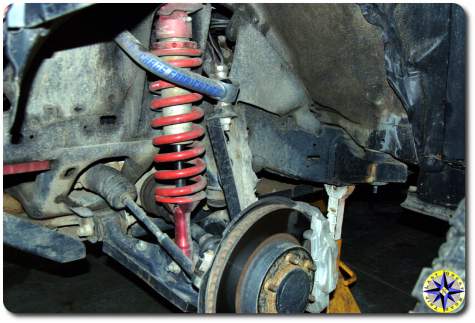
As the saying goes “you can never be too thin or too rich”.  We’d add, your rig can never have too much wheel travel on an off-road adventure.  To that end we finally took the plunge and threw out the stock independent front suspension (IFS) and replaced it with Total Chaos’ 2″ long travel kit…

Now, we could go into a write up with pictures, witty descriptions and clever verbal banter that you have come to expect from us, but than you would not have incentive to read the article we shipped of to “4WD Toyota Owner”…  Hopefully this video will hold you over… if you’re really jonesing for a story you can always check the archives.

We will tell you, this set up allows you to dial in more lift for bigger tires or add droop for more travel.  Since we spend more time bombing down dirt roads than crawling over boulders and rock we choose to utilize all of the 11.5 inches of travel dialing in more droop to keep the rig riding fast and smooth over miles of washboards.

So how does it ride you ask… you know you were thinking that. The ride is incredible.  We had a chance to take it off road a little bit and the ride unbelievable…  and those pothole filled back roads are not match for this setup.  Even without the sway bar, the rig corners like it is on rails with very little body roll.  No it doesn’t handle like a Porsche, but you can’t take a Porsche where angle fear to tread.

fj cruiser knuckle gusset installed

Knuckle Buckle Buster (say that fast 3 times)

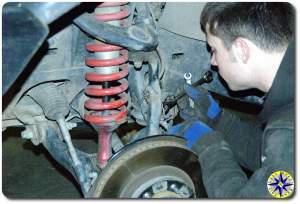
removing fj cruiser steering knuckleTurns out there is a weak spot in the FJ Cruiser’s front knuckles that can give out under the right circumstances.  Now those circumstances can be found on off-road adventures and include speed, suspension extension and brute force, all in the right combination…

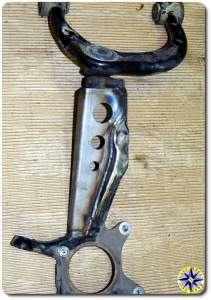
Since we look for places that set up situations where all those circumstances come together, we thought we would see about reinforcing the knuckle spindle.  We found that Total Chaos now offers a weld on 1/8” laser cut spindle gusset intended to reinforce the spindles where they bend. These gussets can be installed with aftermarket upper control arms (UCA) but are not compatible with stock upper control arms. Just another reason for a UCA upgrade.

grinding prep fj cruiser knuckleThe gussets also dictate that you run without a sway bar.  On the road the sway bar helps eliminate body roll and keep the wheels planted on the ground at high speeds or in emergency maneuvers.  Off-road the sway bar can limit the amount of flex your rig is capable as it tries to balance out the movement.  We are running Sway-A-Way coil overs upfront and use the rig as for daily driving.  Luckily the SAWs are plenty capable of preventing body roll on their own and removing the sway bar should not impact on-road performance.  If you’re running a daily driver with other coil overs, test drive your rig without a sway bar before committing to permanent removal.
We headed down to Metal Tech, to have the guys help us out with this mod.  Mark and LT really know Toyota’s and have performed several of these mods, including one on their own shop FJ after bending a spindle during a hard day of wheeling.

LT welding on fj cruiser knuckle gussetThe first thing the guys did was pull apart the rig, removing the sway bar, breaks, hubs, seals, lines, and sensors in order to pull off the knuckle.  Be gentle with the ABS sensor that plugs into the front of the knuckle, you don’t want to set off all the angry dash lights when you bolt it all back up.  Also before you start be sure to have new seals and hub covers on hand since they will take a beating during the disassemble process and are hardly worth spending the time needed to clean and repair.

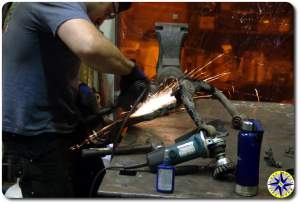
With the knuckle off it is time to apply heat.  The TC gussets weld directly to the knuckle up the length of it to the UCA mount point.  That means there is a some prep needed to ensure you get good contact and alignment between the knuckle and gusset.  With a little grinding, LT quickly cleaned up the knuckle and than on to the welding table.  Sparks, fire, metal…  It just doesn’t get much cooler than this.  (You can see, LT left the stock UCA attached in order to hold the knuckle up off the table and make working around the corners a little easier.)fj cruiser knuckle gusset

After giving the metal a chance to cool down it was time to pull out the one universal tool every wheeling back yard or pro mechanic must have.  Rattle Can paint!  You have to love that can of Rustolium sitting on the shelf that keeps little spots looking good and stays off the rust as we through the rig into all the nasty stuff that convert perfectly good steel into weak brittle bits.

With all the fab work done, it was time to button it all up and reassemble the suspension.  That means the new UCAs go into place along with bolting on the hubs and seals, tie rods, brakes, lines and of course bleeding the break lines.  The shield that holds the ABS sensor cable out of the way will take a little grinding to ensure it fits up against the knuckle and gusset.  After getting it all put back together it was a quick run to the hot rod shop down the road for an alignment and the hole thing was done in no time.  With all the experience the guys at Metal Tech have, this mod was easy.

So how was the handling on the road without a sway bar?  With Sway-A-Way coil overs, I did not notice a change in handling.  That was even after taking the twisty back roads from Newberg to Portland, the hole time testing how fast I could comfortably go into and out of the turns.

toyota mass air flow sensor removal

How To Clean A Mass Air Flow Sensor

Toyota mass air flow MAF sensorToday’s sophisticated computer controlled fuel injected engines squeeze a significant amount of horse power out of each combustion chamber.  In order to achieve their maximum output, they need precise input.  That precision involves 14.7 parts air for every 1 part fuel or 14.7:1.

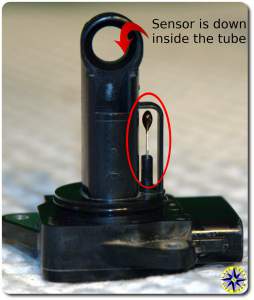
In order to know the correct amount of fuel to pump, the engine must know how much air is coming  in.  Air flow is not a constant. As the rig drives down the trail, through the hot and cold as well as humid or dry conditions air volumes change. Enter the Mass Air Flow (MAF ) sensor. The technical jargon behind the acronym MAF involves a constant voltage passed over two heated wires placed into the airflow.  As the air flows across the the wires, they cool down creating a positive temperature coefficient (PTC).  In other words by measuring the drop in temperature of the wires (or increase in current passing through them) the engine’s computer can calculate the airflow.  To ensure a correct reading the engine’s computer takes into account temperature and humidity as well.

Eventually, dirt and oily film can cook on the wire creating a thin insulating layer of muck.  Periodically, there’s a cleaning cycle where the wires are heated to a very high temperature to burn off deposits. If the deposits remain and engine’s computer sees an air mass value out of range, it sets an error code…  and the dash board lights up like a Christmas tree.

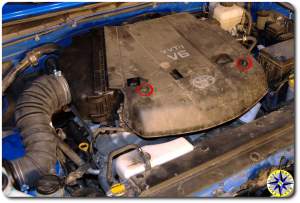
2007 toyota fj cruiser engine bayManufacturers of MAF sensors recommend replacing the sensor, after all they are in the business of selling them.  If you have a few garage tools and about twenty minutes you can clean the MAF sensor, which may solve the issue, if the wires are mucky between cleaning cycles.

Removing the FJ Cruiser’s MAF sensor for a visual inspection and cleaning is a simple procedure.  The first step is to remove the plastic engine cover, by loosening the two nuts up front and lifting the cover off it’s hinge.

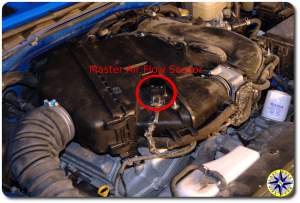
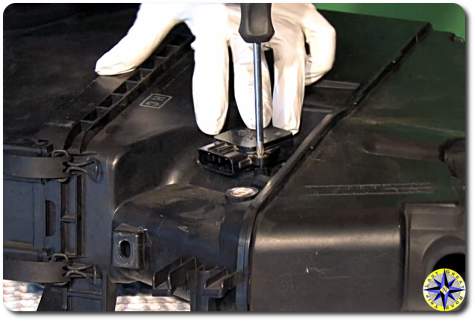
mass air flow maf location fj cruiserOnce cover is removed, the MAF is exposed in the front of the secondary air flow box.  Carefully, unhook the wire harness connecting the MAF to the engine’s computer.  To remove the wire harness, depress the clip and give a snug pull on the sides of the connector.  Do not pull on the wires.  If the connector refuses to release its grip, try holding the clip down while sliding a screw driver between the connector and MAF, gently prying  the two apart, careful not to apply too much force (remember plastic exposed to heat, over time can become brittle).

With the harness disconnected, remove the two screws holding the MAF in place and lift the sensor out of the the air flow box.  You can cover the opening with a shop towel to prevent any dirt, bugs or stray bird poop from falling in while you clean the sensor.

With the MAF sensor removed inspect the hot wires for muck.  In order to clean the hot wires we picked up “contact cleaner” from Radio Shack and following the directions, really read the directions… sprayed the hot wires with cleaner.

The contact cleaner we used drys in about 10 minutes and does not leave a film.  After the cleaner has done it’s job, slide the MAF back into place.  You will hear a click as it seats past the O ring on the sensor’s collar.  Screw it into place, connect the wire harness and reattach the engine cover.  Your done.

If you have an Intelligent Tester, you can ensure the mass air flow sensor is operating within spec following the Toyota mass air flow check service bulletin.  We simply made sure the dash board lights didn’t go into hyper-drive when we started the rig and let it warm up.

fj cruiser kn air filter

Long-term Report – K&N Cold Air Intake

We all get excited by our new mods and tell everyone we know how its the best (fill in product name here) on the market and we explain all the reason we choose product X. But over time does that glowing praise fad, or are you still pleased with your purchase? This report follows a year of use in all sorts of off-road adventure conditions, and reflects our real world experience with the K&N CAI for the the Toyota FJ Cruiser.

We replace the Toyota FJ Cruiser’s stock air intake with a K&N cold air intake (CAI) about 30,000 miles ago.  The decision to make this mod was based on the horse power gain claims and our desire to beat the dust and debris associated with the dirt and gravel roads of expedition travel.  We picked up the K&N model 63-9030 cold air intake for the Toyota 4.0L engine.

K&N states “our 63 Series Intake Kits or AirCharger® Intakes are built for many different vehicles and represent a dramatic improvement over a K&N O/E replacement filter alone. These intakes use only non-metallic rotationally molded tubes that can reduce intake air temperature and decrease intake sound over a metal tube. Restriction can exist BETWEEN an air filter and the engine reducing the benefit of a K&N Air Filter. The weakest link in the airflow ‘chain’ robs a vehicle of its natural horsepower. Often that weak point is the factory air path leading to the Engine. K&N Air Intake Kits virtually eliminate air path restriction by replacing the air filter and the entire air path to the engine. The aerodynamically engineered tube drives a massive amount of air into an engine, which translates into POWER.”

According to K&N we should have seen a horse power increase of 11.95hp @ 4785rpm (K&N intake kits dynojet research).  And while our rig was not put on a Dyno to validate the increase we felt a gain and certainly heard the throaty sound of air rushing in.

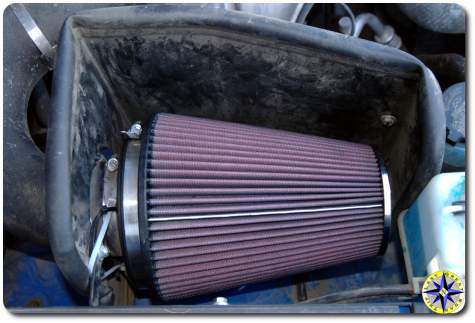
The installation is simple for anyone who has changed their own oil or replaced a stock air filter.  The kit came with all the parts and easy to follow instructions. The bigger, and I do mean bigger, air filter is washable and reusable allowing you to save money on filter replacements and increase air flow.

K&N states “All filters are constructed with ultra-strong molded pliable rubber flanges which absorb vibration and allow for secure attachment” and this is where we saw a major problem.  The weight of the air filter hanging off the intake mount combined with the vibration of the rig as we cruised over washboard back roads (200 to 500 miles a day of washboard gravel and dirt at speeds of 40 – 55 mph) caused the filter to rub against the rigs body. This rubbing caused the filter to wear a hole through its wire mess and polished off the rig’s paint and primer below.  At one point the filter vibrated completely off the intake tube despite a adjustable screw-down band clamp that came with the CAI.  We did manage to correct this problem with some zip ties that secure the intake tube to the heat shield, adding support for the filter and lowering the amount of vibration cause the heavy filter.

The other drawback we found is that although the K&N CAI comes with an air guard designed to shield it from the hot engine bay, it is less than an ideal fit.  Unlike TRD’s CAI which encloses the air filter and draw cool air from the outside, K&N’s is much more open with hot air flowing in from around, underneath and above the shield.

Bottom line, would we do it again…  No!  Although the K&N CAI works well enough, the lack of air control and the filters desire to jump off the intake tube led us to remove this K&N CAI.

All high flow air filters trade some filtration capability for more air flow.  They try to solve it with oil spray or other dust attraction.  The oil sprayed onto this type of filter has been blamed for muck on the MAF (mass airflow) sensor so use it sparingly according to directions.    For now we will go back to the original stock configuration.  For us the additional horse power claim from added air flow was not worth the trade off of filtration and added headaches.