Tag Archives: off road truck stuff

yellow sun fusion fj cruiser rock crawling

Don’t Take My Word For It

sun fusion fj cruiser yellowIf you read this website and well you must or you wouldn’t be here….  You know I believe the Toyota FJ Cruiser is a great rig for the type of off-road adventures we do.  We take the rig on off-road adventures, across Alaska tundra, through Baja desert, over tough Rubicon 4×4 trails and explore just about any two track that looks interesting. And while I will tell you it is a great rig, who am I!

Well don’t take my word on it, turns out we have some other opinions to share and it is not the thousands of other FJ Cruiser owners… We’re all biased.  No, this best rating comes from US News & World Report.  They just came out with their list of best truck, cars, hybrids, and toasters.  Ok I’m kidding about the toasters, I think the Hamilton Beach True Toaster is the best.  In the category of Midsize Crossovers/SUVs US News & World Reports picked the Toyota FJ Cruiser number one.  In their words “Despite the fact that it’s a bona fide truck-based SUV, the Toyota FJ Cruiser provides a surprisingly comfortable highway ride. Add to that a cool, retro-looking exterior and its ability to double as a rugged off-roader and daily driver, and you’ve got a good value — even if fuel economy isn’t the greatest.”  And the Toyota FJ Cruiser’s quirky looks, it gets a 9.2 (excellent) score for it’s Exterior from US News & World Reports.

If that is not enough, The Washington Times reports on the Insurance Institute for Highway Safety, finds that the FJ Cruiser earned a Good ratings and has become a Top Safety Pick.  This rating is of course on the new 2009 rig but you check Insurance Institute for Highway Safety web site for Top Safety Picks from earlier years.  I’ll save you the click through…  2007-2009 received a Good rating.  And for these guys a rating of Good, is as good as it gets.  While your looking around on the Insurance Institute’s site check out all the cool info on safety, crash test and status reports.

toyo open country MT tire in sand

Long-term Tire Report – Toyo Open Country M/T

cactus embeded toyo open country mud tire30,000 miles later we can now give our long-term report on the rubber that took us on our off-road adventure to the Arctic Ocean, Telluride, Inuvik and around town.  Toyo’s Open Country M/T® are an aggressive mud traction radial.  Running 295x70x17 tires on our rig provides sure footed traction and an additional inch of lift over the stock 265s.  These tires fill the wheel well with massively lugged rubber just weeping testosterone.

But the Open Country M/T® does more than just butch up your rig.  According to Toyo “the Open Country M/T® is a mud and snow rated mud terrain radial tire that features hook-shaped tread blocks, scalloped shoulder blocks and a high performance cap of ply construction for excellent off road traction.”  With 3-ply polyester casting, two spiral wound nylon cap plies and two steel belts, this tire is designed for long life and more protection than a three pack of Trojans stuffed into the wallet of a sixteen year boy.

We found our Open County M/T®  tires to be very protective as we bombed down roads where the occasional granite dagger reached out for our sidewalls.  With their hook-shaped blocks they performed well on slippery hills, and gripped the rocks they were asked to climb.  Feed back from others who have used the Open Country M/T® confirms, their compounds grip the obstacles, feeling “stickier” than other tires.  Even with 30k miles on them, after the occasional rotation, our set still have most of their tread life left.toyo open country mud tire cross sections

And while mud tires are known to be noisy on the road we found Toyo’s claim of being the “quietest mud terrain tires on the market” to be true.  No they are not silent, but even with the windows down they don’t have that typical whirl as you drive down the tarmac.

All that rubber, polyester and steel adds weight…  serious weight.  Each one of our tires tips the scale at just under 75 lbs.  Add a rear spare and second on the roof and you can use an egg timer to measure the time between fuel stops.

In addition to the weight the sheer size of the 295 tire has caused some rubbing on the upper arm controller.  Without wheel offsets or after market UCAs, a 285 is probably the way to go.  You can find all the sizes available in the Toyo Open Country mud tire spec sheet.

fj cruiser toyo open country mtOverall the  Open Country M/T® has  been a good choice for our style of wheeling, overland adventures and daily driving. And although they are heavy and priced higher than most (about $300 each MSP), we would do it again. But than again we are kind of nuts about having a tire we can count on when we are hundreds of miles from no where.

Update: We’ve had two sets of these Toyo Open Country M/T tires.  They are indestructible and we relied on them for our Baja off-road adventure.  Our one complaint is their weight.  Based on simple around town and highway testing, these heavy M/T’s cost about a mile or two per gallon of fuel when compared to all terrains such as the Falken Rocky Mountain ATS.

air down fj cruiser baja mexico

What Goes Up Must Air Down

airing down 4x4 tires fj cruiserIf your off-road adventures include sand, mud or 4×4 trails you realize the advantages of letting a little air out at the start.  Lowering your tire’s air pressure, known as “airing down” has a number of benefits including:

  • In sand lower tire pressure increases the tire surface that comes in contact with the ground allowing your rig to float on top of the soft surface rather than sinking into it
  • On rocks airing down allows your tires to contour to and bite the obstacle keeping more tire surface in contact with the rock or tree root to maintain forward momentum
  • On mild trails you will find a lower tire pressure provides a softer ride over bumps and ruts.

In order to lower the air pressure on the trail you can take the minimalist approach and hold down the valve stem with a pen or twig until you get to the pressure you want.  Or you can purchase one of several tools on the market designed to air down tires.  Some of your choices include: Tire Buddy II, Sun Performance Quick Air Deflator, Oasis Trailhead Deflator, ARB E-Z Tire Deflator and many others.

staun tire deflatorFor our wheeling needs, we use Staun Tyre Deflator.  They are adjustable, simple to use and can quickly bring a tire to a preset tire pressure.  Staun Tyre Deflators come is a set of four so you can air down all your tires at once without having to run back and forth.  Simply set your deflators to the desired air down pressure ahead of time, then at the trail head screw them onto the valve stem and watch while they do their job.  They will automatically stop at the pressure you set them to, ensuring all four tires are at the same PSI (pounds per square inch).

Setting the Staun Tyre Deflator to the desired presure is a matter of following these five steps:

  1. Air down one of your tires (the spare is handy for this) to the desired PSI.  I like to keep my Staun Tyre Deflator set a little high, say 24 PSI.  This gets me to a known preset on all tires and than I can make any final adjustments down (16, 18 ,22) depending on trail conditions.
  2. Wind  the lock ring and adjusting cap all the way down (clockwise).  Screw the Staun Tyre Deflator onto the valve stem of the tire you deflated in step 1.  Be sure the value stem threads are clean and in good condition.
  3. Loosen the adjusting cap (counter clockwise) until the deflator opens and you hear air escaping, Immediately tighten the adjusting cap (clockwise) until air flow stops.
  4. Turn the locking ring up to the adjusting cap and tighten.
  5. Remove the Staun Tyre Deflator. Air up your tire, adding 5 to 10 lbs of pressure. Screw on the defaltor and wait until it stops.  Remove the deflator and check the tire’s PSI to ensure it is where you expected it to be. Make any slight adjustments and repeat if necessary.  When making adjustments to Staun Tyre Deflators,  each 1/2 turn of the adjusting cap is equivalent to 3 PSI.

Your deflator is now set.  Repeat this process for each  of the four deflators in a set.  When the tire pressure and the Staun Tyre Deflator setting is less than 8 PSI apart, you may need to lift the center pin to start the deflator.

Trail Tip: It is a good idea to print-off up these five steps, cut them out, laminate it and keep the laminated card with your Staun Tyre Deflators in case you need to readjust your deflators on the trail.

Having an adjusted set of Staun Tyre Deflators will allow you to go from street pressure to trail pressure in minutes and ensure that all four tires are aired down to the same PSI. Be sure to remove the deflators, check the pressure and screw on the valve cover caps prior to starting down the trail.

Don’t forget to air up when you’re done wheeling before heading back onto the tarmac.

fj cruiser rear bumper cover top bolts removal

Eyes In The Back Of Your Rig

fj cruiser backup sensorEveryone who owns and FJ Cruiser knows how difficult it can be to judge distance when backing up.  Little cars that sit below your line of site which are impossible to see and make parallel parking hell.  Luckily Toyota added a Toyota parking assist system to tell you when you’re getting close.

Awhile back we ran into a little trouble with our sensor… so to speak… And as a result, needed to replace the back up sensor on the passenger side. After a quick trip to our local Toyota dealer for the part it was time to play back yard mechanic.

With the advent of snap together components, replacing sensors is usually an easy operation.  And this was no different.  In fact we spent most of our time fj cruiser rear bumper cover button snap locationunbolting the plastic bumper cover to get to the sensor location.  All of the bolts can be removed with an 11 mm socket.  A flat head screw driver is helpful for unplugging the sensor coupling as well as the plastic pop snap on located inside the back door edge on the side of the bumper cover.

We started at the bottom and worked our way up.  Note: We removed the metallic bumper cover so we could pull out the black cover further for pictures. You should be able to leave it in place and simply remove to screws holding the back bumper cover on the bottom side. There are a total of six bolts holding the bumper cover to the underside of the bumper.  Four along the base of the bumper and one on each back corner.  These last two are set into little plastic clips and keep the bumper corner covers in place.fj cruiser rear bumper bottom bolt removal

You will have to open the back door to access the four bolts on the top of the bumper cover.  You will also find a sneaky little button fastener where the bumper cover wraps into the back door.  A flat head screw driver will lift it out easily.

The old cruisers had panels welded and riveted in place.  Enter the era of ABS plastics.  To remove the bumper cover after you’ve unbolted everything and pulled the little button snap; follow the cover around the corner where it meet up this the fender and give it a strong, even pull away from the truck.  It is held in place with ABS plastic snaps that will release their grip with a little force.  Since we were only replacing one of the sensors we only removed the passenger’s side.fj cruiser rear bumper side cover removal

Now it was simply a matter of pulling the cover away from the bumper enough to unplug the old sensor, slide in the new one and connect it to the two wire plug.  It really is that easy.

After hooking up the sensor and before bolting it all up, we tested the sensors to ensure everything was connected correctly.  Even though we only replace one sensor, we check both to make sure we had not pulled any wires loose in the process.

fj cruiser backup sensor wire connectorOnce we were sure every thing worked, it was simply a matter of buttoning it all up with the bolts we had removed four on top, six underneath and that one little button snap.

The backup sensors help you gauge distance but will never substitute for using your mirrors and knowing what is behind you before you put it into reverse.

sway-a-way racerunner shocks and coilovers

Long-term Mod Report Sway-A-Way Suspension

Every one loves their mod the first week. The real test is how you feel after a year or more. Would you do it differently, would you spend the money, is it a still worth it? Does it improve your off-road adventure?

Jumping into the way-back-machine, it was in 2007 that we asked Metal Tech to add a Sway-A-Way (SAW) suspension lift giving us a three inch lift. Our setup is mild as far as racing suspension go, 2.5″ diameter coil-overs up front and 2″ shocks and springs in the rear.  No auxiliary oil reserves or exotic bypasses just a straight coil-over. Built by hand and tuned for the FJ Cruiser at the factory this is a great all-around setup.

After a number of off-road adventures with thousands of miles of bombing down washboard riddled dirt roads, local 4×4 trails and more than a year of daily driving, the Sway-A-Way suspension continues to prove its worth. Born from a tradition of desert racing, the setup excels at smoothing out the bumps.  The ability to smooth out the terrain is clear when cruising on the dirt/gravel roads as well as torn-up city streets.

Although Sway-A-Way says the factory sway bar fits without modification, we had a significant amount of rubbing and squeaking as we sped down Alaska’s Haul Road.  When I say squeaking, think putting a loudspeaker next to the black board and Sister Mary Knuckle Buster drags her fingernails down its length. Not a pretty sound.

Although annoying there are two simple fixes for this problem. First you can take a grinder to the factory sway bar until there is a 1/4″ or so of clearance. This will allow your front springs and factory sway bar to pass each other unmolested.

The second option is to remove the factory sway bar altogether.  Desert racers are build to go fast over bumps with suspensions designed to keep the wheels on the ground through the ruts and turns.  As a result, Sway-A-Ways can manage the FJ Cruiser’s sway and roll on their own without a factory sway bar.  In addition, removing the factory sway bar gives you more flex when slowly picking your way through 4×4 trails.

While a set of SAWs will empty your wallet more then some other options, their reliability, ride, travel and flawless performance have been well worth the extra cost for our style of off-road adventures.

metal tech front tube bumper fj cruiser

Bumper Talk with Mark Hawley

2007 toyota fj cruiser field arb bumperThere are a number of aftermarket products for the FJ Cruiser and the list continues to grow everyday.  For us one of the first mods we completed was a bumper swap-out to add protection and support a winch mount.  Originally we chose a shell style bumper designed for off-road adventures that would allow us to nudge a musk oxen or buffalo gently if it came down to it.  Later we swapped out to a tube style for its light weight high strength ratio.

When we purchased our shell bumper, the choices were limited.  Today not so much.  In fact there are more bumper options than pimples on a fifteen year old boy the night of his first dance.

Recently we had the opportunity to talk with Mark Hawley of Metal Tech and ask him about some of the things to look for when selecting a bumper.

Mark explained that there are two basic styles of bumpers, the shell and tubular bumper.  Shell style bumpers are characterized as a box type bumper such as ARB’s Bull Bar or All-Pro Off Road’s FJ front bumper.  Although the shell style bumper can appear beefy and protective, not all are engineered to take a blow and deflect the obstacle away from the truck.  Look for reinforcement of the outside wing areas and thick steel to prevent twisting into the body in the case of a collision with a rock or tree.  The trade off for sturdy, undeniable protection is weight which can be significant in some cases.

Tube style bumpers are designed from tubular steel presenting a more open airy look to the front end.  While appearing to be less protective, well designed tubular bumpers are designed to deflect the force of an obstacle away from your rig.  Tubular bumpers are typically lighter and reduce the weight hanging off the front end lending themselves to racing and rock crawling competition rigs.

Ultimately the style choice is a personal taste and based on the type of off-road adventures the truck will be set up for.  Always research your choices and talk with knowledgeable shops to determine if the bumper is truly designed for the off-road adventures you plan to put it through.  Also be sure to ask about installation and lighting options that can add to the cost and installation whoas.

Thanks to the ‘blue room forum‘ you can find a number of bumpers compared side by side.  You will also find a number of opinions from owners of the different bumpers.  Remember it is your responsibility to make an informed choice so always consult with several knowledgeable sources before putting down your hard earned money on any aftermarket product.

fj cruiser driving dirt road baja mexico

That Was Then This Is Now

The Toyota FJ Cruiser is just one more evolution in Toyota’s a rich off-road history. A quick look at the time line and you’ll see, Toyota has been in the truck business for decades and continues to build on that rich tradition with the FJ Cruiser.  Can’t wait to see what is next.

TOYOTA LAND CRUISER TIMELINE
1935 – Toyoda initiates manufacturer of trucks with the G1
1937 – Toyota Motor Co. founded from its roots in Toyoda Automatic Loom Works
1939 – G1 becomes the GB, with 75-hp Type B engine
1950 – Development begins on 4×4 AK10 utility vehicle using the Type B engine
1951 – BJ sold to Japan’s National Police Agency
1953 – Large-scale BJ production begins
1954 – BJ named Land Cruiser
1955 – F-Series 3.8L Six adopted, FJ25 introduced
1955 – BJ discontinued
1958 – Land Cruiser introduced to the U.S. in September
1960 – 40 Series introduced, replaces 20 Series
1961-1965 – Land Cruiser 40 Series is the best-selling Toyota in the U.S.
1967 – 55 Series station wagon introduced
1968 – 100,000th Land Cruiser sold
1972 – 200,000th Land Cruiser sold
1973 – 300,000th Land Cruiser sold
1975 – 4.2L engine, four-speed transmission introduced
1979 – 55 Series production ends
1980 – 60 Series, second-generation wagon, introduced
1980 – Millionth Land Cruiser sold
1983 – Final year of 40 Series sales in the U.S.
1984 – 40 Series production ends
1984 – 70 Series introduced
1989 – 60 Series production ends
1990 – 2-millionth Land Cruiser sold
1990 – 80 Series, third-generation wagon, introduced
1991 – Full-time four-wheel drive introduced
1993 – 4.5L DOHC six-cylinder engine introduced
1993 – 90 Series introduced
1997 – 80 Series production ends
1998 – 100 Series, fourth-generation wagon, introduced
1998 – 4.7L i-Force V8 introduced
2002 – 120 Series (current Prado, Lexus GX 470) introduced
2003 – 4-millionth Land Cruiser sold
2007 – FJ Cruiser introduced
2014 – FJ Cruiser production ends

Like so many legendary trucks, Toyota continues to evolve its line of land cruisers.  Can’t wait to see where it will go.

fj cruiser scale model

You Know You Want It!

Every year car and truck enthusiast wait for the appearance of their favorite ride. My time at General Motors gave me insight into just how fanatical this anticipation can be. Like a kid on Christmas Eve, folks fidget, analysts yammer, and everyone tries to peek under the tree to gain just a glimpse into the future.

It is also difficult for manufactures to keep secrets. That doesn’t even count the company approved “leaks” of information designed to generate a buzz

Toyota has put out a list of the 2009 FJ Cruiser’s new goodies but no sightings of an actual rig. For those who are debating on a 2009 or 2008 here is the update on what the 2009 will have over the 2008.

For 2009 the FJ Cruiser adds:

  • driver and front passenger active headrests
  • roll-sensing curtain airbags
  • a VSC cut-off switch
  • front map light
  • driver-side vanity mirror as standard equipment

Three new colors appear for 2009 non-metallic Black, Silver Fresco metallic, and Iceberg White with all-white monochromatic finish. The Iceberg White will be the Toyota Trail Team addition signature color. Toyota is retiring Titanium Metallic.

There are a number of additional upgrade items and you can build your own FJ with all the goodies at Toyota’s FJ Cruiser site.

The base MSRP for the FJ Cruiser will range from $23,320 for the 4×2 V6 with a five-speed automatic transmission to $24,910 for the 4×4 V6 automatic. Toyota says you will also find a TRD and Trail Team version equipped for the challenge. Even in this tight market with high fuel costs, the price of the 2009 FJ Cruiser has increased by $275, or 1.1 percent. I guess that increase covers the cost of the vanity mirror.

fj cruiser metal tech slider rub rail

Always Carry Protection (Sliders)

original metal tech 4x4 shop
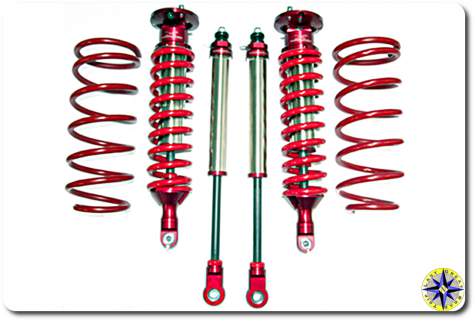
I always enjoy any opportunity to meet up with Mark and LT from Metal Tech 4×4 and this project brought me to their shop in Newberg, OR. These guys are a couple of the most knowledgeable guys in all things Toyota 4×4 and wheeling. What makes these guys special is their willingness to spend time teaching others how to wheel trails, talk about the differences in various years of the 80 series or explain the performance difference between ICON, Sway-A-Way and Old Man Emu suspension components. Mark and LT go out of their way to make sure you understand what you’re doing and feel good about your choice rather than just selling you what they have on the shelf.fj cruiser last great road trip sticker

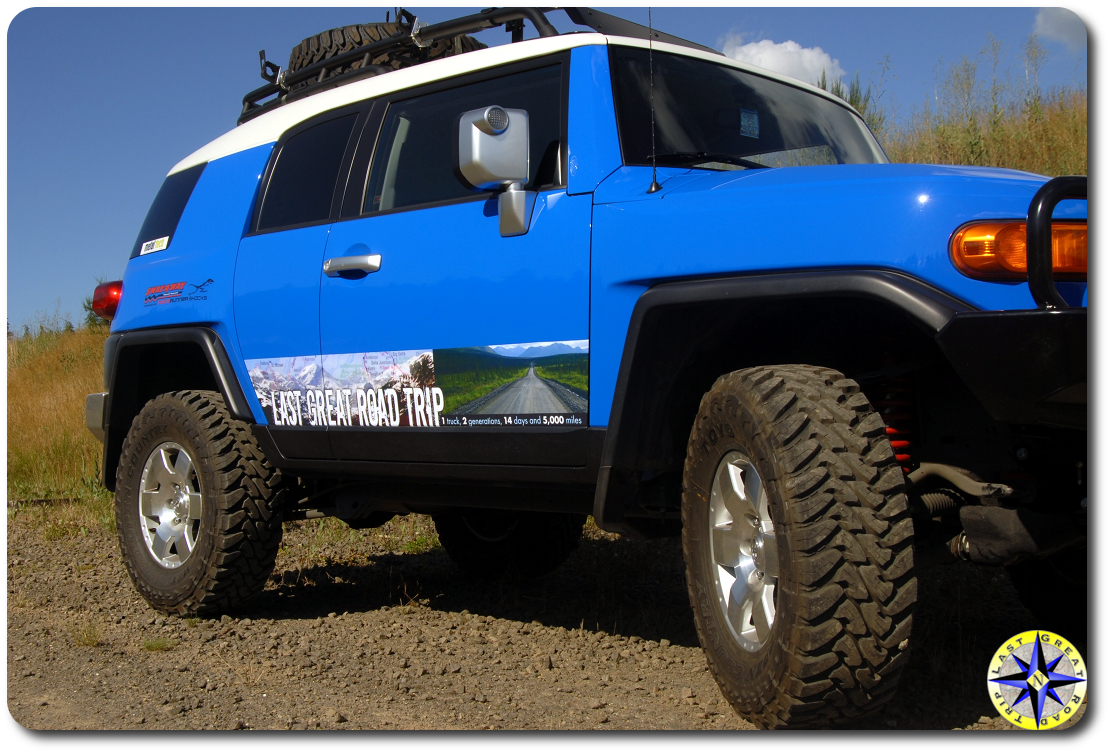
Off-road adventures involving difficult 4×4 trails takes a certain bit of acceptance that you will scratch, ding and possibly brake something. One way to minimize this possibility is to protect the most vulnerable points on your rig. On the FJ Cruiser, one of those vulnerabilities is the door sills which if set onto or slid across a bolder can result in an expensive repair. Protecting this area is achieved through the addition of “sliders”. Also known as “rock rails” or just “rails”, sliders bolt onto the frame of the FJ Cruiser and take the impact of a bolder, sliding across the rock rather than it bashing in the bottom of the door sill.

This means, now your sliders will take the brunt of the force and receive a significant impact. Not all sliders are created equally. In today’s market there are two groups of sliders. There is the group designed for show, which are made from thin walled steel or aluminum. While they can act as a step up, they will crumple under the weight when pressed between a bolder and the rig with both the slider and door sill being damaged. The other group is for serious wheeling, made of thicker high-grade steel, and reinforced at points that will be asked to take the brunt of the impact and support the weight of the rig.

fj cruiser frame mounting point for sliders
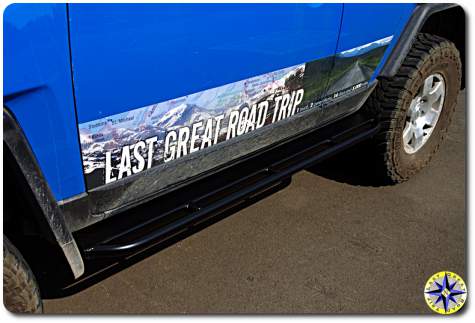
Metal Tech sliders fall into the serious wheeling category and are among the strongest on the market. These sliders have a hard core off-road design imbedded in their DNA. The sliders are laser cut and bent to match the lines of the FJ Cruiser, proving protection their entire length. These sliders are a fully enclosed box style, allowing a full length step for quick access to the top of the FJ Cruiser. Metal Tech maintains a high quality standard on everything about these sliders from being the only ones on the market that are powder coated inside and out, to the U.S. made, high alloy grade 10.9 metric bolts used to attach them to the frame.

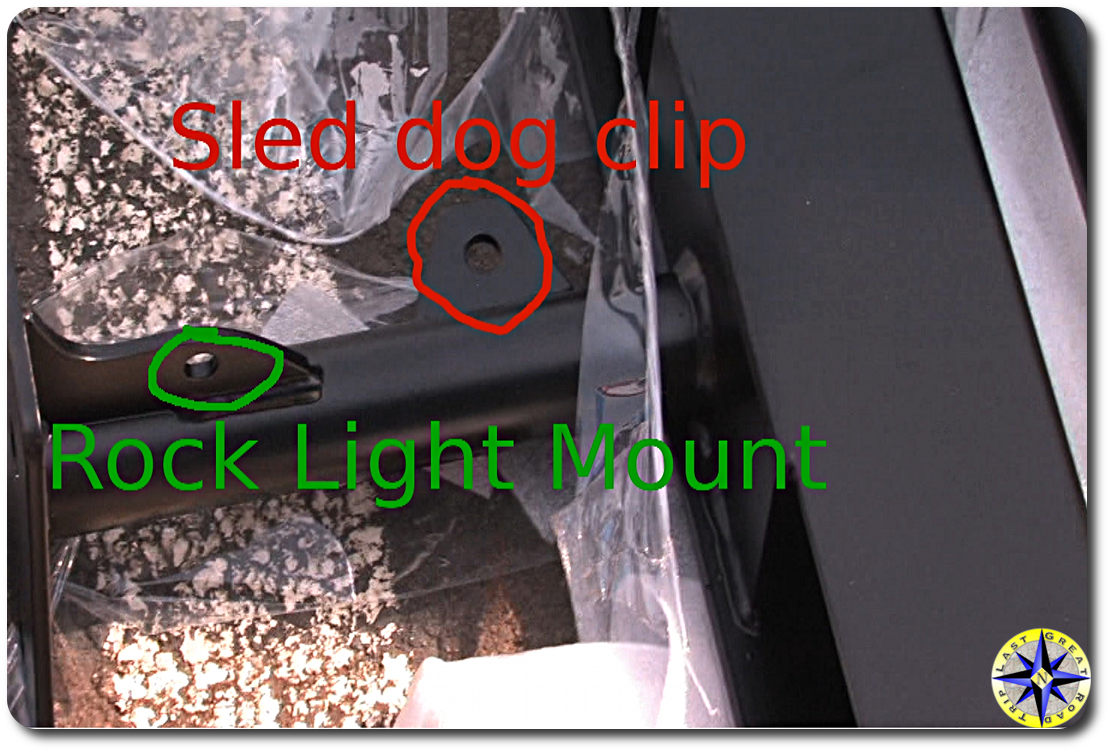
Thanks to Metal Tech’s on-site fabrication we had ours customized for our special needs. We asked the guys there to add a rub rail for additional protection and mount points that would allow us to clip in our team of sled dogs to the sliders when we come back from mushing snow covered mountain trails with our dogs. We also requested mount points for rock crawling lights that will illuminate the ground below for night time trail runs and making activities such as airing up or taking off snow chains a breeze in the dark.metal tech slider custom work

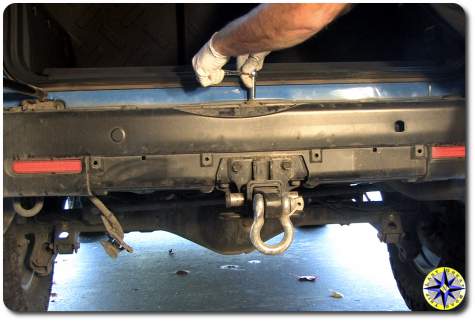
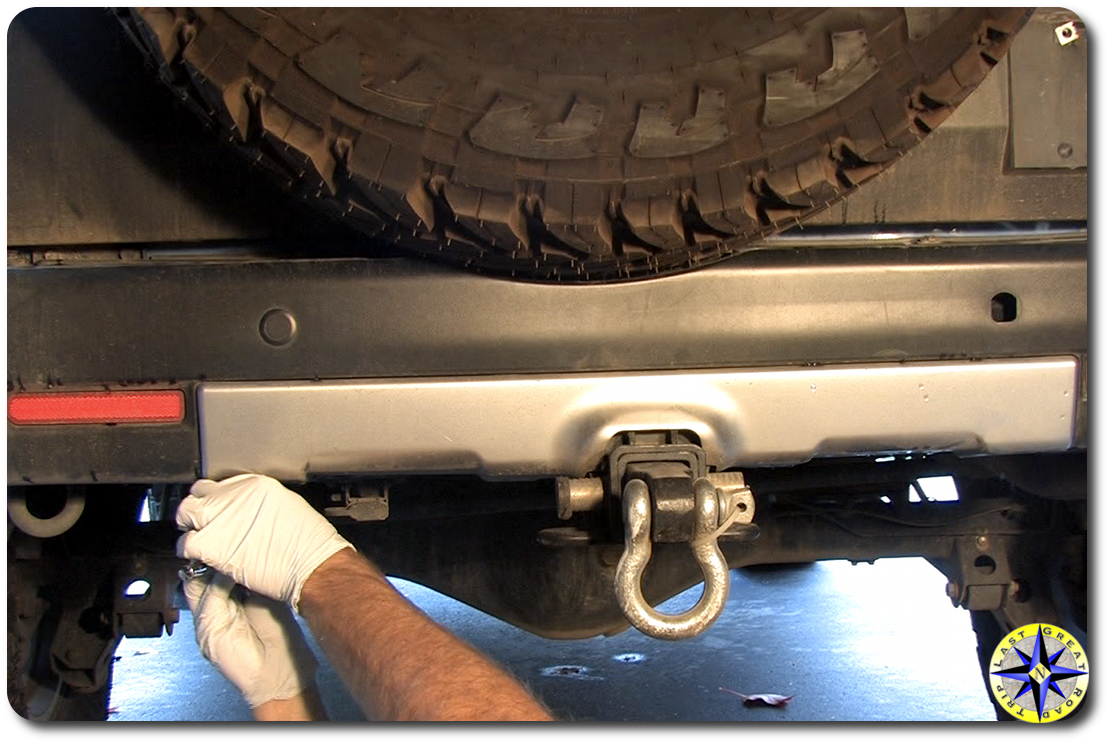
Installing sliders on the FJ Cruiser is one of the simpler mods any back yard mechanic can do. Toyota designed the box frame of the FJ Cruiser with eight mount points on each side, allowing sliders to bolt directly up. Installation is a matter of lifting the slider into place and hand tightening the bolts so you can ensure the slider is level and aligned. Once you have the slider where you want, torque down all eight bolts, rinse and repeat on the other side for a complete set of protection.

Although this is an easy mod, you will want a friend to help lift and hold the sliders in place while you hand tighten the bolts. They can also help gauge everything is aligned and level before you torque it down tight.fj cruiser frame mount nuts for sliders

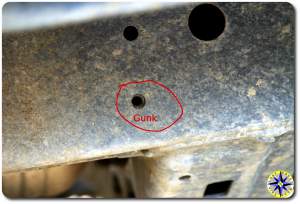
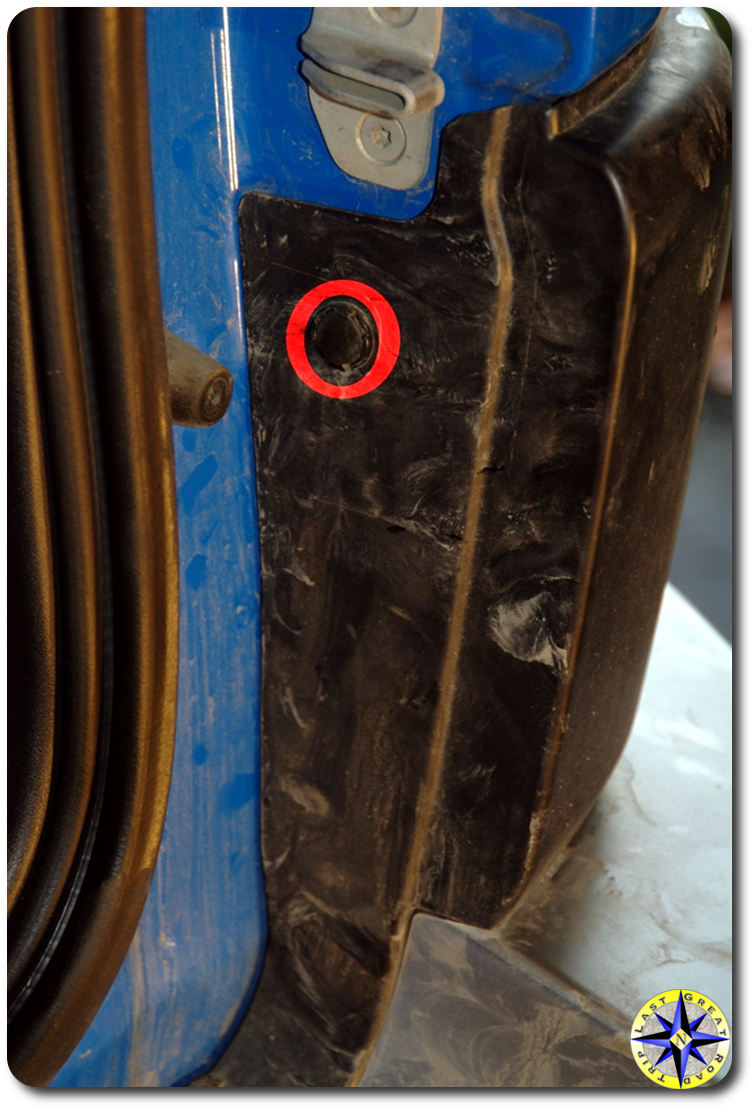
One cautionary note: The nuts you are screwing the bolts into are tack welded to the inside of the enclosed frame. You don’t want to brake the tack weld by misalignment of the bolt and twisting hard only to have the nut free fall into the box frame. It is a good idea to clean out the gunk that may have built up in the threads and spray a little WD40 before you line up everything and ensure the bolts go in straight and smooth.

With everything bolted up we were good to go knowing the Metal Tech sliders will carry the weight of the rig over boulders and protect our door sills from things that go bump on the trail.
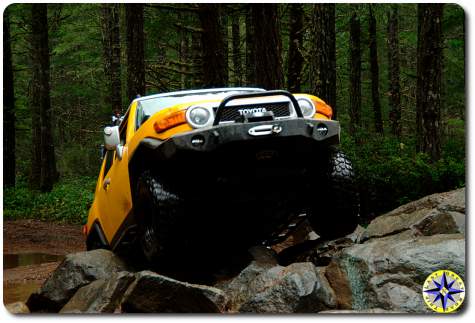
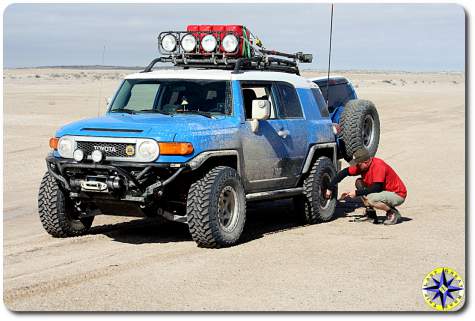
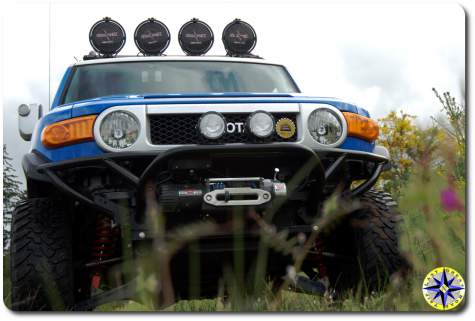
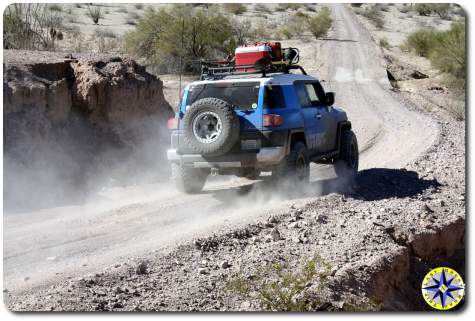
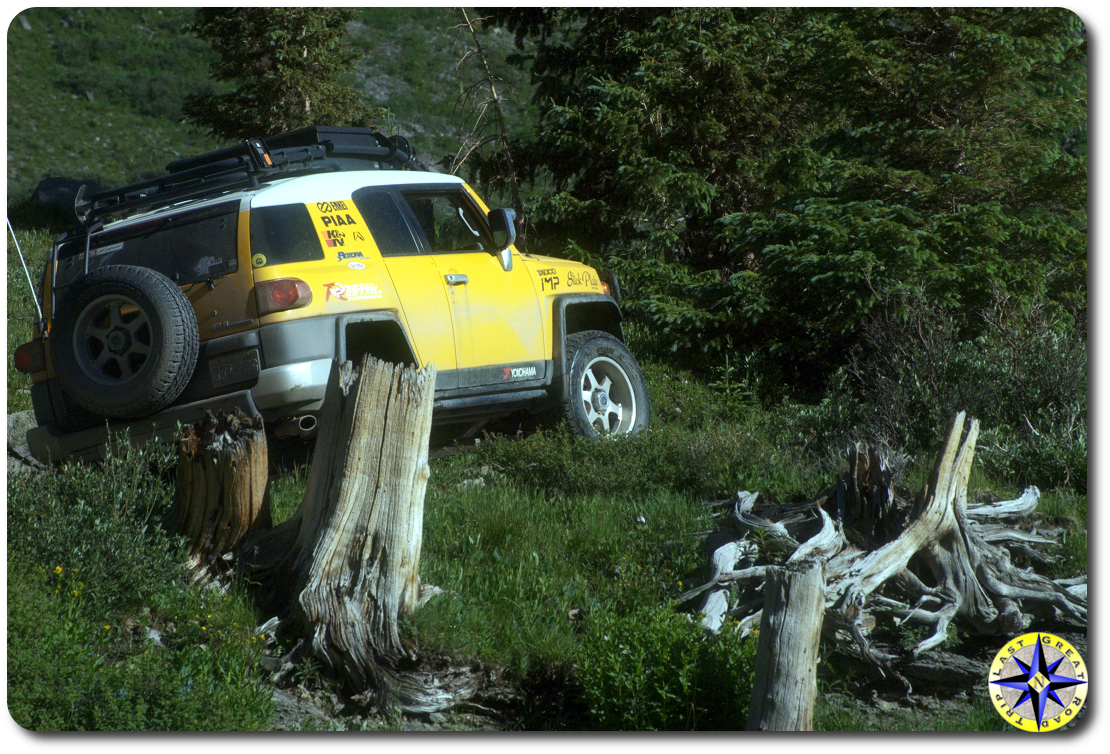
toyota racing development

Toyota Racing Development Interview

Not long ago on an off-road adventure we had an opportunity to meet and talk with some of the folks behind Toyota Racing Development’s (TRD) products for the FJ Cruiser and Tundra trucks. TRD is Toyota’s team responsible for taking what they have learned from racing and turning it into products for the consumers who want more than basic grocery getter transportation. The TRD super charger is just one of the many products that the team has brought to market.