Tag Archives: off road truck stuff

jeep wrangler off-road

Ride-N-Drive Test Results

wet vehicle dynamics area
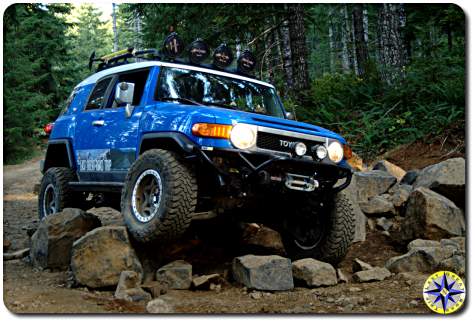
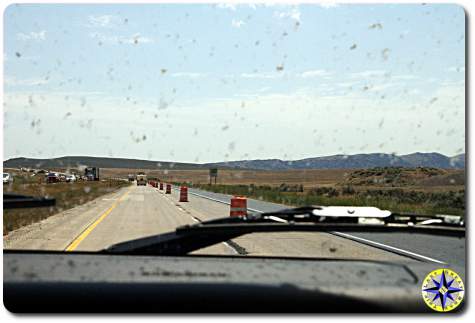
Cooper Tire’s ride-n-drive event is an opportunity for the media to test all terrain tires and see how they behave in tough conditions. In this case, we’d be testing Cooper Tire’s DISCOVERER A/T3 and DISCOVERER S/T MAXX.  Now remember this is a tire test, not a suspension or gearing test, so we did not get turned loose on a wild Rubicon Trail off-road adventure.  We did get placed into situations that could demonstrate tire performance and handling.

driving on wet vehicle dynamics areaThe first test placed us on a 14 acre wet vehicle dynamics area (skid pad to you and me) that tests how well tires behave under wet, slick conditions.  We would be driving two rigs.  One equipped with BFGoodrich T/A KO tires, while the second rig was equipped with DISCOVERER A/T3.  The instructions were simple, drive the course out-lined by orange cones, complete a couple of laps remaining safely in control and see how fast you can comfortably complete the course.  While driving, notice how the tires allow you to drive through the corners and brake without loosing traction.  Of course you bring a bunch of gear-heads together and put up a lap time clock…  Yeah there is a chance it may get competitive.

jeep in mudDriving around the course with the BF Goodrich, we could feel the rear cutting loose in the corners and the front wanting to  push into the orange cones rather than track through the curve.  With the DISCOVERER A/T3 at the same speed we were able to hold the corners better and maintain control…

On the last corner… of the last lap…  yeah we wanted to know what it was like to throw a rig into a turn, far exceeding the speeds conditions warranted…  mud trackThe resulting 360 degree spin that sent orange safety cones flying in all directions can only be described as heart pounding…  Then after restarting the engine and driving into the staging area I could hear a voice call out… Nice, but that wont help your lap time!

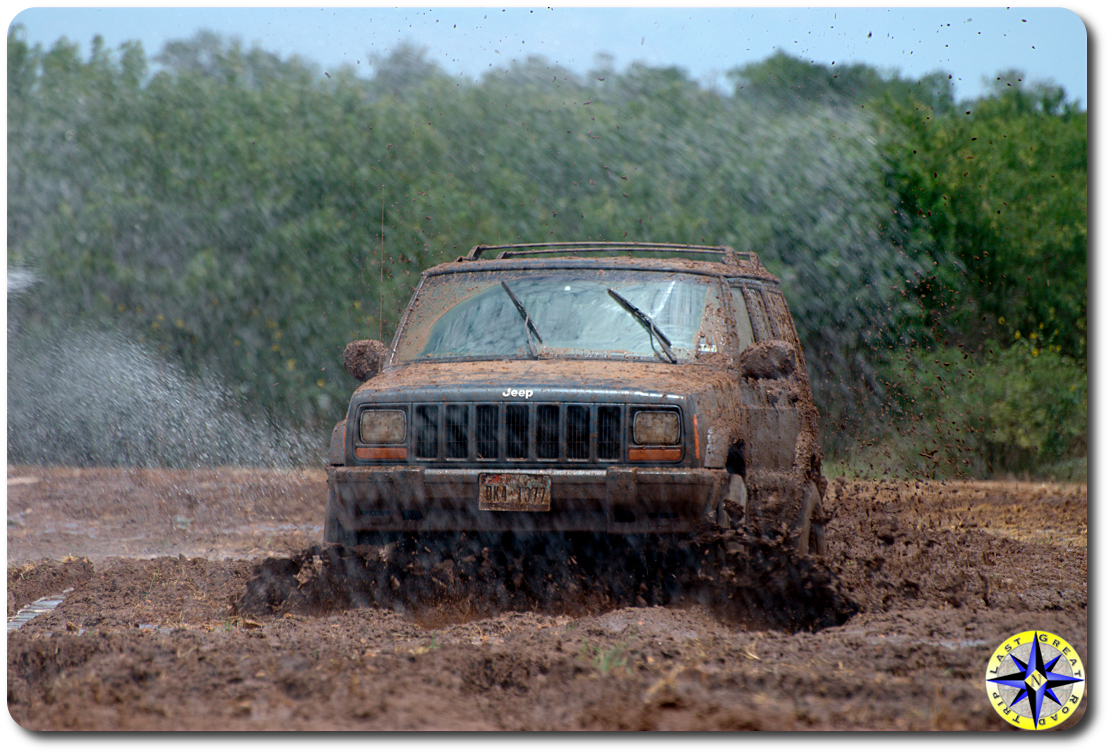
The mud field is one part Texas clay, three parts water and hundreds of yards long.  I’m not a huge mud fan.  On our off road adventures, mud is something separating you from where you want to go not the playground you’re heading too.  That means having a tire that can drive smooth and stick to rocks but still clear mud and keep plowing forward when you have to cross the swamp to get to the other side.  Climbing behind the wheel I aimed the rig straight, gave it a slow steady peddle  and watched to see how it went.  The tires kept going, they held their line without slipping around or spinning wildly.  It was fairly effortless jeep mudto remain on target down the length of the mud field without getting bogged down.  Of course it was fun to watch the mud fly as other drivers got into the mud with a little more gusto.  Although the driver will remain nameless…  if you want to watch professional videographers cringe, driver hard and fast at them through the mud, turn sharp at the last minute and send a wall of mud flying directly at ten’s of thousands of dollars of video equipment…  But the shot that results….  priceless.
http://youtu.be/d6H1y08KMo4

Place a dozen little fountains atop a 30  degree concrete incline and you can find out how well tires hold when gravity is working against you.  One lane of smooth concrete (think garage floor), another grooved concrete and a third lane with exposed softball sized rocks.  Driving up the hill at a snails pace the tires crawled up the smooth surface without slipping or spinning. Over the rocks, the DISCOVERERs reached from rock to rock biting into them and motored the rig up.  Then on the grooved surface they never missed a beat, even when we came to a complete stop half way up. The DISCOVERERs allowed us to easily regain forward momentum.

muddy jeep on incline
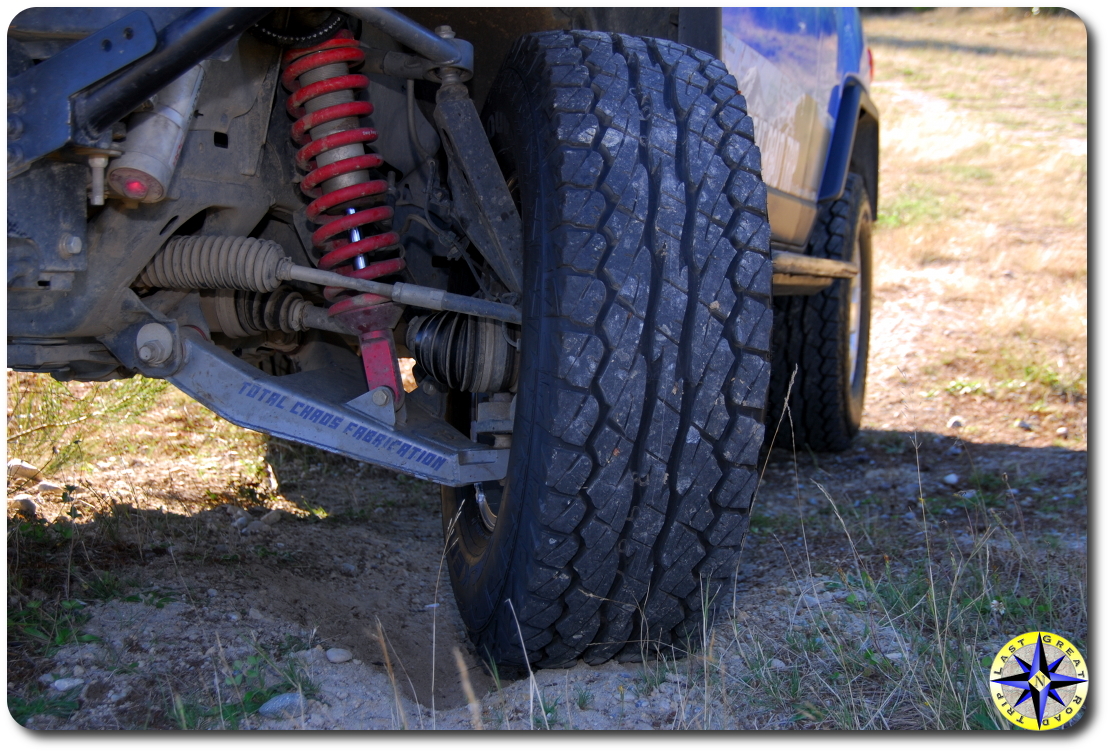
A question we had was around sidewall strength.  On an off road adventure, a tire’s sidewall takes a lot of abuse: airing up and down, carrying extra weight and the ever present rocks reaching out to cut them open.  Ali showed us the v-groove area where they test sidewalls.  The v-groove’s width means as they drive a rig through it, the sidewalls of the tire are carrying the weight of the rig. They will spend hours driving back and forth to see how the sidewalls hold up.

v groove tire testAfter completing a day behind the wheel, we learned that the DISCOVERER tire is capable of taking you through the mud, can climb steep inclines and keep it’s manners on wet roads.  With any luck we’ll have a chance to strap a set of DISCOVERER ST Maxx to our rig and taking them through one of our adventures and give you a long term report.

Want more pictures from the event?  Check out our photo spread in this July’s FJC Magazine.

And what do you think about our comment in their video…  Too Much?


voodoo blue fj cruiser rock pile tillamook forest

Constant Change in 4×4 Adventure Suspension

fj cruiser total chaos long travel falken rockie mountain tireChange is what Buddhism is all about.  But this is an off-road adventure not a centuries old philosophical approach to life…  Or is it.  What follows is an evolution in our quest for the perfect suspension.

Back in late 2006 we purchased the Blue Bunny, our early 2007 Toyota FJ Cruiser, one of the first to hit the west cost.  On a warm sunny fall day we drove it off the lot in Portland, headed back up to Seattle and fell in love… Thanks to the independent front suspension (IFS) the FJ Cruiser’s ride is smooth.  The 4.0-liter 1GR-FE DOHC V6 engine puts out loads of torque and horse power.  The 2 speed transfer case, rear locking differential and A-trac traction control system make the FJC a pack mule that will go up and down most 4×4 trails right out of the box.  But we don’t travel down most 4×4 trails… and so our quest began for a smooth riding mountain goat that will go just about anywhere and remain dependable enough to get us there and back without a team  of mechanics and a fleet of chase vehicles…  Not that we wouldn’t like a traveling pit crew…  we just don’t have it in the budget.

The first thing we needed for our adventures was added ground clearance and the ability to soak up miles and miles of washboard roads. A common misconception is that a lift kit gives you ground clearance.  That is not true.  A lift allows you room to put on larger tiers and it is the taller tiers that deliver ground clearance.  So our goal was to lift the rig as little as possible, keeping our center of gravity low, while allowing us to stuff 295x17x70 Toyo mud tires into the wheel-wells with enough space for travel up and down.  We considered our FJ Cruiser lift options and decided on a suspension lift that would maintain the smooth IFS front travel rather than swapping to a solid axle aimed for more purpose built rock crawling.

In order to reach our ground clearance goal we started out with a 3″ Sway-A-Way suspension lift front and back.   The Sway-A-Way coil-overs can be individually adjusted allowing us to dial in the pre-load to compensate for the added weight of bumper, winch and any winter weight the driver might be carrying.  The lift allowed us to stuff our tires into the wheel-well giving us the clearance we were looking to gain.  Over the next year and half we explored our way up to the Arctic Ocean and wheeled local trails working on off-road driving skills in order to take our adventures to the next level…  Through out this time our 3″ lift met all our needs.

fj cruiser baja racerAs our desire to explore further grew, ground clearance was no longer enough.  We wanted to add travel and increase the capabilities of our rig as it travels over washboard dirt roads and boulder filled trails.  In order to pick up the travel we were after, we choose a Total Chaos front long travel kit.  The kit achieves it’s additional travel by pushing the wheels out 2″ further on each side making room for longer coil-overs.  On our rig we kept the lift at about 3″ and took the gain in travel through droop (wheel falling down).  The additional droop keeps the wheels on the ground over all sorts of terrain as the rig rides smooth across it all.  The added travel proved invaluable when we tested it on our Rubicon off-road adventure.

While the front travel jumped from a stock 7.81″ up to about 12″ with the long travel kit, the rear with it’s 3″ lift was stuck at around 9″.  Although impressive numbers, running down the Baja it became clear that the rear end, with its 2″ diameter shocks and original factory geometry could not keep up with the front end or the demands of our Baja off-road adventure.  So here is where we are going in our evolution… Introducing the Metal Tech rear long travel.

The FJC comes from the factory with a five point rear suspension.  Metal Tech offers their FJ Cruiser Rear Long Travel Suspension Package – Stage 2 package which ups the shock travel to 11.5″ and allows the wheel to move 27″ from top to bottom.

Ask anyone and they will tell you Metal Tech makes great stuff and their kit is better than anything else on the market. But we’re looking for a bit more custom solution so we’ve asked Metal Tech to engineer a solution that will be able to take us to the top of the world.fj cruiser flexing suspension

We plan to start with Metal Tech’s progressive rear springs.  Their springs stand 19 1/4″ high but allow you to maintain a rig height the same as a standard 3″ lift.  Metal Tech has engineered a progressive rate into their spring that allows for soft supple expansion that gives more flex when needed while the stiffer section maintains lift and support.  Remember our goal, lots of travel while keeping the center of gravity as low as possible… Well we didn’t forget and neither did Metal Tech.

We are also going to utilize Metal Tech’s three link suspension system (although its is 4 when you count the pan-hard bar which we’ll maintain daily driving, although who knows…  LT is talking about swapping it for a torsion bar.  Metal Tech uses 2″ x 3/8″ wall DOM tubing for their links and then mounts them to the frame using 1/4″ and 3/8″ plate to protect the ends.  If you’ve ever bought anything from these guys you know it is all about the steel.  They specify that the steel their suppliers provide, meets their requirements for tensile strength and hardness to ensure its ability to take the punishment that wheeling delivers.

In order to control the up down oscillations as our rig bombs down the trails we’ll be installing 2 1/2″ diameter, 12″ travel, remote reserve, 3 tube by-pass Sway-A-Way shocks.  If you ask us why we are choosing these shocks we’d tell you… A single 2 1/2″ diameter shocks is comparable to the performance of dual 2″ diameter shocks.  The by-passes will let us fine tune our shocks’ compression and rebound in order to compensate for different terrains and loads as we go from daily driver, to 4×4 trails to all out expeditions.  Shocks benefit from a large external reservoir that offers the greatest oil of volume.  The oil flows freely between the shock body and reservoir through a flexible high pressure hose, providing excellent heat dissipation and preventing fad during a long, hard day on the trail.  To ensure we have enough room for the larger shocks we’ll be relocating them to outboard hoops that let us squeeze out every bit of the 12″ travel.  And why are we choosing Sway-A-Way?  We need to know we can count on our shocks through any terrain and Sway-A-Way has proven themselves to us since our initial 3″ lift…  It’s all we’ve run.  Their quality and toughness have performed when we needed them most.

Metal Tech has spent significant time working out the geometry to ensure our rig will have the proper squat and anti-squat needed to maintain proper handling.  LT has also worked out the spacing requirements for those bigger rear shocks and dialed in their springs to take advantage f all that travel.

The truth is…  there is no such thing as the perfect suspension.  The suspension set up we are working on is the best compromise between flex, stiffness, adjust-ability, maintainability, ride, and cost for our style of wheeling.  What works for us is not the best for a class I race rig or full time rock crawler…  But this is the best build in the evolution, for our needs…  A rig that can go just about anywhere, if we’re careful and willing to go around some stuff, driver forever over the nastiest back roads, at reasonable speeds, and still get us to work come Monday.  Over the next month or two the Blue Bunny will roll into Metal Tech’s shop and go under the torch to receive its new rear suspension.   As it’s evolution progresses, we’ll bring you lots of pictures and many more details…

But suspension is only part of the story…  we’ll also address the need to improve the transfer of horse power down to the wheels and keep them all turning.  We have plans for that as well…  but that’s another post.

All I Want For Christmas

toyota fj cruiser ARB bumper snowy roadWhat would the holidays be without endless website and magazine Christmas gift lists to send Santa?  Since we take the road less traveled, we prefer to strategically slip our off-road adventure Christmas list into the pages of Hula Betty‘s Cosmo.  We also like to drop subtle  reminders to her about how all our off-road adventure skills and gear will save lives when a meteor the size of Kansas comes hurdling towards earth and we need to escape into the mountains to avoid Armageddon.  In case Bruce Willis fails to save the planet, we are prepared.

It’s not like Hula Betty took the hint last year, but in keeping with tradition here is our new Christmas wish list.

  1. pelican flashlightPelican Flex-Neck LED flashlight – This light has a magnetic base which allows the lite to attach to metal surfaces and 15″ flexible neck that directs bright LED light in any direction. Map reading, working under the hood, or helping you rummage through a duffel on a dark and stormy night this light will deliver 7 hours of burn time on two AA batteries.
  2. Winch line extension – Getting unstuck can sometimes mean running a line out beyond the length of your winch’s capacity.  Having an extra 50 foot extension handy can be the difference between continuing on with your adventure and a long hike out.
  3. metal tech land cruiserAnything Metal Tech – If you own a Toyota Land Cruiser, FJC, 4Runner or Tacoma these guys should be your new best friends. High quality products engineered from the ground up to protect your rig and service that never ends. Bumpers, sliders, tube doors and roll cages are just a few of signature Metal Tech items on the Christmas wish list.  (don’t tell Hula Betty, but there is growing pile of stuff at their shop with our name on it)
  4. LuxuryLite cot –  When your adventure keeps you on the trail for days and nights on end, a good night’s rest is a must. While the young Turks can sleep on the ground, old bulls know the value of a cot that keeps your tired bones off the rocks and supports you head to toe. The LuxuryLite cot is lite weight and compact enough for anyone to bring along regardless of how you travel.  This one really goes out to  our Dual sport bike friends where space is at a premium.
  5. ORTT wheel chockOff-road Trail Tools wheel chocks – When gravity isn’t your friend, you’ll want a good set of wheel chocks to keep your rig stead fast on pavement or dirt. Unlike most others, these chocks fold up into a very compact form factor to stow away neatly and then quickly deliver stability when needed on just about any surface.
  6. Contribution to BlueRibbon Coalition – Doing something for others is what Christmas is suppose to be about. The BlueRibbon Coalition (BRC) champions responsible use of public lands and waters for the benefit of all recreationists.  When others are trying to shut out motorized use of public lands, the BRC is working hard to secure, protect, and expand outdoor recreation access and use, for all.
  7. zarges casesZarges storage case – Being self sufficient on an off-road adventure requires a lot of gear that you need to store. Zarges aluminum containers allow you to organize and transport food, recovery gear, cameras, kitchen equipment, first aid supplies, clothing and everything else safely out of the elements. Their design, protects your gear from dirt, rain and grim when its traveling on the roof or pulled down next to your camp overnight for easy access in the morning.
  8. Subscription to Overland Journal –  If you’ve read our website top to bottom (you did right) and you’re still looking for inspiration for your next adventure, this is the magazine for you. The journal is about exploration. The journal covers long weekend trips, gear reviews and 10,000-mile expeditions across every continent in the world. And as a bonus the photographs filling their pages are worthy of placement in the finest main street galleries.
  9. magnetic spice tinsMagnetic spice tins – Meals on an off-road adventure are more than just calories. A good meal around a camp fire at the end of a day exploring is the thing culinary dreams are made of. A dash of Indian cumin, a pinch of pink sea salt, a bay leaf, a measure of rosemary, sage and just a hint of  Madagascar cinnamon will turn any meal into a gourmet dining experience. Magnetic tins keep all those spices securely at hand.
  10. Primus Power Ignitor 3 – A good lighter is a big advantage when it comes to starting a fire, camp stove or indulging in fine a cigar after a long day on the trail. This lighter burns at 1300°C  and is as close as you can get to weather proof.  And while the Primus ignitor will help you get your burn on. You might want to ask for water proof matches and a flint stick for back up.

Not sure whether I’ve been naughty or nice this year but come December 25th (Christmas morning, not Christmas eve) we’ll find out.  And regardless of what is under the tree, I’ve already received my present this year.  Back in January, Hula Betty didn’t blink an eye when I asked to go on our Baja Off-Road Adventure…  She just said “be careful, have fun and comeback in one piece.”  You can’t ask for a better present than that.

dempster highway warning sign

Tracking Your Truck

NetTrack softwareThis off-road adventure website was started five years ago for one reason… Let my mother know dad was ok and to track where he was on our original Arctic Ocean Adventure. A lot has changed since then and our off-road adventures have taken us through some extreme conditions and to amazing locations. But one thing hasn’t changed, when we take off, mom wants to know we’re safe and where the hell we are.

Recently the guys at Track Your Truck (www.trackyourtruck.com) asked us to give their tracking system a try.  These guys have satellite and cellular based real time GPS vehicle tracking.  Why would you need one of these?  Well how about dispatchers looking to keep their delivery trucks moving efficiently, helping lost drivers find an address and alerting customers for accurate arrival/departure time predictions.  Our personal favorite (and probably ever teenager’s father’s favorite feature) covert tracking of the car you lent to your teenager.  Or just to let those who worry about you know where you are.

We received the cellular based Coyote unit which providestrack your truck coyote AT unit

  • real-time vehicle location, speed and heading 24/7
  • 2-minute GPS tracking updates
  • Internal antennas and battery backup
  • Starter Kill—Vehicle only allowed to operate on predefined schedule
  • Accelerometer for excessive acceleration, deceleration events

The unit can be plugged into your rig’s power socket (cigarette lighter for those who remember when cars came with ashtrays) or hard wired in behind the dash.  We unpacked the unit, plugged it into the power socket and we were done.  That has to be the easiest install we’ve ever done.  We even moved it between vehicles a time or two in just seconds (I have a teenage daughter who asked to borrow one of our rigs for a weekend).

Once the unit is installed you can keep track of your fleet using Track Your Truck’s on-line software, NetTrack.  Log-in and NetTrack lets you see in real time, the locations of all your vehicles against Google Maps as well as review several spreadsheet based reports with tons of data including location points, dates, times, headings and speed.  You can also replay your vehicles’ routes using Google Maps or Google Earth.

All this functionality comes with a price.  The units start at $199 along with a monthly fee beginning at $19.99 for coverage and NetTrack access.  If you’re a fleet manager looking for an easy solution that allows you to track your vehicles and optimize their use in transit, Track Your Truck is worth a look.  The unit and software definitely performed well.

For our simpler needs, this technology is not the right match for us.  We’re not going to be taking advantage of real time traffic maps overlaid on our rigs location to optimize delivery times or looking to streamline routes across multiple vehicles.  And while the cellular based unit will cover our road trips, we’d need to bump up to the satellite coverage for off-road adventures.  And all that data in NetTrack is designed to be private so publicly publishing real time location goes against the grain.   However, speaking as a father that covert tracking and kill switch scheduling capability has some real appeal.

metal tech 4x4 100 series slider

100 Series Land Cruiser Sliders

There is a long rich Land Cruisers heritage.  Over its long off-road history the Land Cruiser has led off-road adventures all around the world.

When we started getting serious about taking our FJ Cruiser on off-road adventures, a pair of rock rails (aka sliders) were installed (FJ Cruiser slider install) to keep the rocks from crushing our door sills and help the rig slide around an obstacle.

Over the years the Land Cruiser has taken on many sizes and now the popular 100 series has protection for whatever off-road adventure you have planned.

Recently Metal Tech announced the official release of their 100 series Land Cruiser sliders.  Over a year in the making, Metal Tech 4×4 is releasing their signature laser cut and formed sliders with their two stage rub rail design.

The unique Metal Tech look and engineered design protect your rig, enhance the looks and provide a solid step for reaching those items stowed on the roof rack.  The sliders are 100% bolt on, powder coated black and includes all the mounting hardware.

orange barrels on road and bug on windshield

Windshield Wiper Replacement

Spring is in the air, the sun is shining, and the last thing on your mind is your windshield wipers. But this is exactly the time when you should be thinking about replacing your windshield wipers.

Throughout the winter, your windshield wipers worked their little blades off, clearing snow, rain, hail and road gunk off your windshield. And now they are probably a little tired and worn out, leaving streaks and no longer able to give you that crystal clear vision they once did. As we get ready for summer wheeling (and who isn’t excited about that), changing out our windshield wipers is one of those maintenance items on our check list.

A quick Google search will return you lots of choices, so we turned to our friend Beau Jaramillo over at Amsoil and he sent us Trico’s Neoform Beam Blade. These are their highest-performing blades with single beam construction offering an infinite number of blade pressure points that keeps a constant, even pressure across the entire length of the wiper. All that pressure translates into a smoother, more consistent wipe across the windshield. They even have a Teflon coating for longer life. The NeoForm blades’ aerodynamic spoiler design helps keep the blade on the windshield, even in high wind or vehicle speeds… Not that our FJ Cruiser is breaking the sound barrier.

Our FJ Cruiser requires three windshield wipers, one 16″ blade in front of the driver and two smaller 14″ blades keeping the center and passenger side of the windshield clean. The windshield blades connect to the arms using a hook style attachment (other rigs my use a different attachment style). Changing your windshield wipers is easy and can be done rain or shine in about five minutes.

Remove the old windshield wiper. It should have a small tab that will release it from the arm and allow you to slide the old wiper off the arm.

Push the Trico wiper adapter latch open, lifting it up.
Slide the arm end through the latch opening and pull the blade back onto the arm’s hook to lock it in place.
Close the adapter latch and you done.windshield wippers

Sound complicated? Here is a 60 second video that will show you how easy it is: Trico Install Video

Now when we run into rain, mud or trail dust, our new blades will wipe it clean, instead of just pushing the water back and forth.

We live in the northwest so of course it rained within a few hours of installing the new wipers… And how did they perform? Highway driving in a good downpour, no streaks or wet spots. The view remained crystal clear!

lgrt decal check mark

Off-Road Check List: Rig Inspection (aka Did I Break Anything)

Whats the difference between wheeling a local 4×4 trail and an epic off-road adventure?  You check your rig the day before you wheel a local trail and fix it when you get back home, on an epic off-road adventure you check your rig every morning and fix it every night.

OK, so Conan has nothing to worry about from my stand-up, but there is a lot of truth in that joke.  Pilots know that you live and die by your check lists: prior to take-off, during flight and prior to landing.  The same is true in wheeling, especially if you will be dependent on your rig for a number of days, with no support in sight.

Sometimes with all the excitement and work of an off-road adventure it is easy to forget something (trust me, I’ve forgotten more than my share).  In order to reduce the chance of missing a potential problem, we now keep a laminated memory jogger checklist to help us stick to our inspection program before, during and after a day on the trail.

Pre-Trip / Daily – Rig Inspection

  1. Axles & Differentials – bolts, boots, clips, u-joints, grease points.  Check to ensure everything is tight and look for leaks or drips.
  2. Battery – clean terminals, check for damaged, corroded wiring. Check for loose connections.
  3. Brakes – drums, rotors, pads/shoes, fluid, hoses, leaks, check parking brake, brake lights.  Helps to have a second person pressing on the breaks while checking.
  4. Belts & Hoses – look for cracks or bulges. Ensure spares are packed in the parts bin.
  5. Body/Frame – look for cracks and rust.  Remove any sticks and debris caught up in the frame.
  6. Cooling/Heating system – look for leaks, fluid levels, clean and repair fins, check hoses and clamps, thermostat, radiator cap. Ensure leak repair kit is packed in parts bin.
  7. Communications – CB / ham radio, antenna broadcast and receive.
  8. Driveline/Transmission – inspect case and shifter, leaks, fluids, universal & CV joints, skid plates
  9. Engine – carburetor, fuel injectors, spark plugs, wires, PVC valve, pumps, distributor & wire, check for leaks and cracks, air filter (clean or replace).  Keep an eye out for loose wires and hoses.
  10. Exhaust – muffler, tailpipes (rust or holes or hanging). Check all hardware holding tailpipes in place.
  11. Fluids – oil, transmission, brake, radiator coolant, gear oils, wipers, power steering (check levels and color).  Ensure extra fluids packed in rig.
  12. Lights – headlights, brake lights, auxiliary lights; make sure they’re aimed properly.  Verify turn signals.  Ensure extra bulbs packed in parts bin.
  13. Steering – check alignment, fluid level, belts and hoses, pump and reservoir.  Look for leaks.  Check tie-rod boots for tears or rips.  Check all joints for play.
  14. Suspension – coil overs, springs, shocks, alignment, wheel bearings, steering linkage, control arms, pan bars.  Notice unusual play in components.
  15. Tires – tighten (torque) lug nuts, air pressure, tread wear (including your full-size spare), look for cuts and missing chunks, torque beadlock bolts.  Ensure auxiliary air pump or CO2 tank is operational and packed in the rig.
  16. Winch – free spool rope and inspect, rewind onto drum.  Check for loose connections and look for frayed rope or wires.
  17. Wipers – check for wear, fluid level.

Trail Head – Rig Inspection

Before you take off for the trail start the engine and inspect the following with while the rig warms up:

  1. Fuel level – check fuel gauge ensuring level is on full (plan for next fuel stop if necessary).
  2. Voltage – check voltage gauge for proper level.
  3. Oil pressure – check oil pressure gauge for proper pressure.
  4. Engine RPMs – check tachometer to ensure smooth maintained engine idle speed.  Listen for misfires and unusual engine noise.  (you should know your rig’s personality including how its engine sounds normally)
  5. Temperature – check temperature gauge to see proper operation and coolant temperature.
  6. Transfer case – ensure transfer case engages in 4 wheel high and 4 wheel low as well as disengages smoothly.
  7. Traction control – test that the rear locker engages correctly. Test A-trac (or front locker) for proper engagement.  Make sure the disengage as well.
  8. Load – ensure load is properly secured.  Check hi-lift jack, shovel and any exterior mounted items.
  9. Walk around – make one last walk around the rig.  Look for any item left out.  Ensure valve stem caps are screwed on after airing down.  Check that nothing was left resting on the spare, bumper, hood or roof.

If you are on a multi-day off-road adventure stop early enough so that you can fully inspect your rig for damage while the sun is still out.  Stopping early also gives you enough daylight to see what you are doing if repairs are needed.  Tip: remember fluid levels change based on the engine temperature always read against the appropriate level marks.

While a checklist wont prevent breakage, it will go a long way to lessening potential problems.  By catching leaks, tears and loose bolts early on, you can hopefully avoid finding yourself trying to reconnect a break line while standing in axle deep mud.  But just in case all hell breaks loose… carry lots of duct tape.

toyota fj cruiser transfer case oil filling

Transfer Case Oil Change How To

Amsoil severe gear SAE 75w-90 oilOn an off-road adventure in a 4WD vehicle, the transfer case distributes the power front and back.  The 2007  Toyota  FJ  Cruiser  maintenance  schedule, shows that Toyota recommends changing the gear oil in the transfer case every 30,000 miles depending on usage.

Sure you can bring your rig into the local shop but changing the transfer case’s gear oil yourself is an easy maintenance activity that can be completed by any back yard mechanic. Besides saving money, you will also learn a little more about your 4×4 adventure vehicle which can only help when your on the trail.

We checked our 2007 Toyota FJ Cruiser owners manual and found we would need 1.5 quarts of Hypoid gear oil API GL-5 (Toyota Recommends oil viscosity: SAE 75W-90).  We went with Amsoil Severe Gear SAE 75W-90 synthetic extreme pressure lubricant, formulated for sever duty applications.

We also grabbed new gaskets for the fill and drain plugs as well as a funnel with flexible tube (Hopkins FloTool 10704 Spill Saver Measu-Funnel) for getting the thick gooey oil into the transfer case.  The only tools needed are a oil catch pan, 24 millimeter socket, ratchet and a torque wrench.

Start by putting the rig on a flat, level spot to ensure good draining and proper refill. Tip: clean around the transfer case with soapy water and a scrub brush to remove the road and trail gunk.  This will prevent any dirt from falling in to the case while changing the oil.

toyota fj cruiser transfer caseUsing the 24mm socket remove the fill plug located in the middle(ish) of the transfer case.  By removing the fill plug first, the housing will be able to breath allowing the gear oil to drain more quickly.

With the oil catch pan in place remove the drain plug, located on the bottom of the transfer case, using the same 24mm socket. If your going to use gloves, this is the time to wear them.

Once the oil is fully drained, wipe the area clean and re-insert the drain plug with a new gasket and hand tighten.  Set the torque correctly on your torque wrench and tighten down the drain plug.  The Toyota maintenance manual states the torque specifications for both the drain and fill plugs as 27 foot pounds for our 2007 Toyota FJ Cruiser.

Remember that funnel with flexible tube?  Getting the oil out of the bottle and into the transfer case through that little hole can be tricky.  One of the advantages of the Hopkins FloTool 10704 Spill Saver Measu-Funnel is that the flexible tube funnel cap will screw directly on to the Amsoil quart bottles.  The cap has an open and close position preventing spills as you position the bottle and hose into place.

Squeezing out thick gear oil through the tube takes awhile.  It works best if you give the quart bottle a few long squeezes and than allow air to flow back into the bottle followed by a few more good squeezes.

The transfer case on our 2007 Toyota FJ Cruiser holds 1.5 quarts.  Checking the fill level on flat ground is easy.  The oil should begin to run out or be just about to run out (within 5mm of the fill opening).toyota fj cruiser rear differential fluid level

Hand tighten the fill plug with a new gasket followed by torquing down the plug to Toyota specifications (27 ft./lbf for the 2007 FJ Cruiser).

Once everything is buttoned up, give the plugs one more wipe down and check for leaks followed by a drive around the block.  Double check for drips and leaks when the test drive is complete.

Keeping the power distributed to the front and rear axles in key in a 4×4 vehicle.  Ensuring the transfer case continues to do its job takes only a little maintenance in the form of an oil change.  Changing the gear oil in the transfer case of a Toyota FJ Cruiser is a simple maintenance job anyone can do with a few tools, a little know how and about 60 minutes.

Don’t forget to change the oil in the rear differential too while your at it. You can learn how with our rear differential oil change how to video.

toyota fj cruiser adding rear differential oil

Changing Rear Differential Oil On The FJ Cruiser

toyota fj cruisdr rear differentialThe gear oil in your rig keeps friction to a minimum and ensures the long life of your differential gears.  Changing the oil in the rear differential is an easy maintenance activity that keeps your off-road rig motoring forward, saves money and allows you to learn a little more about your 4×4 adventure vehicle (you never know when that knowledge will come in handy on the trail).

The first big decision is what oil to use. The Toyota maintenance manual for a 2007 FJ Cruiser specifies: Hypoid gear oil APL GL-5. We went with Amsoil Severe Gear SAE 75W-90 synthetic extreme pressure lubricant, formulated for sever duty applications.  Our FJ Cruiser is equipped with an e-locker which means it requires between 3.01 and 3.12 quarts to properly fill the rear axle housing.

The other item to pick up before you get started are new drain and fill plug gaskets (part# 1215710010).  Unless your on the trail working a field repair, don’t try save a few bucks by reusing these little items.  (Get a complete set of FJ Cruiser differential and transfer case gaskets they will also fit you Lexus GX470 and 4Runner)

Most back yard mechanics will have the tools required to perform this simple activity.  The tools you will need include:

Ok enough shop talk and prep…

Put the rig on a flat level spot to ensure good draining and proper refill. Tip: clean the axle housing with soapy water and a scrub brush to remove the road and trail gunk.  This will prevent any dirt from falling in to the differential while changing the oil.

Using a 24mm socket remove the fill plug located in the middle(ish) of the rear axle housing.  By removing the fill plug first the housing will be able to breath allowing the differential oil to drain more quickly.

With the oil catch pan in place remove the drain plug, located on the bottom of the rear axle housing, using a 24mm socket. If your going to use gloves, this is the time to wear them.

toyota cleaned differential drain and fill plugsThe drain plug has a magnetic insert designed to attract and hold tiny metal shavings that become suspended in the oil.  Yes these are little bits of your gears.  Inspect the drain plug checking for any chunks and observe how much has accumulated.  This will give you an idea of what has been going on inside your differential.

Even with the fill plug removed, it will take a while for the oil to completely drain, which is good since it will give you time to grab the shop rags and clean the plugs, removing all the gunk and accumulated metal shavings.  When your done the plugs should be clean and dry.  Don’t forget which is which.

Once the oil is fully drained, wipe the area clean and re-insert the drain plug (Be sure to use the correct plug) with a new gasket and hand tighten.  Set the torque correctly on your torque wrench and tighten down the drain plug.  The Toyota maintenance manual states the torque specifications for both the drain and fill plugs as 36 foot pounds for our 2007 Toyota FJ Cruiser.

Remember that funnel with flexible tube?  Getting the oil out of the bottle and into the axle housing through that little hole can be tricky.  One of the advantages of the Hopkins FloTool 10704 Spill Saver Measu-Funnel is that the flexible tube funnel cap will screw directly on to the Amsoil quart bottles.  The cap has an open and close position preventing spills as you position the bottle and hose into place.

Squeezing out three plus quarts of thick 90 weight through the tube and into the axle housing will take awhile so get comfortable.  It works best if you give the quart bottle a few long squeezes and than allow air to flow back into the bottle followed by a few more good squeezes.toyota fj cruiser rear differential fluid level

Checking the fill level on flat ground is easy.  The oil should barely begin to run out or just about to run out (within 5mm of the fill opening).

Hand tighten the fill plug and new gasket followed by torquing down the plug to Toyota specifications (36 ft.*lbf for the 2007 FJ Cruiser).

Give everything one more wipe down and check for leaks followed by a drive around the block.  Double check for drips and leaks when the test drive is complete.

There comes a time in every rig’s life when it’s gear oil needs a change to keep all the gears turning smoothly.  Changing the rear differential oil on a Toyota FJ Cruiser is a simple maintenance job anyone can do with a little know how and about 60 minutes.

Be sure to change the gear oil in the transfer case as well. Learn how with our step by step transfer case oil change video.

swr meter CB radio test setup

Can You Hear Me Now…

cb antenna quick release spring baseCommunication when off-road is key to safety and fun.

The most popular method of trail communications has to be the CB radio. Available at almost every discount department store, a CB radio setup provides good vehicle to vehicle coverage while on the trail.  On outings with many off-road clubs, a CB is mandatory if you plan to participate in a club-sponsored ride.

If you ask Hula Betty, she will tell you there is one universal truth about me…  No matter what, and I really mean it, no matter what, I will forget one thing when I go on an off-road adventure.  And for a while the one thing was a CB antenna which meant I would have to stop along the way and pick one up.  On the good side this has given me a nice collection of CB antennas and an opportunity to try them all out.

The line up includes:

CB radio antennas have two functions…

  1. Capture radio frequency waves and convert them into electrical signals
  2. Radiate out radio-frequency signals, which is done best when the length of the antenna precisely matches the wavelength of the transmitted radio frequency (1 – 40)

CB antenna flexIf they all do essentially the same thing is there a difference in CB antennas you ask. CB antennas come in various sizes, flexibility and with different methods of fine tuning their efficiency.

A CB radio can broadcast for miles but it is based on line of site.  For this reason we use a four foot antenna which mounted on our rear door hinge stands above the roof and any stuff packed in the roof rack giving it a clear view of the horizon in every direction.

SWR (standing wave ratio), is a measurement of how efficiently your antenna system will radiate the power available from your radio. In simple terms, your radio would like to radiate all of its power, but can only do so if the other components cooperate. Bad coax and mounts, inefficient ground plane or poorly tuned antenna can cause system backups.  CB antennas need to be tuned to be as efficient as possible and by setting your antenna’s SWR you reduce the restriction of radiated power. The easiest way to understand the concept is to think of it in terms of water flow. That is, if you put a nozzle on the end of a fire hose, your potential output will be restricted by the outlet and water pressure backs up into the pump. Tuning your antenna opens the nozzle to full.  Poorly tuned antennas restrict the flow of the output frequency and can cause damage by backing up all that power into the CB radio.firestik designer CB antenna

If all radios only transmitted on one channel, it would be a much easier task to design antennas. As it is, there are 40 CB channels to contend with.  CB antennas can only be made to resonate at one specific frequency (channel). The goal of the antenna manufacturers is to build the antenna to resonate at a frequency in the middle of the band (channel 19) and make it broad- banded enough to keep the other frequency’s related SWR at the two extreme ends (channel 1 and Channel 40)  of the band below 2.0:1.  Since each radio system is unique, the final tuning is left to you.  How you go about fine tuning your antenna varies slightly.

firestik II cb antenna tuningThe three models of antenna we now have, are all four feet long with adjustable tips.  Because the antennas stick up high, they run into low branches, overhangs and ferry boat cross beams.  The Wilson flex-4 is designed to bend when it encounters solid objects.  In fact it can double back without cracking or breaking.  The K40 and Firestik requires a spring base that allows the antenna to fold back instead of splintering the fiberglass.  When properly adjusted they all broadcast and receive radio signals well. But here is where they seem to differ the most to us.  The K40 requires a small allen to make adjustments.  The Flex-4 requires a small screw driver for adjustments.  The Firestik uses a turn screw that can be adjusted by hand.  Once you have your antenna dialed in for your CB radio you should not have to worry about it again.

So how do you fine tune you’re CB antenna?  You need a SWR meter, which you can pick up from Radio Shack.  You may want to check with your local 4×4 club to see if anyone there has a SWR meter you can borrow.

You need to understand two basic points before adjusting the length of your antenna (fine tuning it):

  • If the SWR on channel 40 is higher than that on channel 1, your antenna is too long.
  • If the SWR on channel 1 is higher than that on channel 40, your antenna is too short.

Start by finding a suitable location to park your rig. There should be no obstructions, such as trees or buildings, within 10-15 meters of your antenna.  Make sure that you’re inside the rig with the doors and windows closed to ensure an accurate reading.  It is important to have your antenna properly grounded to your rig or it may not operate at all.

IN GENERAL HERE IS HOW YOU FINE TUNE YOUR ANTENNA (follow the directions for your specific SWR meter).

Hook up the SWR meter. Disconnect the coaxial cable from the back of the radio. Reconnect this end of the cable, which leads back to the antenna, to the SWR meter in the slot marked “antenna” or something like that.   Use the jumper lead and connect your radio and the SWR meter through the connection marked “transmitter”or something like that.  You are placing the meter between the CB and the antenna.

  1. You will initially calibrate the meter for your system. Set the switch on the SWR meter to “CAL.”
  2. Turn the radio the Channel 1 (40 on the second pass).
  3. Key the microphone (depress the button and hold it) but do not speak into the microphone.
  4. Turn the knob on the SWR meter labeled “CALABRATION” until the needle reaches the setting position at the end of its range.
  5. Release the transmit key.
  6. Set the function switch to “SWR”.
  7. Key the microphone again without speaking into the microphone.
  8. Quickly record the reading on your SWR meter and release the transmit key on your microphone.

You are now going to repeat this process for channel 40.

Depending on your readings, lengthen or shorten the antenna appropriately and repeat your tests.  Make small adjustments as you work to optimize your antenna and remember:

  • If the SWR on channel 40 is higher than that on channel 1, your antenna is too long.
  • If the SWR on channel 1 is higher than that on channel 40, your antenna is too short.

The objective behind tuning your antenna is to make these two readings identical or as close as possible. Getting down to a ratio between 1.5:1 and 2.0:1 will produce an excellent broadcast signal that will not harm your CB radio and broadcast clearly across all 40 CB channels.

If you only communicate on one or two adjacent channels anywhere within the band, you can tune your antenna to achieve optimum performance on those channels.  However, most people prefer to use the entire bandwidth when tuning.

This procedure can sound a little cumbersome, but fine tuning your rig’s CB antenna only takes a few minutes and is vital in protecting your CB Radio and optimizing its performance .  Each antenna manufacture claims they have power output improvements and other performance enhancements that set them apart.  We found them all to operate the same on the trail when tuned correctly.  Of course it could be our set up and this is not a scientific test by any means.  Can you hear me now.