Category Archives: 4×4 Tech

How to fix, maintain or modify your off road adventure truck is here. We also discuss gear and how it holds up out on an adventure.

essential off-road equipment

Chasing The Gear Whore

land rover defender 110 camel trophy“He who desires more gear, knows not what he wants from his gear”- unknown source.

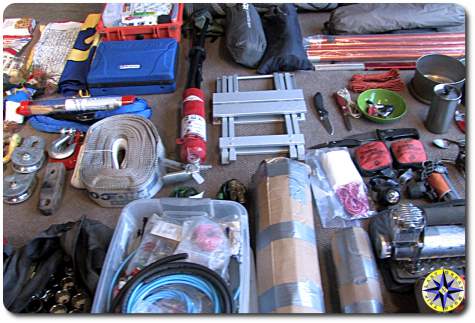
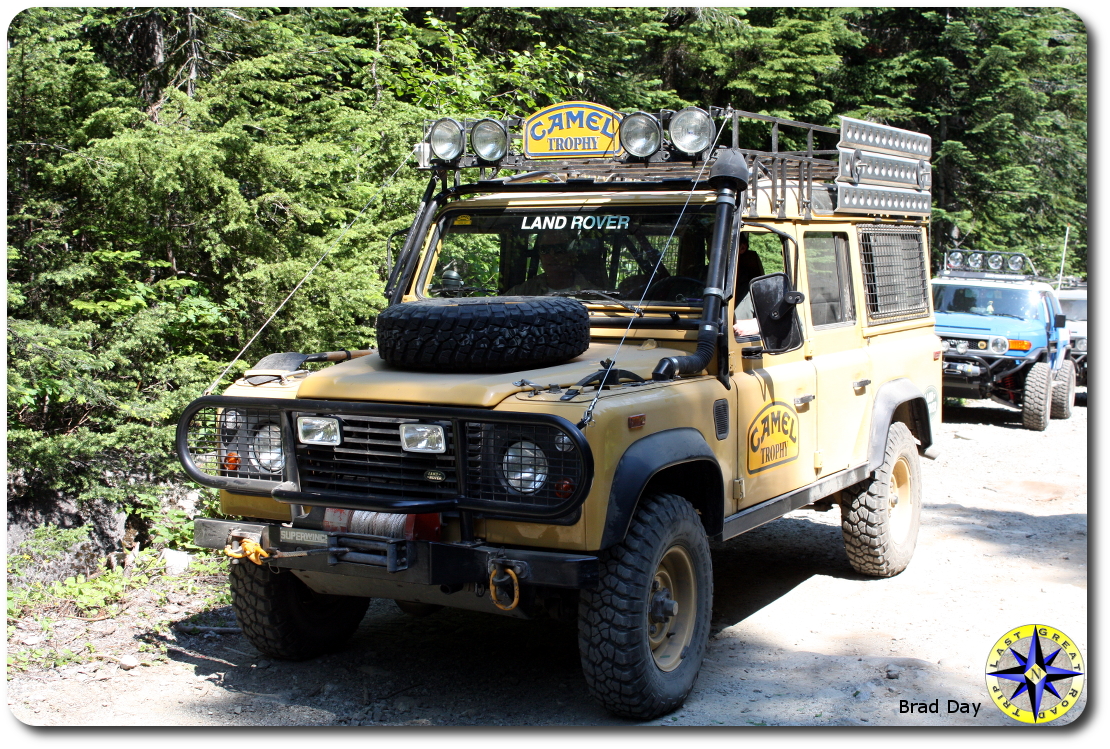
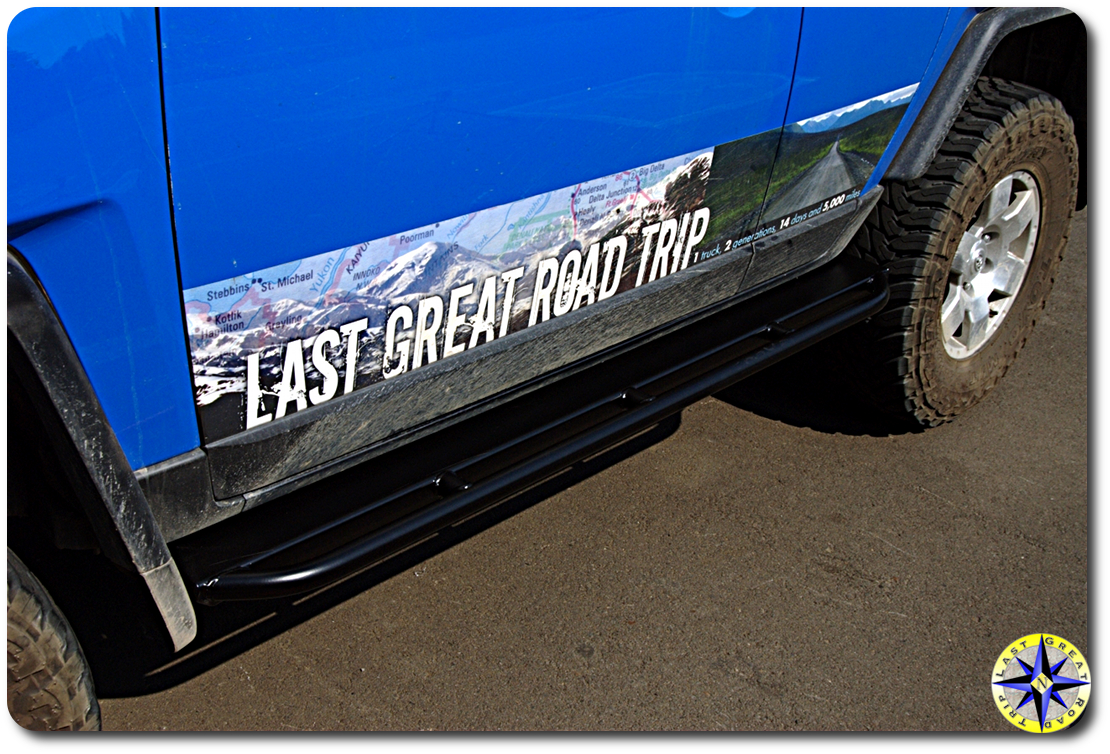
Whether you call it car camping, off-road adventures or overlanding, an off-road based adventure requires stuff and as a group, we overlanders do not travel light.  If you search the Interwebs, you would think that in order to start overlanding you must have a Land Rover, preferably a Defender 110 (Camel Trophy insignia optional), capable of carrying months of supplies, sand ladders, roof top tent (RTT), titanium cook sets,  wind sail canvas & teak lounge chairs with matching tables and an engine manifold hot water heater with power shower head.

loaded dual sport motorcycleI have a theory and it holds true for all major activities not just overlanding…  It goes like this:

  1. Looks interesting phase – This (insert activity name here) looks like something you would enjoy.  You have little to no experience but the activity seems interesting so you tag along with a friend or give it a try on a limited basis.
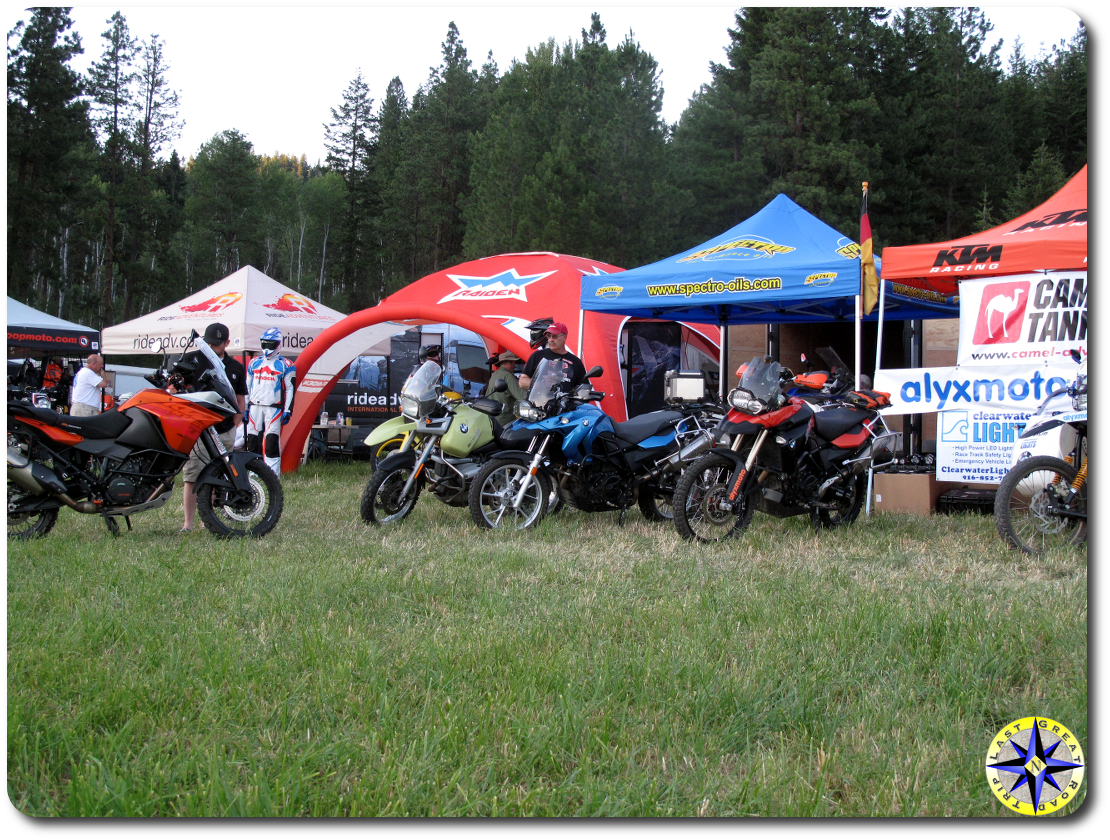
  2. Let me open my wallet phase – You tried it, you like it and you’re hooked.  You surf YouTube videos and hang out on the forums during work taking in everything you can about this life changing activity.  moto vendors nworYou imagine yourself living the dream that allows you to quit your job, take the kids out of school and spend all your days doing “this”.   If the “so called experts” tell you, you need a thing-a-ma-bob, you get a thing-a-ma-bob.  If you see a new whats-it’s that promises to take you to the next level you save up and order a whats-it’s.  You check out whats-you-ma-call-its that others have and compare detailed specs of each new piece of gear to hit the market.  You become a gear whore… and you’re proud of it.  In fact you show off your gear and tell everyone how it makes life much better…  and you are happy.yellow land rover discovery
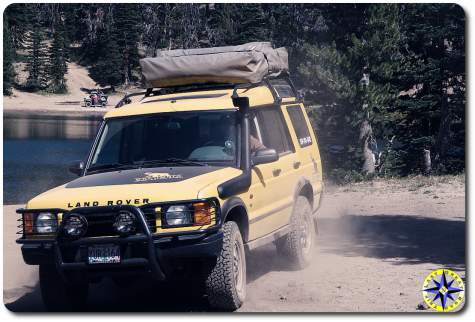
  3. Attaining Zen phase – If you stick with the activity long enough eventually you know what works for you.  Your gear is not so shinny anymore but it performs well and meets your personal needs. You’ve pared down your gear to the minimum you feel comfortable with.  You use all your equipment regularly and your favorite piece of gear is one of your oldest items.  You have repaired much of your gear yourself.  New guys (those wide eyed newbies entering phase 2) look at you and can’t imagine how you do without the newest most talked about piece of gear they just bought.  You are old school.  off-road trailYou are more interested in experiences than buying your way into the club… and you are at peace.

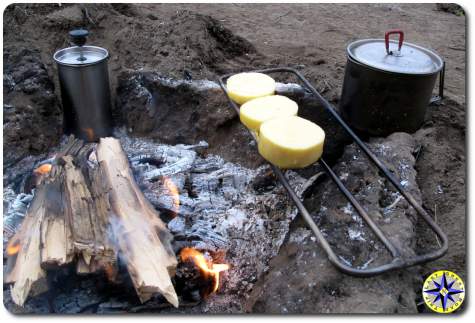
I have a friend who explores very remote locations in her Forester.  That’s right, a stock Subaru with nothing more than a good set of all terrains.  She sleeps in the back, keeps her creature comforts to a minimum and only brings along the essential gear.  Most of her equipment comes from the backpacking world so it is light and compact.  She eats volvo driving snowy pass
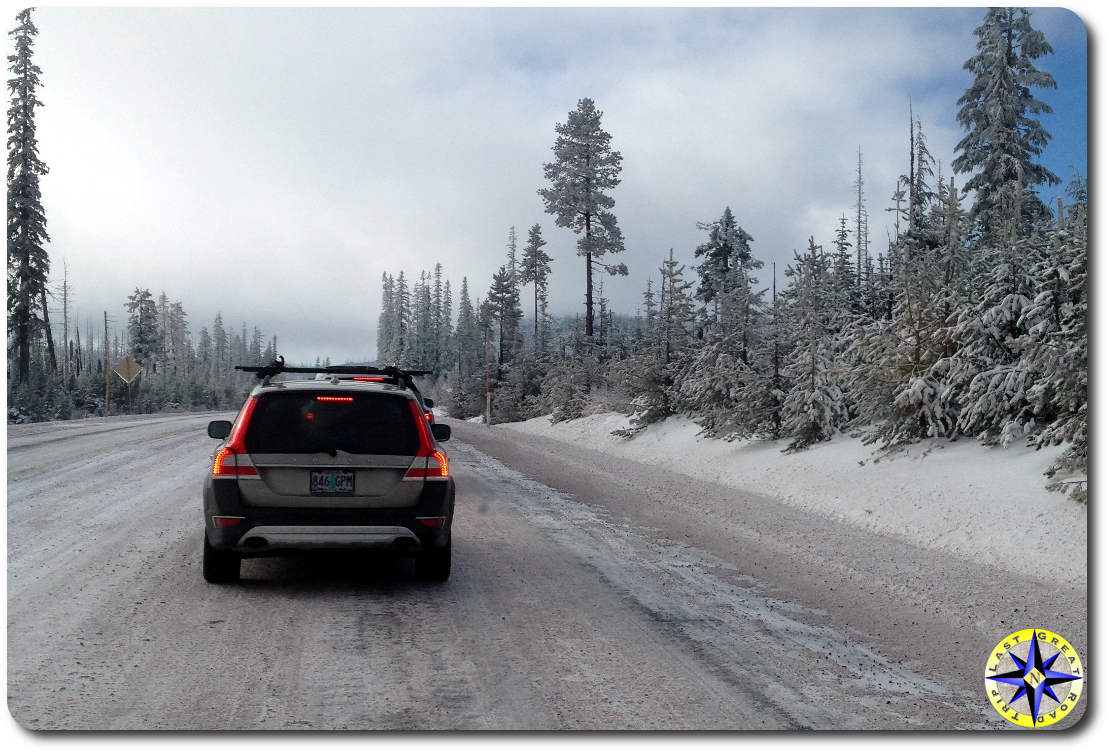
granola trail mix, energy bars and PB&J sandwiches.  She is comfortable with her style and she has seen more remote North West destinations than just about anyone else I know.

There is nothing wrong with the gear whore.  In fact it is that willingness to purchase new stuff that fuels the overlanding community.   Gear purchases encourage manufactures to sponsor rallies and shows that bring us all together.  Profitable vendors contribute to the fight for open access to places less known for all of us to explore more.

I84 sunset
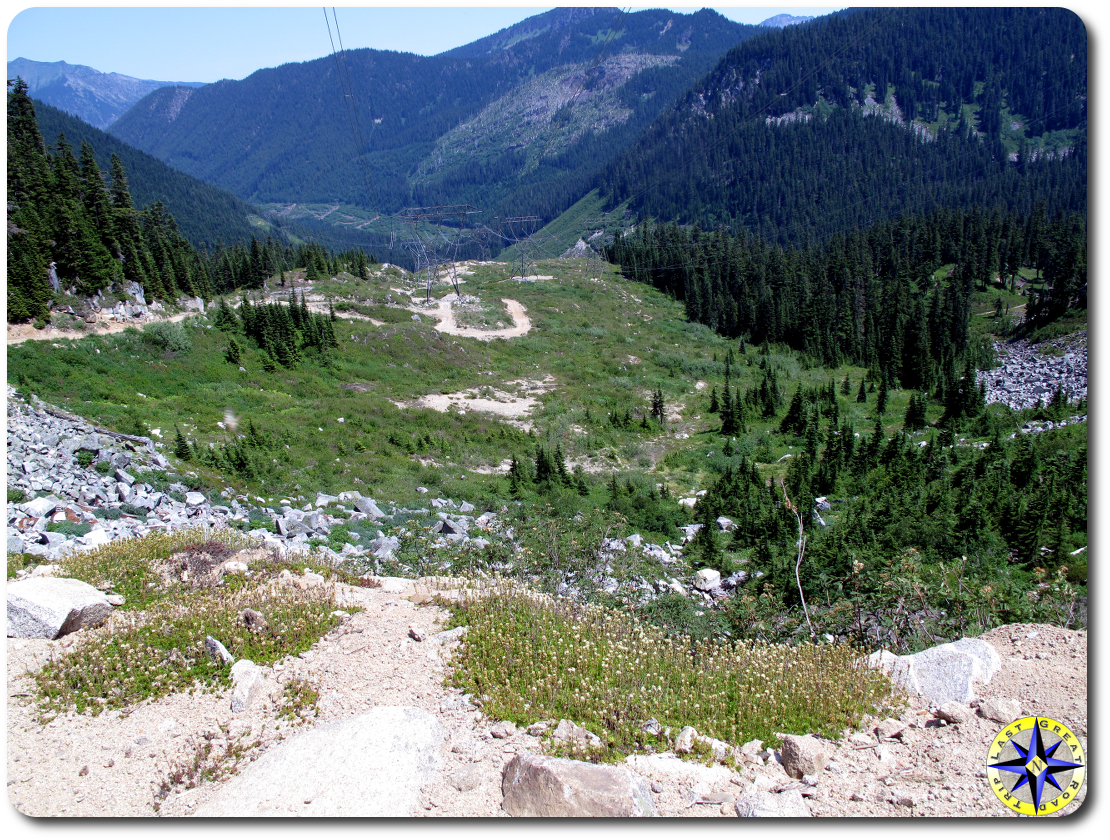
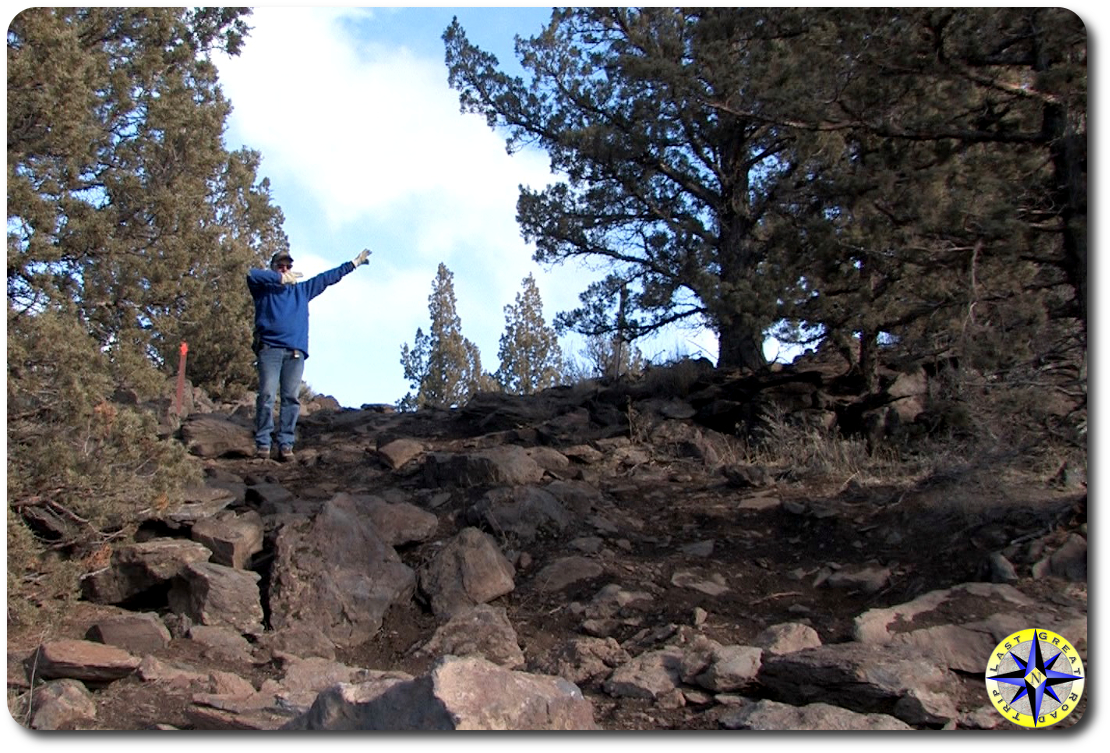
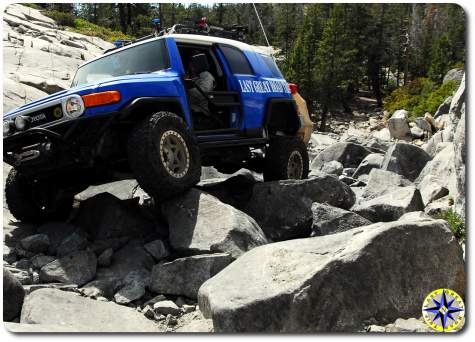
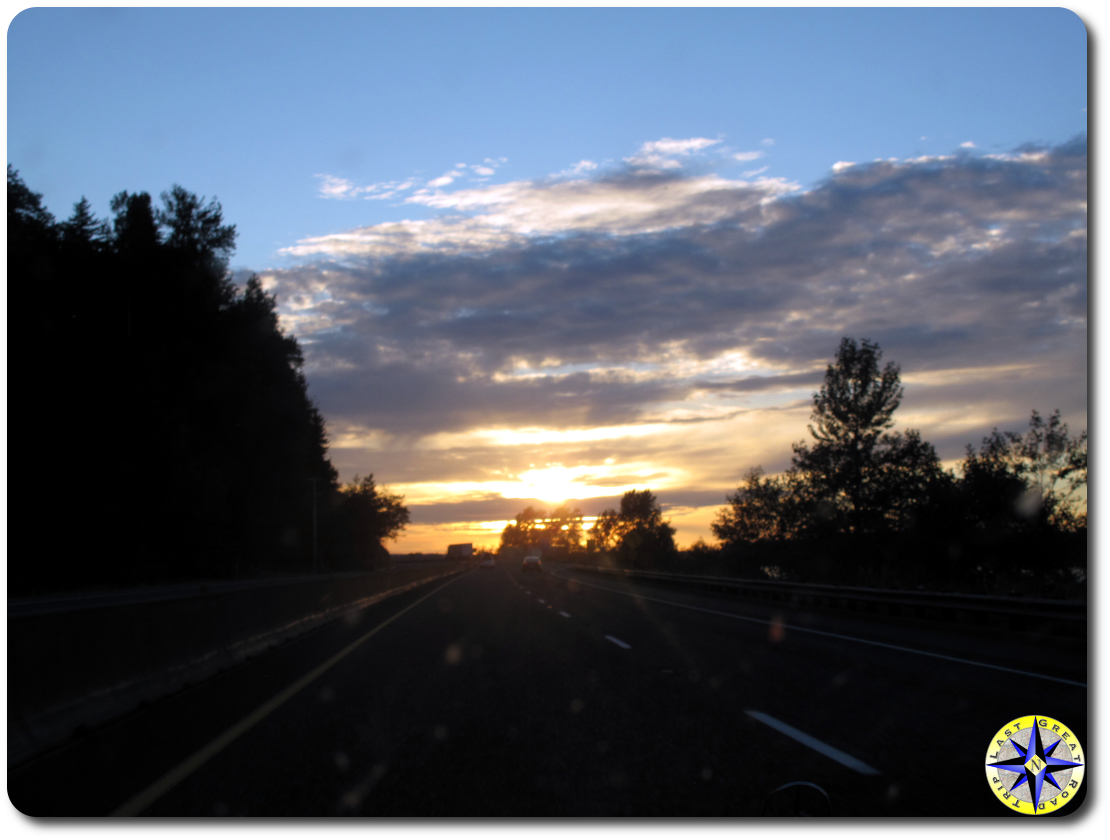
Whatever phase you’re in…  don’t let anyone mislead you into feeling that you must have a truck with lockers, 33″ tires, armor or top-of-the-line suspension or other cool stuff before you can start enjoying off-road adventures.  They will of course allow you to go to more difficult locations but  all it takes to start is imagination and a desire to explore. The key to great off-road adventures is that you grab a map, pick a destination and explore the road less traveled.  Over time you will find your own way and discover what gear is right for you.

blindfolded driver

Driving While Blind – The Off-Road Spotter

4x4 trail spotter d90 bj60Driving off-road can feel like you have your head on a swivel.  You need to see what’s in front of you, behind you and on both sides.  And when things get really though you wish you had an extra set of eyes.  It’s at this point a trail spotter becomes your best friend.

The job of a spotter is to driver the truck “remotely” through the obstacle.  By seeing what the driver cannot, the spotter instructs the driver which way to turn, how fast to go and when to stop in order to get the truck past a difficult obstacle in the trail.

two men fj cruiserIn order to perform this feat, driver and spotter have to trust each other.  The driver will need to follow the instructions to a tee and the spotter needs to know how the truck will behave as she has the driver put a wheel on a rock or come down a ledge step.

Before the driver and spotter get to the driving part, they need to talk and agree on the line and signals as well as honestly discuss driving skills and concerns.  This is no time for ego.

turn driver spotting signalWhen it comes to spotting signals, bigger is better.  It is incredibly hard to tell what the spotter is trying to communicate if they are simply pointing a finger.  The spotter needs to get into it.   She needs to use big gestures when directing the driver and hand signals should be accompanied with loud vocal commands.

Start with the basics:

  • Come Forward – The driver should drive forward with the wheels as they are.
  • Turn Driver – The driver should turn the wheel to their left.  The spotter’s left and the drivers left are different so get into the habit of using “driver”.man spotting fj cruiser on trail
  • Turn Passenger -The driver should turn the wheel to their right.  The spotter’s right and the drivers right are different so get into the habit of using “passenger”.
  • Stop – The driver should stop the truck and maintain control.  “Wow”  can sound a lot like “go” so avoid it and stay away from ambiguous phases like “hold up”, “that’s good” or “wait”.  Let the driver know to “STOP”.
  • Backup – Drive the truck in reverse with the wheels as they are.

There is a common problem that can creep up, when there are several bystanders around the truck as it is being spotted.  A number of folks may start to give suggestions to the driver, distracting her with “turn left, your other left”, “watch out for the rock”, or a dozen of other misguided directions.  They are trying to help but it only makes things worse.  This is where the spotter needs to step in, take control and tell everyone to stop helping.  There can be only one spotter. man 4x4 trail spotter

ADVANCED: The spotter may ask another observer to step in and perform one function for her.  That function is to yell “STOP”.  This is helpful when the spotter is backing the driver up or trying to have the driver make very minor adjustments.  The observer does not provide any directions or advise to the driver, she only shouts out the command “stop” based on what the spotter requested.  The spotter will relay the “stop” voice command with a stop hand signal when she hears the observer shout “stop”.

A good spotter can help a driver get through obstacles  unscathed  that they never could have driven on their own.  Like any valuable skill,  spotting takes practice in order for you to guide the blind down the trail.

metal tech 4x4 100 series slider

Rock Rail (Slider) Maintenance

metal tech box slidersOff-road adventures put a lot of stress on your rock rails as they work to protect your door sills.  Over time your sliders will start to show their age as road grim, rocks and dirt take their tole.  Rocks and road salt eat away the paint and rust attacks any exposed steel.  To keep your slides at their best every year or two you need to show them a little love.

Start by removing your rock rails from the truck.  Scrub them down with soap and water removing all the dirt, loose paint and grime.  Work the nooks and crannies where gunk may have accumulated.   Rinse them off and while they dry wash the truck’s frame and clean it up.

If your rock rails are like ours there is some rust that needs to be knocked it down with a wire brush.  You can also sand (or grind) down to bring back a smooth finish.  After you have them cleaned, spray a rust reformer over any spots showing rust.  A rust reformer will convert the rust to an inert material that can be painted with several costs rust proofing paint.  Don’t forget to perform the same rust proofing on your trucks frame.fj cruiser frame mounting point for sliders

This is one of those activities that is easy but will take time.  This literally is watching paint dry.  Take advantage of this down time to run to the hardware store and purchase new hardened bolts and washers (grade 10.9).  Your sliders often carry the weight of your truck and the last thing you want are those old bolts to sheer off because you weren’t willing to replace $20.00 worth of hardware.

fj cruiser metal tech slider rub railBefore you bolt your rock rails back on, give the threads in the frame a good spray with WD-40 and chase the bolt through to ensure their is no sand or grit in there.  Finally position your sliders and bolt them up to your frame ensuring they are aligned.

Now your sliders should look almost as good as new and continue to protect your truck on lots of off-road adventure.

2007 Toyota FJ cruiser

3 Quick Off-Road Adventure Tips

These off-road adventure tips have served us well and we hope they help you.

  1.  If you have read “The Checklist Manifesto” by Atul Gawande you know how valuable checklist can be to jog your memory and prevent you from forgetting an important step.  We laminate our checklists in clear plastic to protect and keep them clean when using them on an adventure. Make your own personalized checklist or download and use our off-road adventure checklists so that you don’t forget something important on your next big adventure.
  2. Every time you wash your truck or at least once a month exercise your winch. Spool ten or 15 feet of rope out and back in about a dozen times.  This will make sure the gears stay lubed and any moisture that finds it’s way in is evaporated off of the drum and winch motor.  By regularly using your winch you can ensure it is operationally ready if needed on your next off-road adventure.
  3. Look inside of your engine compartment.  You will certainly find a few nooks and crannies perfect for stowing a few quarts of engine oil and gear lube.   Make sure oil bottles are kept snug and avoid any sharp edged areas. This trick will keep a spare quart or two handy where and when you need it.

Do you have a tip that you find extremely useful when exploring the road less traveled?  Let us know.

Blue Bunny the FJ Cruiser Walk Around

2007 voodoo toyota fj cruiserOur 2007 Toyota FJ Cruiser has gone through a number of iteration since we first purchased it in late 2006. We thought it was time to record exactly what she has these days.

We’ve discussed why we’ve made some of the off-road modification choices we did with our build.  We’ve also told you why you should not modify your off-road truck.  We obviously didn’t take our own advice so here it is…  the Blue Bunny a Toyota FJ Cruiser walk around:

Trail Armor:

Front Suspension:

Rear Suspension:

  • Metal Tech custom built 3-link
  • Metal Tech long travel progressive rear springs
  • Metal Tech bump stop re-locators
  • Sway-A-Way 2.5″ bypass shocks
  • Custom rear shock hoops

Drivetrain:

  • ARB air locker front and rear
  • 4.56:1 ring and pinion gears
  •  Custom Curry rear housing (4″ wider to track with front tires)
  • Custom Curry rear axles
  • Ford 9″ third-member
  • Atlas 4 speed: 2.72:1 reduction gear, 3.8:1 low range gear

Miscellaneous:

man holding fj cruiser cabin air filter

DIY Cabin Air Filter for Toyota FJ Cruiser

WEB absorber DIY cabin air filter materialWe’ve shown you how to replace your Toyota FJ Cruiser’s engine and cabin air filter. Now we want to show you how to save money the next time you do.

Toyota OEM cabin filters (and knockoffs) cost between $15 and $20 on the Internet depending on the brand, shipping and who you purchase from. You can make your own for as low as $2.00? It’s crazy but true, you can make your own cabin air filter in minutes with easily available materials.

Stop by the pet store and pick up aquarium filter material, the polyester cut to fit stuff that runs around $6.00 a sheet. You will get a couple of filters from a single package of aquarium filter material. We like using a furnace filter called “Web Absorber”. This statically charged material includes a layer of carbon covered fiber that absorbs odors. While the Absorber will cost between $10 and $20, you will get four of five cabin air filters from one 20″x25″ furnace filter.DIY cabin air filter process

Lay out the material on a flat surface you can cut on.  Using your old OEM cabin filter as a template, trace it out with a Sharpy onto your filter material and then cut out along your traced lines.

To assemble it, I like to start by laying a dryer sheet into the cabin filter holder. This will add a fresh scent to the air. On top of the dryer sheet lay in the filter material you cut out. If you sized your material right it will fit snugly into filter holder on all sides.  Be sure to tuck the filter material under the top tabs of the filter holder.dryer sheet in cabin air filter

That is all there is too it.  Slide your cabin filter holder back into place and you’re done.  You should have plenty of material left over for the next time you need to replace you cabin air filter.

bright LED dome light

FJ Cruiser LED Dome Light Swap

fj cruiser dome light bulb and LED chip comparisonEvery try to read a map at night by your dome light?  How about trying to find something in your console at night?  The Toyota FJ Cruiser OEM dome light may give you a warm glow, but bright light you can read by is not its strength.

One of the easiest FJ Cruiser modifications  you can perform that pays big dividends is to replace the interior dome lights with new bright white LED chip-sets.

fj cruiser dome light cover removal drawingWe picked up a Putco LED Lighting “980018 premium interior dome light kit”.  The kit included a pair (one for the front and one for the rear) of LED white light chip-sets.  The chip-set fits the original dome light fixture and is designed as a direct bulb replacement.  With three LEDs on the chip-set, it puts out approximately 18 times more light than the original bulb, an increase that you can definitely notice.fj cruiser dome light cover removal

  • Start by removing the cover.  Using a screwdriver with its tip wrapped in tape, disengage the 4 claws and remove the light’s lens cover.
  • Remove the old bulb from the socket.
  • Press the LED chip-set into the bulb socket
  • Replace the cover.

LED dome light installedIt really is that easy.  Your new dome light(s) will be significantly brighter, use less energy and provide a whiter light.

No this mod wont help you climb over rocks or pull you through gumbo thick mud but it will help you find that last handful of nuts you dropped on the floor of the cab before the three second rule kicks in.

camp fire cooking

Camp Cook Out

cooking over open fireEveryone we know loves cooking out on the trail when camping on an off-road adventure.  And as you know the stove you have on hand will have a big influence on what you cook and how it turns out.

We love cooking over an open fire.  Grilled burgers, chicken, fish, boiling water for coffee you can do it all.  But you have to get the fire down to a good pile of hot coals, avoid hot spots and constantly regulate the fire. It can be tricky.  For us everything tastes better cooked over a fire, even a simple quesadilla.

The down side is that many times you will find a fire ban or heavy rains have dampened your chance of cooking over open fire.  In that case you need to turn your attention to a stove.

msr backpacking stoveBackpacking stoves are compact, light weight and put out a lot of BTUs for their size.  They are extremely efficient at bringing liquids to a boil and making one pot meals (boil in bag) for one or two people.  They are not so good at simmering or cooking on anything but full blast.  Charred eggs, scorched sauces and pieces of bacon that are both burnt and under cooked at the same time are the norm if you’re not extremely careful.

cook partner camp stoveMoving up to camp kitchen stoves allows you to rock your inner Wolfgang Puck.  Typically, these are propane based with multiple burners. Camp kitchen stoves provide enough surface area and heat to throw down a griddle to easily fry up bacon and eggs while allowing you to dial back the heat to gently simmer the most delicate sauces.  If you can cook it at home on your stove top, you can cook it on one of these camp kitchen stoves.

Camp kitchens do get bulky and depending on your choice may take up a significant amount of room when you add in all the pots, pans and fuel canisters you’ll need to create your gourmet meal.

men cooking camping breakfastFuel is another choice to consider.  Propane is the driving force behind most camp kitchens and many backpacking stoves.  Propane is versatile, readily available (in the USA) and clean burning but you can’t reuse the small bottles and extreme cold temperatures can cause problems.  However for most situations propane is a good choice.

egg shells camp stoveLiquid fuel such as white gas provides a lot of BTUs, performs well in all weather and is readily available (in the USA).  Care needs to be taken not to spill the fuel during stove setup and tear down.  Many stoves that run on liquid fuel are capable of running on more than one type of fuel including kerosene or unleaded gas (available worldwide) making the stove an extremely good choice for global travelers.

Depending on the location your traveling, size of your team and the meals you plan to prepare, the right cook stove option may be different for each trip.  Knowing the pluses and minuses of each cooking option will help you make the right choice.  Or you could just go out to eat.

wheel bearing ABS sensor

FJ Cruiser Wheel Bearing Replacement

FJ Cruiser Axle AssemblyIt started out as oil appearing on the inside of rear wheel. Hum, that can’t be good.  Ok, a blown oil seal, that is easy enough and just a couple of bucks for a new seal. After changing the seal out it was much better, but not perfect and in a few days it was clear something wasn’t exactly right. Did I screw up the seal when I put it in?  Is the breather clogged and building up pressure that blows the seal? God I hope it’s not the bearing.

After checking the breather to ensure good air flow and changing the seal one more time for good measure, it was clear we’d need a little professional help and turned to our friends at Auburn Car Repair & Offroad to replace the wheel bearing.

In order to change the rear wheel bearing, you need to pull the axle, apply 20+ tons of pressure to separate the bearing from the axle and than push the new bearing on.  But aside from machinist magic of replacing the bearing, most folks can perform a majority of the work involved.

After getting the axle in the air and removing the wheel, start by unplugging the the ABS sensor wire.  Remove the bolts that hold the disk brakes housing and carefully set it aside.  Tip: if you cut the top of the clip holding the brake hose in place you can slide the hose out without disconnecting it from the hardline and avoid having to bleed the brakes later.

FJ Cruiser Parking Brake ShoesPulling the brake disk (rotor) may take a few soft raps with a plastic mallet to loosen rust’s grip in order to slide if off.    With the disk removed the parking brake is exposed.  There are springs top and bottom that hold everything together.  The top springs are under a good deal to tension and will require work to lift them off of the stud.  Once the springs are released, the shoe hold down springs can be removed along with the brake shoes and other parts.  The best advice here, slow down, take your time and ensure you keep track of all the parts.

FJ Cruiser Axle ReplacmentThe parking brake cable needs to be removed before the #1 shoe can be completely removed.

Remove are four nuts holding the axle (the wheel bearing housing actually) to the axle housing.  Grab a shop rag and slide the axle straight out from the housing.

Remove the axle seal and drape a shop towel over the opening to keep the dust out.  If you’re simply replacing a blown seal, you can jump to the re-install.

rear axle hub partsThe ABS sensor is attached to the wheel bearing housing.  A small bolt holds it in place and needs to be removed before you proceed.

This is where the magic happens.  If you don’t have a 40 ton hydraulic press in your garage you’re going to need to head down to a machine shop / auto shop for a little love.  The machinist will remove the retaining clip, set up the axle in their hydraulic  press, and pull the wheel bearing housing off of the axle.  She will then set up the new wheel bearing housing so it can be pushed into place on the axle and replace the retaining clip.  Done.

When you get the axle back, be sure to reinstall your ABS senor.  Add a little grease to the outside of your new axle seal and tap it into place.  This is also the time to replace the O-ring.

FJ Cruiser rear brakesCarefully slide the axle into the housing.  Avoid banging against the seal.  You may need to turn the axle a little in order for the splines to line up and fully slide into the housing.  Tighten up the nuts that hold the axle to the housing.

The tricky part for me was reassembling the parking brakes.  Although the guys at Auburn Care Repair & Offroad completed it in a few minutes, it took me about 30 minutes to get the parking brake shoes back in place when I replaced the seal the first  and second time.  Install the #1 shoe first, reattach the parking brake cable, then install the #2 shoe.  It is not all that complicated but there is limited room to work the parts into place and the springs take a little muscle so take your time and use the diagrams here to help.rear axle assembly parts

After the parking brake shoes and brake cable are complete it is time to adjust the shoes so they will hold tight when the parking brake is engaged.  Make small adjustments, put the brake disk in place and feel the rotation against the shoes.  Once you feel the shoe begin to rub, back it off a bit so the disk rotates freely but quickly grabs the drum when the parking brake is engaged.

Put your disk brake housing back on (if you disconnected the break hardline you’ll need to bleed the brakes).  Connect the ABS cable to the ABS sensor.  Mount your wheel and your set.

rear axle parts listNo so hard right.  If you want to do this work yourself you’ll need a few parts:

  • Rear Axle Hub and Bearing Assembly
  • Rear Axle Bearing Inner Retainer
  • Rear Axle Shaft Snap Ring
  • Rear Axle Shaft Oil Seal
  • O-Ring

Although you may not be able to perform all the work, you can certainly perform a good portion of the work and let a machine shop do the heavy lifting on your rear wheel bearing replacement.

Bonus: Here are the instructions Toyota has for removing and installing a rear axle on a Toyota FJ Cruiser:

fj cruiser taillight assembly wiring

FJ Cruiser Tail light Replacement

fj cruiser broken tail lightNot that long ago on an off-road adventure we broke the tail light on our FJ Cruiser (Carnage on the trail).  Now it is time to pay the piper and repair the damage.

Replacing a broken tail light is a simple fix anyone can perform with a few simple tools.

fj cruiser taillight housingAlthough simple, plan on at least an hour to complete this repair.  It is also time to throwout all child labor laws and enlist the help of your daughter or son or anyone else who has small hands.

In order to remove the broken tail light assembly, pull back the small plastic access panel on the interior back corner of your fj cruiser taillight access panelFJ Cruiser.  Since we replaced the driver’s side we also removed the bottle jack in order to reach the third hexnut that holds the tail light housing in place.  If you are replacing the passenger side you will have to remove the base speaker and the access panel behind.

The tail light housing is held in place by three hexnuts on long screws that are attached to the tail light assembly.  A 10mm wrench will installing fj cruiser driverside taillightloosen the hexnuts closest to the back door accessible through the small access portal.  The third requires a 10mm deep socket (on a 1/4″ drive there really isn’t much room in there) and small hands.  Reach back up into the cavity behind where the bottle jack is stored.  You cannot see the long screw or hexnut so you (or your small handed assistant) will need to feel your way in order to slide the socket on and loosen the hexnut.

fj cruiser taillight connectorsWith the hexnuts removed, gently slide the old light housing off and carefully remove the wire clip connections to the light sockets.  After you have the housing off remove and transfer the light sockets (with bulbs) onto the new housing.

fj cruiser taillight assembly backNow simply reverse the process to attach the new tail light housing assembly to your FJ Cruiser.  Once you have the hexnuts hand tightened, test that the brake, reverse light and turn signal are operating correctly.  When tightening the hexnuts, be careful not to over tighten. The screws are attached to plastic and can crack the plastic housing if over tightened.  You want to a apply just enough torque to hold the tail light housing to your FJ Cruiser securely.

Think you might need additional instructions?  How about the Toyota FJ Cruiser rear light assembly instructions manual pages?  They do make it more difficult but it will provide details you might want to consider.

fj cruiser fixed taillight
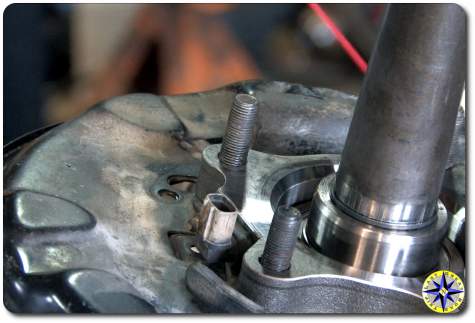
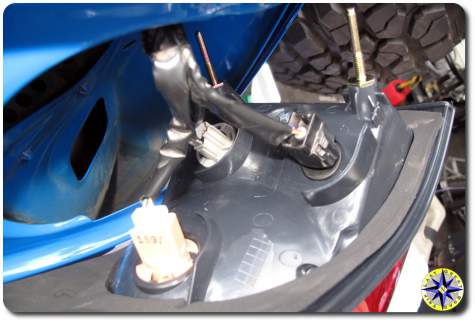
Because this repair is so simple, we are not a fan of tail light guards.  The guards attach using the three tail light housings screws with the guard’s attachment points sitting between the metal body and the plastic tail light assembly.  When the guard comes in contact with an immovable object the guard is pushed in causing body damage and most likely cracks to the tail light housing.  We prefer braking the tail light housing over body damage.