All posts by Last Great Road Trip (LGRT)

fj cruiser taillight assembly wiring

FJ Cruiser Tail light Replacement

fj cruiser broken tail light
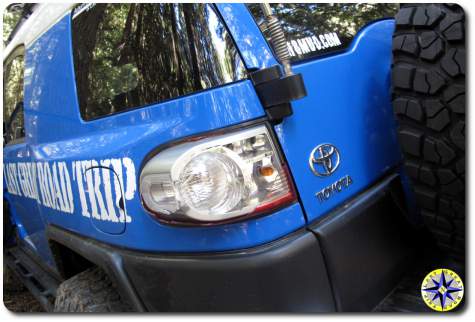
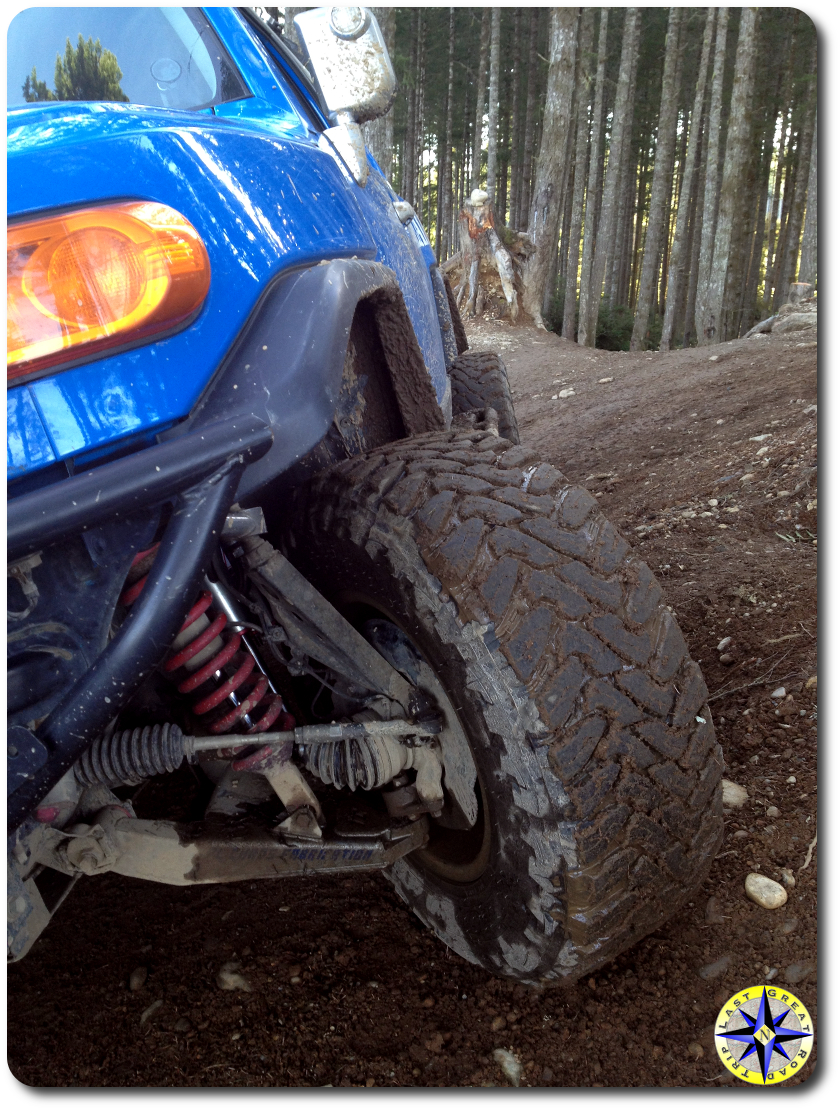
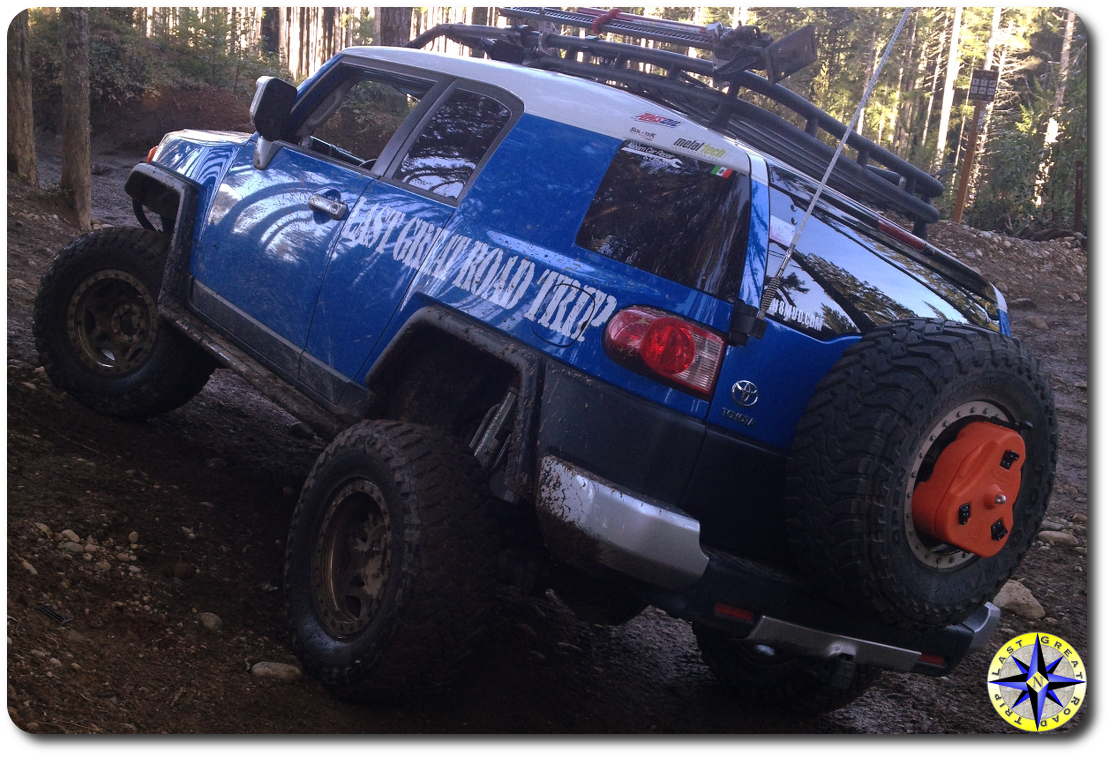
Not that long ago on an off-road adventure we broke the tail light on our FJ Cruiser (Carnage on the trail).  Now it is time to pay the piper and repair the damage.

Replacing a broken tail light is a simple fix anyone can perform with a few simple tools.

fj cruiser taillight housing
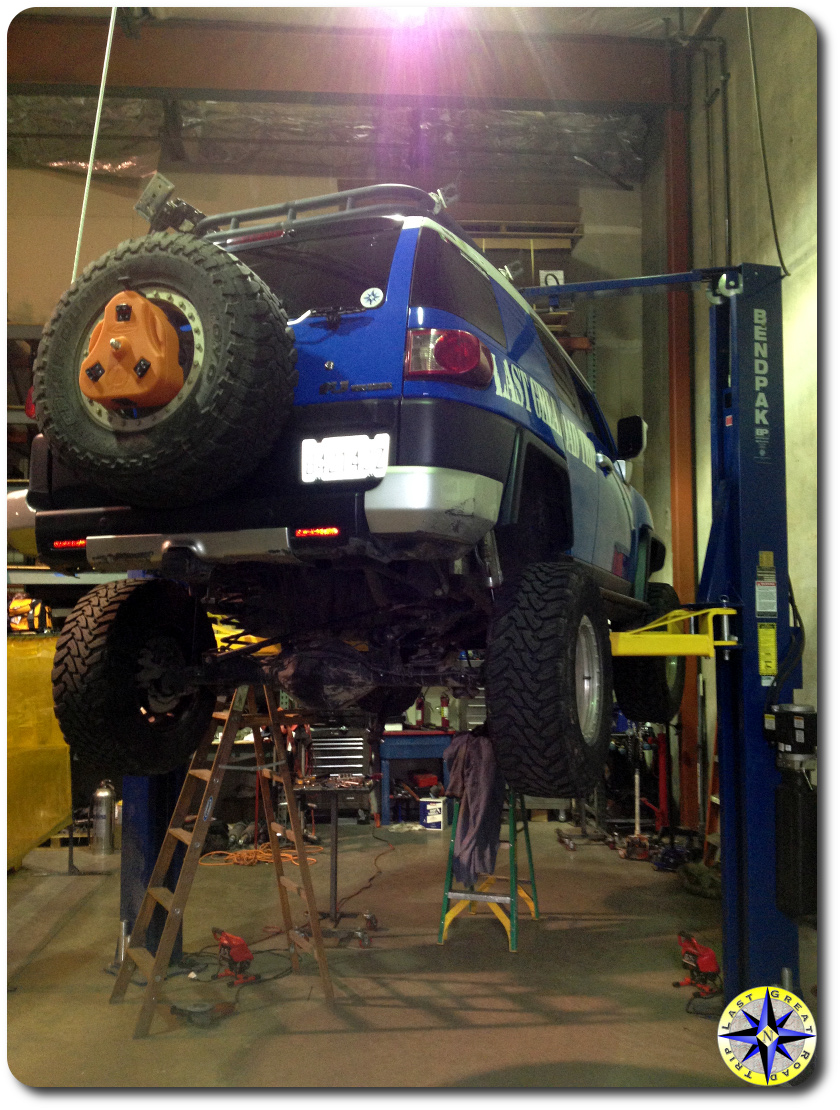
Although simple, plan on at least an hour to complete this repair.  It is also time to throwout all child labor laws and enlist the help of your daughter or son or anyone else who has small hands.

In order to remove the broken tail light assembly, pull back the small plastic access panel on the interior back corner of your fj cruiser taillight access panelFJ Cruiser.  Since we replaced the driver’s side we also removed the bottle jack in order to reach the third hexnut that holds the tail light housing in place.  If you are replacing the passenger side you will have to remove the base speaker and the access panel behind.

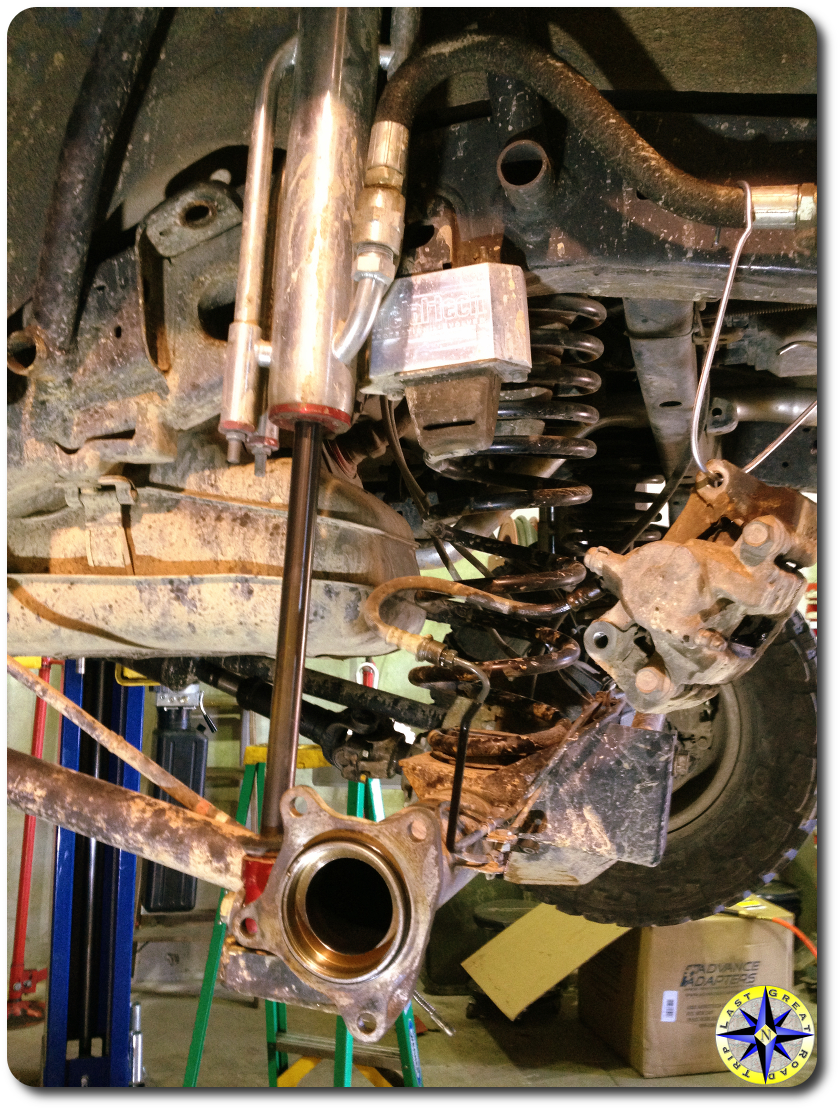
The tail light housing is held in place by three hexnuts on long screws that are attached to the tail light assembly.  A 10mm wrench will installing fj cruiser driverside taillightloosen the hexnuts closest to the back door accessible through the small access portal.  The third requires a 10mm deep socket (on a 1/4″ drive there really isn’t much room in there) and small hands.  Reach back up into the cavity behind where the bottle jack is stored.  You cannot see the long screw or hexnut so you (or your small handed assistant) will need to feel your way in order to slide the socket on and loosen the hexnut.

fj cruiser taillight connectors
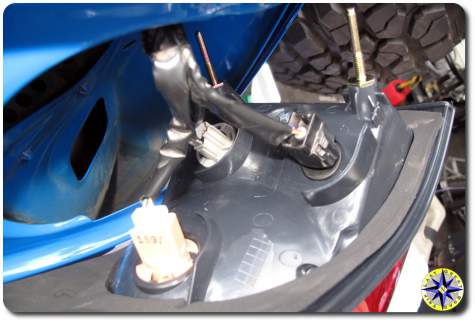
With the hexnuts removed, gently slide the old light housing off and carefully remove the wire clip connections to the light sockets.  After you have the housing off remove and transfer the light sockets (with bulbs) onto the new housing.

fj cruiser taillight assembly backNow simply reverse the process to attach the new tail light housing assembly to your FJ Cruiser.  Once you have the hexnuts hand tightened, test that the brake, reverse light and turn signal are operating correctly.  When tightening the hexnuts, be careful not to over tighten. The screws are attached to plastic and can crack the plastic housing if over tightened.  You want to a apply just enough torque to hold the tail light housing to your FJ Cruiser securely.

Think you might need additional instructions?  How about the Toyota FJ Cruiser rear light assembly instructions manual pages?  They do make it more difficult but it will provide details you might want to consider.

fj cruiser fixed taillightBecause this repair is so simple, we are not a fan of tail light guards.  The guards attach using the three tail light housings screws with the guard’s attachment points sitting between the metal body and the plastic tail light assembly.  When the guard comes in contact with an immovable object the guard is pushed in causing body damage and most likely cracks to the tail light housing.  We prefer braking the tail light housing over body damage.

looking out the tent

The Over Night in Overland

sunrise prayer flagsWhether you call it an off-road adventure, car camping, or overlanding, making camp and sleeping under the stars in the great outdoors is a big part of the experience.

There was a time when I longed for a luxurious Shangri La roof top tent, retractable awning, stainless steel four burner propane camp chef stove, 82 quart portable fridge freezer combo, landrover roof top tent overland campweathered sail cloth and teak hardwood folding camp chairs with matching  distressed teak dining and end tables.  I imagined a camp right out of the pages of Glamping Journal.  A cross between pampered British upper crust and lone rugged American cowboy with a hint of African Serengeti safari and a touch of Everest base camp.  I dreamed of eating fine meals, stopping for afternoon tea and ending the day with  single malt in crystal tumblers by the fire as twinkling stars filled the darkness.sunrise minimalist primitive camping paryer flags

As appealing as this marketing driven outdoor dream was to me, at some point I realized it wasn’t my own.

Over the last few years I’ve taken a step back to transform my idea of and off-road adventure camp.  Drawing from my backpacking and mountaineering background I mixed in a few childhood car camping memories and now have my own unique style of camp when I stop for the night.cooking over open fire

First let me say there is nothing wrong with roof top tents and teak furniture, it’s just not me.  Truth be told sometimes I wish it was.

These days I’ve dialed camp back to a minimalistic mindset.  A Noa tarp to keep the dew off, provide shade from the sun and keep a spot dry if the rains encroach.  The tarp is versatile, light weight and can be configured dozens of ways from trees, my truck or a poles.  The real weather protection comes from the bivy sack I throw my sleeping bag into.  My simple shelter protects without blocking out the nature I came to commune with.  At night I can lay there with an unobstructed view up as the stars overtake the darkness.sunrise camp prayer flags minimalist primitive camping

A pair of African mingle mats lets me sit on the dirt or wet grass without tracking it everywhere.

Although I’ve pared back, I haven’t given up on a good night’s sleep.  A whisper light, super compact cot creates a cushion of love that cradles me through the night for an incredible rest.

camping stove pot and table minimalist primitive campingThe gourmet chef shove has been replaced by a small bullet proof mountaineering blast furnace with two settings: off and full blast.  This little white gas single burner stove will boil water or weld a spoon to the bottom of the pot in minutes but simmer is not in its vocabulary. Simmer, grill and toast occurs over an open campfire.  A light weight, compact backpacking cook set, little french press and a spoon that doubles as stove wrench round out the kitchen. A compact aluminum table and three legged stool provides all the camp function and fireside comfort I need to call the woods home.voodoo travler alter minimalist primitive camping

Had I stopped here it would be a nice spartan camp…  But I had to make it mine.  Prayer flags make me smile.  Brilliant colors and prayer script blowing in the wind.  Peace and loving kindness sent out into the universe.  Belief in Karma is not required to know that what goes around comes around.

And then there is the alter where I hedge my bets.  A spin on the Internet will tell you that every belief places certain reverence on protecting travelers.  Ganesha the Hindu deity revered as the remover of obstacles and protector of travelers.  St. Christopher the patron saint of travelers. A Catholic rosary offers universal protection.hindu buddha voodoo hoodoo alter Seven day candles carry prayers to the heavens.  Mayan worry doll,  sitting Buddha, Indian incense, sacred sandalwood, dried chicken foot, Tibetan tin prayer bells and a New Orleans voodoo doll, all offer protection and draw positive energy into camp.   Bruddah Ed, Hula Betty’s jolly grass skirted cousin, makes me laugh and that is good too.

sleeping under a tarp minimalist primitive camping

This mix of minimalism, eclectic talismans and eccentric showmanship is definitely more reflective of my style than my original vision of camp.

I’m not camping in the lap of luxury.  I’m not pampered while the Sherpa tend and clean up.   Setting up camp is my meditation.  I eat well, sleep soundly and enjoy a fine cigar around the fire as the Milky Way pours over me. I am living the dream.

fj cruiser broken tail light

Dented My Dream

fj cruiser dented fron fenderNever set limits, go after your dreams, don’t be afraid to push the boundaries. And laugh a lot – it’s good for you! ~ Paula Radcliffe

You spent forty, fifty, even sixty thousand dollars on a new truck and its modifications. You want to take it off-road to explore the 4×4 trails you’ve read about in search of solitude in the great outdoors. You just can’t seem to reconcile the idea of denting up a perfectly good truck in the name of getting away from it all.

If you take your truck off highway you will get some damage. That damage could be as little as paint chips from gravel kicked up on a forest road to full-on body damage caused by flopping your truck on the Rubicon Trail trying to navigate Little Sluice or Cadillac Hill. I say “you will” because eventually it happens. Maybe not on your first outing or your second but if you wheel long enough you will see damage on your truck.

There is something incredibly rewarding about driving a trail more difficult than the last and applying what you have learned in order to make it through the challenge unscathed. But as the saying goes; you learn more from your mistakes than you do from all your successes. In this case, an off-road fail can be a bit expensive. I recently learned a hard lesson. After driving thousands of miles of dirt roads and two tracks, the Baja 1000’s route to Cobo, The Rubicon Trail… TWICE and lots of 4×4 trails relatively unmarked, I got careless.

On a 4×4 trail I’ve driven several times before, I was working an easy stretch when another group of trucks approached from the opposite direction. I made a poor choice of places to pull out, miss judged the stability of a rock and before I knew it, my front fender and rear taillight were trying to occupy the same space as a fallen log which seemed to operate at a quantum level. I didn’t hear a bang or feel a big jolt. It was more of a soft kiss as the two came together leaving me with the sensation that something wasn’t right.

I’d be lying if I told you it didn’t hurt. For eight years I’ve kept my FJ Cruiser free of dents and dings. Sure a bit of pin striping but no body damage. This felt as if I’d somehow failed my truck, a broken promise to keep it out of harms way in return for it’s continued reliability and the assurance it would get me home. I’d screwed up. I was over confident in my ability and all the trucks fancy mods so I had tried to wedge the truck into a small crease instead of taking the time to look for a more appropriate turn out, and forced a bad choice. This mistake can be fixed. I will replace the taillight myself. The fender, well, it will get a little professional love after a few more off-road adventures we have lined up for the summer.

Now, before you give up on the dream of exploring the road less traveled in your new truck let me talk you off the ledge. I’m not telling you this story of carnage to scare you. Rather, I tell this tale so you will know there are much worse things than accidentally banging up your truck. The sting is temporary. It hardly even compares to the rewards you receive for exploring the fringes of your ability and discovering you have pushed out the boundaries that once held you back. This is the zen that eludes those who fail to try. These rewards are not given to the careless who thrash their junk against the rocks but is reserved for the thoughtful who attempt to live life without limitations and refuse to let setbacks stop their progress.

But the fact of the matter is: Sheet metal is repairable. Chicks dig dents. And the United States of America has the best body-shop to off-road-adventurer ratio in the world!

comeup winch

Off-Road Winch Installation

comeup winch fj cruiserAnyone who explores the backcountry knows, a winch is one of the best recovery tools to have on your 4×4 truck when you’re on an off-road adventure.

Recently we received a new DV 9s Comeup winch.  The DV 9s has a pull line rated at 9,000 lbs, 3-stage planetary 156:1 gear train, an automatic full load Cone Brake Structure (CBS) and comes loaded with a 100’ of 3/8″ synthetic rope as well as a Hawse fairlead and mounting hardware.

Mounting the Comeup winch on most 4×4 aftermarket bumpers is relatively straight forward (Comeup winch installation manual).  Comeup includes a footprint template to locate the hole position for the winch’s four mounting bolts.  Once you have the the four holes marked, grab an 11mm bit and drill them out.

We’re installing our Comeup winch on a Metal Tech 4×4 tube bumper’s winch mount.  While Metal Tech’s winch mounting plate is pre-drilled, the holes will need to be increased in size to account for Comeup’s larger mounting bolts.  Once the holes are drilled out, a little shot of spay paint on the holes will protect your bumper against rust as you take on the elements.

Start the installation by inserting the mounting nuts into the slots on the winch’s feet.  Carefully lift your Comeup winch into place aligning it with the mounting holes.  From below, attach the winch using the 8.8 grade bolts that come with the kit.

Metal Tech 4×4 provides a set of brackets designed to mount Comeup’s solenoid pack to their tube bumper.  Attach one of the brackets to the back of the solenoid pack using the supplied hardware.  The bracket should remain loose in order to make any final adjustments when it is attached into place.  The other bracket can be firmly attached to the Metal Tech tube bumper.

Attach the solenoid pack’s “F1”, “F2” and “A” leads to their matching terminal on the winch’s motor. Using two wrenches hold the lower nut steady as you tighten the upper nut over the lead.

Next attach the thinner “green” lead from the solenoid pack and black ground cable to the bottom of the winch motor.  Now attach the motor’s lead using its pre-wired connector to it’s mate from the solenoid pack.

Work the solenoid pack into place where it will attach to the bumper.  Before screwing the two plates together ensure the leads remain untangled and can be tucked out of the way than tighten all the nuts to secure the solenoid pack in place.

Route the black ground and red power cables to engine compartment and attach them directly to the battery posts starting with the black ground cable.

Once the winch is installed and wired it’s time to run a few tests.  Prior to using your Comeup winch ensure you have read and fully understands the Comeup winch operating instruction manual.  Test that the winch free spools, then engage the clutch in order to test both power out and power in.

A properly installed winch is a powerful tool for self recovery on any off-road adventure.  If properly maintained your Comeup winch should provide years of service on your off-road adventures.

willys jeep

Oregon’s 4-Wheeling Gem

red toyota bj60 cedar treeOregon’s Tillamook Forest  Off Highway Vehicle area offers off-road adventurers one of the best 4×4 areas in the west.  250 miles of trails that range in difficulty from easy forest roads to sever, you’re going to have to trailer your rig right to the shop and everything in between.  While the 4×4 trails are open to all, there are several trails designated for motorcycle and quad use only allowing everyone to find the off-road experience they are looking for.voodoo blue toyota fj cruiser woods

The off-road trails are well marked and the Oregon Department of Forestry puts out  the Tillamook Forest OHV area map clearly identifying all the trails, their difficulty level and vehicle usage. This area is a working forest and occasionally sections will be closed for logging.  Trail closures are posted on the OHV trail report along with lots of other useful information.  To help ensure this area remains cared for and open for recreational 4×4 use a permit sticker is required for each vehicle using the OHV area and can be purchased at many of the local stores along the highway in route.prayer flag tent camping

The Tillamook Forest OHV area is very family oriented with day use and large improved camping areas such as Browns Camp or Jordan Creek.  If you enjoy a little more rustic experience, you will find numerous secluded dry camp areas throughout the OHV area.  As you would expect camp sites fill up quickly on the weekends while you will have your choice of sites during the work week.

red toyota bj60With so many trail options, the Tillamook Forest OHV area is the perfect location to build up your driving skills, and there is nothing that can replace seat time behind the wheel when it comes to off-road adventures.  Because of the hours we’ve spent driving trails like “Firebrake 5”, “Hog’s Back” or “Cedar Tree”, when we came to a washout that had completely destroyed the route, on our Baja off-road adventure, dropping into a boulder filled dry river bed felt comfortable and allowed us to keep going.  In fact many of the situations we run into on our more secluded, solo overland style off-road adventures, present little worry because of the hours of practice we’ve put in drifrench press camp coffeeving all levels of 4×4 trails in OHV areas like the Tillamook Forest.

Only a couple of hours from Portland, Oregon and even less from the Oregon coast this area provides endless opportunities to wheel hard all day and still enjoy the many other sights and sounds of the pacific northwest.  The Tillamook Forest Off Highway Vehicle area is truly Oregon’s 4-wheeling gem.

toyota fj cruiser forest

BFGoodrich’s KM2 Mud Tires First Impressions

new bfgoodrich km2 tiresOur off-road adventures take us to places where AAA is not an option.  On our adventures we drive our FJ Cruiser over dirt, boulders and rocks that eat tires for breakfast.  In addition we usually have to cover thousands of miles of asphalt to find the end of the road.  Well built, tough as nails tires are not an luxury, they are a necessity.

A few days back we received a set of BFGoodrich Mud-Terrain T/A KM2 tires to test out on our off-road adventures.  The KM2 is BFGoodrich’s second generation of their toughest “E” rated off-road tire.  The KM2 protects against punctures with three layers of polyester and two more belts of steel.  In addition BFGoodrich wraps the KM2 with three ply sidewall construction to resist cuts and bruises in order to take the edge off of rocks and other off-road hazards.bf goodrich km2 and zep

We chose to mount the 285x75x17 KM2 tires on our Walker Evens beadlock wheels and balance the mud tires with Dyna Beads.  The first thing we noticed is that these tires look good on our Toyota FJ Cruiser.  Aggressive tread blocks and 34″ stance, these BFGoodrich KM2 tires seem to weep testosterone.

In order to get a good first impression of these BFGoodrich tires we decided to leave the state and head over to Browns Camp Off-Highway-Vehicle (OHV) area in Oregon’s Tillamook Forest.toyota fj cruiser bfgoodrich km2

Mud tires are notoriously loud on the highway however BFGoodrich’s KM2 Mud tires were surprisingly quiet and smooth as we motored the 300 miles of highway down to Browns Camp.  The tires provided good road feel as we navigated the twisty asphalt that leads through the foot hills of the coastal range to the trail head.bfgoodrich km2 fj cruiser

At the trail head we aired down allowing the tires to soften the bumps and ruts of the trails.  On the dirt and gravel we easily made our way as the KM2 Mud tires dug in and carried us over the 4×4 trails.

When it came to the tougher rock crawling sections of firebreak 5 we discovered that we had left way too much air in the tires.  At 28psi the tires could not conform and grab the boulder’s edges.  The smart thing to do would have been to bleed off 10 psi and let the tires work for us…  that would have been the smart thing to do.  We kept the tires at 28 psi, worked back and forth through the steep boulder infested hill and climbed to the top.bfgoodrich km2 mud tire

For this initial impression we drove 600 miles of highway and spent a full day driving several levels of trails (easy, moderate and difficult, we stayed away from the extreme and sever rated trails…  after all we still had to drive home).  Our first impression is that the KM2 provides solid performance on and off-road.  The KM2s are well behaved on the road and deliver good footing off-road (next time we’ll give firebreak 5 a try with 18 psi). Over the next few months we’ll count on these tires to take us on several more off-road adventures and we will let you know how they perform.

broken down Yellowstone road trip

Surviving A Roadside Emergency

car emergency kitBack in the 80’s Brad and I took a road trip to Yellowstone National Park.  Miles from anywhere our car’s fuel pump gave out.  We were stuck on a dirt road that maybe saw another car once every day or so.  Fast forward to today and I can add a couple of dead batteries, several flat tires, black ice spin out, two snow closed passes and a blown engine to the list of things that have left me stranded on the side of the road in less than ideal conditions.

Changing a tire on a warm afternoon on a quiet level country road is no big deal.  Changing a tire in the dark on the  side of the highway when it’s 40 degrees and raining, lacks entertainment value. Over the years I have managed to put together an emergency roadside kit that takes the sting out being stuck on road and makes most bad situations bearable.  These days I always have a emergency roadside kit in the trunk of all my vehicles even if I’m just going to the grocery store.emergency kit trunk of car

Our roadside emergency kit is easy to build up and is filled with items you probably have lying around the house.

Start with an old gym bag or duffel. Even your daughter’s pink “My Favorite Pony” school backpack will do.   You just need something to keep all your supplies together.  Once you have your recycled book bag in hand, gather up the following items and stuff them in.

  1. Jumper cables – I’m surprised at how many people with a dead battery who have asked me for a jump, follow it by “Do you have jumper cables?”.
  2. Wool blanket – Coming home from eastern Washington, WADOT closed the pass for avalanche control and I spent four hours waiting for the all clear under a warm blanket while the snow continued to fall.  Wool retains it’s ability to keep you warm even when wet and is one of the most important items in the kit.
  3. Household cleaning gloves – I’ve reached into mucky wheel wells to work snow chains around a tire and pulled crow parts from the grill.  Waring long, heavy duty, rubber household cleaning gloves made it much less traumatic.
  4. Personal first aid kit – No one enjoys driving with a throbbing headache or having you’re allergies kick into high gear as you drive by miles of hay fields.  A simple first aid kit will let you take care of yourself (or one of the kids) and get you back on the road before it becomes a serious problem.
  5. Duct tape – You can fix anything with duct tape.
  6. Pocket knife / Leatherman tool – I’ve pulled out a pocket knife for just about everything including cutting duct tape in order to splint my finger after slamming it in door.
  7. Bottles of water – You can go for weeks without food, but you will quickly start to dehydrate in dry conditions and can die within a few days without water.  I’ve also grabbed a water bottle to wash dirt out a friend’s eye when the wind kicked up, swirling dust everywhere.
  8. Road flares – Ever change a tire on the side of the road…  in the dark?  I have.  It’s important to let on-coming traffic know you’re there.  We like flare over reflectors since a flare can be used to start a signal fire in the wettest conditions if things really go south.
  9. Safety vest – It’s not much of a fashion statement but the more visible you are the better.  On the side of the road or from a rescue helicopter you want to be seen.
  10. Whistle – Yelling for help will only be heard so far and eventually your voice will tire, but a whistle can be blown forever and is a universal call for attention.
  11. Compass – Ff you do have to leave your vehicle and hike out, you want to know where you’re going.  A compass will let you get your bearings and trek a straight line.
  12. Plastic shower curtain liner – $7.00 at any Walmart and you instantly have an emergency shelter, ground tarp, rain poncho, oil catch, knelling mat for changing a tire in the mud, …  There are no limits to what you can do with a plastic shower curtain liner, and it comes folded up in a neat little package that will take very little space.
  13. Flashlight / headlamp (and batteries) – Be sides helping you look into the dark corners of your vehicle to find a fuse you dropped, a light waving by your side as you walk down the highway to a gas station will make you visible to traffic so you don’t become a roadside memorial.
  14. Yard sized trash bag –  From rain coat to dirty close bag to dead body disposal,  the usage opportunities for a large trash bag rival that of duct tape.
  15. Parachute cord – This is another one of those endless use items.  Lashing down a loose tarp  or turning that shower curtain liner into a shelter, in an emergency the uses are only limited by your imagination.
  16. Toilet paper – If you’ve ever used leaves than you don’t need to ask why.
  17. Lighters/matches/magnesium fire stick – You’ll need something to lite a fire if you are really in a bad situation and need a fire.

While these are the basics that should be in your emergency travel kit, there is plenty of room to personalize it with your own flare.  Consider what your family needs are and plan accordingly to include other useful items such as: baby wipes, signal mirror, towel, travel pillow, rubber boots, work gloves or a good book to kill time while you wait for the tow truck.  If you need other ideas take a look at the Red Cross’ survival kits.

Years of road trips have taught us that being prepared means being equipped with the proper supplies that you may need in the event of a road trip emergency or just a flat tire in the rain.

SAM splintted arm

First Aid First

green land rover defender 90We’ve always taken wilderness first aid preparedness seriously as a part of our off-road adventures but it was not until that fateful day in Moab that our training got put into use.

There are two requirements to help produce a successful outcome in a wilderness first aid situation.  First you and preferably everyone in the group, need to have the knowledge on how to treat victims for a wide range of accidents and (b) you need to have the medical resources to treat  the problem.

When you get off the beaten path by bike, hiking, horseback or 4×4 it is important that you have a solid understanding of how to treat accidents of all kinds. This includes: second or third degree burns, deep cuts, sprains, broken bones,  heat exhaustion, hypothermia, animal bites and more.

In order to learn how to treat accident victims, start by taking a basic first aid and CPR class taught through the Red Cross, the American Heart Association, local community college, outdoor club or private company. These courses will provide you with a basic understanding of first aid and how to work with victims in an emergency situation.

woman taking injured man pulseIn addition to the course materials print off, read and keep with you on your adventure:

If you are the leader of an off-road adventure you have an increased level of responsibility and leadership role as medical support for the group.  You may want to take a more intense wilderness first aid training course or assign the medic role to one of the other member of the group who has additional training.  In extreme off-road adventures where first aid is the only aid you can expect, you may want a paramedic, ER nurse or doctor to join the team.

wilderness first aid splinting injured man armWhen it comes to medical supplies we recommend braking it down into two categories, personal first aid kit and group trauma pack.  The group trauma pack should contain a wide list of supplies  such as: scalpels, scissors, tweezers, forceps, nitrile gloves, splints, burn creams, eye wash, ice packs, heat packs,  space blanket, ACE bandages, blood clotter, antibiotic ointments, antiseptic creams, alcohol swabs, hydrogen peroxide, aspirin, non-aspirin pain relievers, mole skin, butterfly wound closures, large sterile gauze pads, triangle bandages, non-stick pads, sterile gauze rolls, adhesive tape and lots of various sized band-aids and sterile gauze pads.  The group should carry a  trauma pack with enough supplies to support several team members being involved in an accident.

Each person in the group should carry a personal first aid kit that is kept with them.  The individual first aid kits are a combination of simple basics as well as personalized medical needs.  At a minimum we recommend each personal kit include: antacid tablets, Pepto-Bismol tablets, aspirin/non-aspirin, antihistamine, insect sting relief, insect repellant, lip balm, sunblock, Moleskin, antiseptic cream, large and medium sized band-aids as well as several 3×3 sterile gauze pads, adhesive tape and tweezers.  Every individual should personalize their kit to support any prescriptions or medical needs they may have such as allergy meds, asthma inhalers, insulin kit or EpiPen.

yellow land rover discoveryMore than likely you’ll never pull out the group trauma pack.  Most little  scraps, blisters and upset stomachaches can be handled by the individual using their personal first aid kit.  More serious needs will utilize both the personal first aid kits, the group trauma pack and other do-dads such as duct tape, Velcro straps, leatherman tools, blankets, water, hi-lift jack bars, hoses, what ever it takes, in order to bring all available resources to bare .

The last piece of the first aid preparedness puzzle on an off-road adventure is to have a pre-departure check-in to assess everyone’s skills, discuss any team members’ special medical needs and drug allergies,  verify individual kits and ensure everyone knows where the group trauma pack is kept as well as what protocol to follow in case of an accident.

Most off-road adventures never encounter a serious injury but without a doubt you have to be prepared to provide medical aid in locations where first aid may be the only aid for a long time.

baja mexico dirt road cactus

Lessons From The Baja

Sometimes you have to travel to the ends of the earth before you can see what is right in front of you.     Our Baja off-road adventure reinforced lessons that apply to more than just off-road adventures.

Explore More – Don’t let yourself get caught up in the ordinariness of life’s daily grind.  Make it your priority to get out, explore and have an adventure.

Push Yourself Further – It can be dangerous to venture where the map shows dragons.  But when you do, the world expands.

Live In The Moment – Whether it’s the ordinary or the extraordinary stay present with it.  Don’t hang onto it, don’t push it aside, just stay with it.

Make Strong Bonds – Let others touch your life.  Relationships are the only thing of real value we carry with us.

Celebrate Everything – Each mile of an adventure holds so much wonder and challenge, celebrate the great, near great and the difficult.  You have earned it.

stock fj cruiser and modified fj cruiser side by side

Before You Modify Your Vehicle For Off-Road Travel

total chaos long travel fj cruiserDon’t modify your truck!  No, I mean it! Don’t MODIFY Your Off-Road TRUCK!

Ok, let me explain. No showroom vehicle is perfect for serious off-road adventures so depending on your adventure you will most likely need to make some modifications to your vehicle.  However, before you start, be clear on why you are making the modification, what you are looking to gain and what effect it will have on the entire vehicle.  Based on our experience, we put together a few thoughts to consider before modifying your off-road vehicle.

Suspension plays a critical role on and off-road. Suspension is responsible for handling in normal driving, emergency situations and maneuvering through obstacles on the trail.  It is important to keep in mind the manufacturers geometry ideals when deciding how you will achieve increased lift and articulation.  Good quality suspension component upgrades in the right configuration will improve off-road performance and allow your vehicle to drive down the highway as well mannered as it did right off the showroom floor.  It won’t do you any good to be able to crawl up 18 inch rock shelves if you cannot swerve to avoid hitting a cow on the road in Baja.  Your goal should be to increase lift and wheel travel while keeping the center of gravity as low as possible and maintain on road handling performance.land rover d90 toyota fj cruiser 4x4 trail

Keep the tires sized right.  Suspension provides lift but tires give you ground clearance.  Larger tires add weight, which in turn puts stress on steering components, reduces gas mileage, strains performance and often contributes to broken axles.  The ground clearance difference between 33″ and 35″ tires is less than an inch and it decreases more as you air down.  If you absolutely need 37″ tires for your adventure, make sure all your steering and suspension components are matched to safely drive highway speeds and still perform emergency maneuvers.  Choose a durable, high quality tire, with strong sidewalls and tread matched for the terrain without over sizing it. We ran 33.5″ (according to the tape measure) tires for both adventures through Rubicon and ground clearance was never the problem.

A big part of keeping the center of gravity low is to avoid putting weight on the roof.  It’s easy to pack a large roof rack with fuel cans, storage boxes, spare tire, roof top tent, awning and even a kitchen sink.  But all that weight becomes a liability in off camber situations or in an emergency maneuver to avoid the cow.  We’ve watched several trucks easily drive through a tight trail section only to see an identical truck with a heavily packed roof rack take a ding as it leaned into a over hanging tree or rock face everyone else slipped by.  Additionally all that wind resistance up top has a very negative affect on your fuel mileage and highway driving manners.  Select a light weight roof rack and use it sparingly, limited  to lighter items such as a shovel, camp chairs or duffel bag of cloths.  If you cannot pack all the items you need for your adventure in the back of the rig, you may have the wrong off-road adventure vehicle.ultimate fj cruiser trail flexing

Recovery gear is extremely important and an often overlooked modification.  A good winch can be an invaluable tool for getting you unstuck or pulling a fallen tree clear of the trail.  A winch should be considered in conjunction with an aftermarket bumper.  Select a bumper that gives you a clear view of and easy access to the winch.  Like any tool, it is very important that you know how to use your winch properly before you need it and follow all the safety precautions.  There are situations that will not require a winch or a winch it not appropriate.  The right tool for the recovery may be a shovel, hi-lift jack, snatch strap or traction device such as Maxtrax. When your stuck, a good situational analysis and well developed recovery plan is far better (more productive and safer) than hastily grabbing your favorite item without a thought.

land rover d90 toyota fj cruiser airing downWhen it comes to electrical modifications, keep them on separate circuits using properly sized fuses and relay switches.  To make troubleshooting and maintenance easier, clearly label the wires and auxiliary fuse box for your CBs, off-road lights, HAM radios, compressors and fridges.  Poorly wired electronics can cause fires, drain batteries or damage other electrical components including your vehicles engine control unit (ECU).

Weight is the enemy.  Heavy bumpers, sliders, full skid plates, winches,  and steel guards of all kinds add a lot of extra weight.  This weight effects handling, performance and reduces the carrying capacity for your other stuff.  A fully loaded truck ready for an adventure should not exceed the manufacturer’s gross vehicle weight rating.  Ideally it should be less than 90% GVWR.  We’re always looking to pair down the weight while still maintaining the right level of protection.  We run a skid, but only for the engine.  Our Metal Tech tube bumper is significant lighter than a shell style bull bar.

FJ Cruiser on the rackLower gears, after market transfer case, beefier third member, air lockers,  or super charger can increase your truck’s off-road capability but it comes at a very high price.  For us these items take you across a very real line in the sand.  By modifying your engine or drive train you now have a maintenance intensive truck that will require a significant amount of work to keep running smoothly.  You also go from carrying a basic tool set to hauling a full mechanics chest and a host of spare parts in order to make adjustments and repairs in the field.

Stronger is not always better.  For example we’ve talked about how the half shaft on an IFS vehicle is a weak link.  However if you opt for beefier CVs with stouter axles you have now moved the breaking point from an easy to fix IFS field repair into the differential gears which were never design for field repair.  The same is true for beefing up tie rods that than pushes the weak point into the rack and pinion.fj cruiser rear suspension components

A poor quality modification component is worse than no modification at all.  For example: if you attach thin walled, flimsy sliders that cannot carry the weight of the vehicle, you run the risk of significant damage on the trail.  On the trail your spotter, who assumes your sliders are more than looks, will guide you through an obstacle that may involve using them. Better to not have them and take an appropriate line than drive with a false sense of security.

One of the best investments you’ll ever make has nothing to do with your off-road vehicle.  Spend as much time as you can driving off-road.  Start out on easy trails learning how your vehicle behaves and build your skills as you progress to more complex off-road adventures.  A good off-road driving course  such as Bill Burke’s 4-wheeling America, can also help jump start your adventures, better than most vehicle modification.  Nothing beats seat time, the more experienced you are behind the wheel, the less modifications it will take to safely complete your off-road adventure.

Modifications are part off-road vehicles.  Every modification has both positive and negative effects on your vehicle’s performance. To get the most from your modifications it is important to understand their full impact in order to choose the ones that are right for your next off-road adventure.